

And another weekend draws to a close! Did you find yourself inspired and productive? I know I did– and now, not only do I have a product pile-up, but I also have a post pile-up!
But before I get to my card and muses, I must share a bit about my crafty Saturday gathering! I am not only lucky to live in one of the most gorgeous places in the United States, the Pacific Northwest, but also lucky to live in proximity to some of the nicest and most talented card artists out there, all of whom are likely household names to many of you! One of the most wonderful aspects of this creative journey beyond the act of creating is the people I have met online across states and continents through challenges and blogs. Being able to meet some of these online friends in person makes it even more wonderful.
So yesterday I had the pleasure of laughing, eating and creating with Katie Brooks of KB Stamps, the Kimberly Wiener of Wienerhoneymooners, Amy Tsuruta of Tsuruta Designs, and Amy’s friend, Laurel. I didn’t get much card making accomplished, but had a great time sharing supplies and ideas, while accomplishing a lot of die cutting (what else is new lately?!) for a mini album!
Amy was a wonderful hostess, and I wanted to show my thanks not only for opening her home to us, but also for being so supportive in her commenting over the past months since I have become more active in the community. It is amazing how she makes the time to visit so many blogs and comment on people’s work (in addition to creating, being on numerous design teams, raising kids and working!) Since Amy loves coffee, I knew I had to bring her a little hostess gift of beans, and of course a coffee-themed card!
I have been working on what I will call “clipboard cards” from recycled cardboard and corrugate. I am really excited about these! There are so many possibilities for different occasions and aesthetic approaches with these cards. I plan to complete a tutorial for you once I have some others finished.
Additionally, I’ve been experimenting with different card-making styles to challenge myself, but the one I keep gravitating to is the shabby chic/vintage collage style with a modern and/or mixed media twist as seen in the work of Magda Luczak of Mama Judo, Stephanie Schutze of Scrapmanufaktur, Frau Muller, and the older work of Scrapperia, whose recent work is more modern, on-trend, freestyle collage.
These works in particular influenced my thinking, since I have been thinking about these a lot!

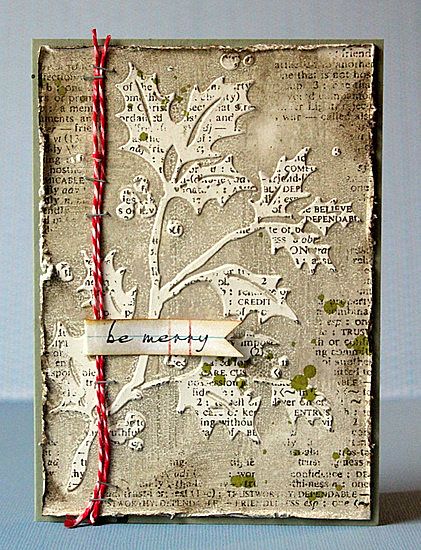

I actually had set out to CASE Magda’s tag card, but went in a completely different direction after playing around with my elements. She has another fabulous tag card over at her blog which I am thinking of CASE-ing. Her work is just magnificent!
So here is my card!


THE PROCESS:
I measured and cut my clipboard back out of recycled cardboard; I use a lot of legal pads in teaching, and always have the cardboard left over after the pad is used. Great crafting supply! I did the same with the corrugated paper, rounded the edges of each, and then Mod Podged them together.
I then distressed my top panel and stamped my coffeestains in Versafine Onyx Black, using stamping off to get variations in hues.
I distressed some scrap paper, and then die cut my little coffee mugs. I strung them along the hemp twine and finally was able to put my Tiny Attacher to use! Love those little staples!!
I knew immediately that I had to use Kelly Purkey’s stamp from the I Like You set– which I thought was cute in reference to a cup of coffee! I stamped that in Memento’s Rich Cocoa onto my tag cut from Avery Elle’s Tag set. I did not attach the tag to the twine as I wanted it to slip out so the message on the back could be read. I also like the coffee cups sliding freely along the twine.

I set out to layer a bit with various papers and the burlap, distressing my 7 Gypsies Conservatory paper with the Tonic Distressing tool.
I die cut the tab from My Creative Time’s Stitched File Tab, and specifically chose a section of the washi to tear and affix to the it.
Then I clipped it all together with the tiny binder clip.

But wait, there’s a surprise inside!!


Some fun confetti mugs and Paper Smooches “Thanks” die cut from various papers and wood veneer. It’s not a confetti pack without some trendy sequins! Love those Studio Calico woodgrain ones! I snuck the vellum envelope between the layers. You can see it peeking out in photos above.

The bottom initially looked a little bare one assembled, so I die cut some branches from the Penny Black Nature’s Song die. I wrote out a message on the back of the tag and then wrapped it all up with some rough twine!

After our fabulous day together, I headed to Snoqualmie Falls, not far from Amy’s for a nature walk. Here are some of my pictures! I so love our PNW forests with the knobby tree-covered trees and mossed branches bending and hanging and breathing life into the forest!
And the neon azaleas are popping out all over now making my eyes pop right out of their sockets. I could look at them in their varying hues of fuschia, red, and pink for hours!


Well, in three minutes, the weekend will be officially over, and it is way past my bedtime. Instead of popping out, my eyes are about to roll back into their sleepy sockets. So I won’t be leaving a fancy linked up supplies list this time, but I have listed what went into the card.
This is headed over to CASE Study for the design team call. There will be a new guest designer as well as a new Muse this coming week! Check it out!
And now it’s lights out for me!
xo
SUPPLIES:
Kelly Purkey “I Like You” Stamps
Prima Paper: Sunrise/Sunset
Crate Paper DIY Shop
7 Gypsies Conservatory Paper
DCWV Burlap Paper
DCWV Woven Paper
Recycled Cardboard
Corrugated Paper
Hemp Twine
Memory Box Mini Cups
Penny Black Nature Song Die
My Creative Time Stitched Tab Die
Avery Elle Tag Die
Tim Holtz Tiny Attacher
Tim Holtz small binder clip
Tonic Paper Distresser
Distress Inks: Walnut Stain, Antique Paper, Tattered Rose, Tea Stain
Versafine Onyx Black ink
Coffeestain Stamp is from Inkadinkado (I think!)
Studio Calico Woodgrain Sequins


