A Crafty Day and A Clipboard Card

And another weekend draws to a close!  Did you find yourself inspired and productive?  I know I did– and now, not only do I have a product pile-up, but I also have a post pile-up!

But before I get to my card and muses, I must share a bit about my crafty Saturday gathering!  I am not only lucky to live in one of the most gorgeous places in the United States, the Pacific Northwest, but also lucky to live in proximity to some of the nicest and most talented card artists out there, all of whom are likely household names to many of you! One of the most wonderful aspects of this creative journey beyond the act of creating is the people I have met online across states and continents through challenges and blogs.  Being able to meet some of these online friends in person makes it even more wonderful.

So yesterday I had the pleasure of laughing, eating and creating with Katie Brooks of KB Stamps, the Kimberly Wiener of Wienerhoneymooners, Amy Tsuruta of Tsuruta Designs, and Amy’s friend, Laurel.  I didn’t get much card making accomplished, but had a great time sharing supplies and ideas, while accomplishing a lot of die cutting (what else is new lately?!) for a mini album!

Amy was a wonderful hostess, and I wanted to show my thanks not only for opening her home to us, but also for being so supportive in her commenting over the past months since I have become more active in the community.  It is amazing how she makes the time to visit so many blogs and comment on people’s work (in addition to creating, being on numerous design teams, raising kids and working!)  Since Amy loves coffee, I knew I had to bring her a little hostess gift of beans, and of course a coffee-themed card!

I have been working on what I will call “clipboard cards” from recycled cardboard and corrugate.  I am really excited about these! There are so many possibilities for different occasions and aesthetic approaches with these cards.  I plan to complete a tutorial for you once I have some others finished.

Additionally, I’ve been experimenting with different card-making styles to challenge myself, but the one I keep gravitating to is the shabby chic/vintage collage style with a modern and/or mixed media twist as seen in the work of Magda Luczak of Mama Judo, Stephanie Schutze of Scrapmanufaktur, Frau Muller, and the older work of Scrapperia, whose recent work is more modern, on-trend, freestyle collage.

These works in particular influenced my thinking, since I have been thinking about these a lot!

Stephanie Schutze, Scrapmanufaktur
Frau Muller
Frau Muller
Scrapperia
Scrapperia
SONY DSC
Mama Judo


I actually had set out to CASE Magda’s tag card, but went in a completely different direction after playing around with my elements. She has another fabulous tag card over at her blog which I am thinking of CASE-ing.  Her work is just magnificent!

So here is my card!

2014-04-25 18.22.32

2014-04-25 18.23.46

2014-04-25 18.24.09


THE PROCESS:

I measured and cut my clipboard back out of recycled cardboard; I use a lot of legal pads in teaching, and always have the cardboard left over after the pad is used.  Great crafting supply!  I did the same with the corrugated paper, rounded the edges of each, and then Mod Podged them together.

I then distressed my top panel and stamped my coffeestains in Versafine Onyx Black, using stamping off to get variations in hues.

I distressed some scrap paper, and then die cut my little coffee mugs.  I strung them along the hemp twine and finally was able to put my Tiny Attacher to use!  Love those little staples!!

I knew immediately that I had to use Kelly Purkey’s stamp from the I Like You set– which I thought was cute in reference to a cup of coffee!  I stamped that in Memento’s Rich Cocoa onto my tag cut from Avery Elle’s Tag set.  I did not attach the tag to the twine as I wanted it to slip out so the message on the back could be read.  I also like the coffee cups sliding freely along the twine.

2014-04-25 18.26.36

I set out to layer a bit with various papers and the burlap, distressing my 7 Gypsies Conservatory paper with the Tonic Distressing tool.

I die cut the tab from My Creative Time’s Stitched File Tab, and specifically chose a section of the washi to tear and affix to the it.

Then I clipped it all together with the tiny binder clip.

2014-04-25 18.24.51

But wait, there’s a surprise inside!!

2014-04-25 18.27.55

2014-04-25 18.30.59

Some fun confetti mugs and Paper Smooches “Thanks” die cut from various papers and wood veneer.  It’s not a confetti pack without some trendy sequins!  Love those Studio Calico woodgrain ones!  I snuck the vellum envelope between the layers.  You can see it peeking out in photos above.

2014-04-26 08.04.39

The bottom initially looked a little bare one assembled, so I die cut some branches from the Penny Black Nature’s Song die.  I wrote out a message on the back of the tag and then wrapped it all up with some rough twine!

2014-04-26 08.04.11

After our fabulous day together, I headed to Snoqualmie Falls, not far from Amy’s for a nature walk.  Here are some of my pictures!  I so love our PNW forests with the knobby tree-covered trees and mossed branches bending and hanging and breathing life into the forest!

And the neon azaleas are popping out all over now making my eyes pop right out of their sockets.  I could look at them in their varying hues of fuschia, red, and pink for hours!

2014-04-26 14.50.422014-04-26 15.22.112014-04-26 15.34.01

Well, in three minutes, the weekend will be officially over, and it is way past my bedtime.  Instead of popping out, my eyes are about to roll back into their sleepy sockets.  So I won’t be leaving a fancy linked up supplies list this time, but I have listed what went into the card.

This is headed over to CASE Study for the design team call.  There will be a new guest designer as well as a new Muse this coming week! Check it out!

And now it’s lights out for me!

xo

SUPPLIES:

Kelly Purkey “I Like You” Stamps
Prima Paper: Sunrise/Sunset
Crate Paper DIY Shop
7 Gypsies Conservatory Paper
DCWV Burlap Paper
DCWV Woven Paper
Recycled Cardboard
Corrugated Paper
Hemp Twine
Memory Box Mini Cups
Penny Black Nature Song Die
My Creative Time Stitched Tab Die
Avery Elle Tag Die
Tim Holtz Tiny Attacher
Tim Holtz small binder clip
Tonic Paper Distresser
Distress Inks: Walnut Stain, Antique Paper, Tattered Rose, Tea Stain
Versafine Onyx Black ink
Coffeestain Stamp is from Inkadinkado (I think!)
Studio Calico Woodgrain Sequins

Prêt-à-Porter

Bonjour mes amis!  I am back with another card for the Fusion challenge.  This one gave me occasion to bring out my little PTI dress form and some fashionable ladies from the awesome British stamp company Crafty Individuals! 

I received a dress form for Christmas, and she has been more of a model than a hard-working girl as I’ve not put together a dress since 2010, the one in the photo below, actually!

BROWN DRESS 10

Back of Brown Dress

I started photographing my pieces awhile back to catalogue them, and hope to get some better shots up in the Sewing Gallery soon.  I’ve a dress in the wings that needs to be done by May (yikes!) so both of these ladies will be in working fashion and whirring along with the song of my sewing machine soon!

Now, here is Fusion’s inspiration and my take:

2014-04-07 14.29.53

There are some hidden details in this card, which I love!  I used the Ranger ATC folder for the background piece; after distressing it, I decided to file some goodies inside!  That’s a folder’s purpose after all!  I liked the idea of a lady clipping sewing ideas from magazines and storing them in this folder for her reference.  The tab is stamped with partial sentiment from PTI’s Button Boutique.

2014-04-07 14.19.23

2014-04-07 14.18.08

2014-04-07 14.18.41

2014-04-07 14.20.01

I cut some of the images from Prima Marketing fashion paper set and vintage lined paper; then die cut a spiral paper edge with Paper Smooches Borders die.  The Button card is from an American Crafts chipboard set.  And what about that hanger from Ranger???  Irresistible et incroyable, non?

2014-04-07 14.15.35

Here is a close-up where you can see the embossed French script on the bodice.  I stamped with clear Versamark and heat embossed for some glossy sheen.  I stamped my ladies with Memento Cocoa and I love how they fit perfectly in the patterned panel, which is cut from a 12 x 12 sheet of Crate Paper’s DIY Shop.

2014-04-07 14.21.49

The bottom panel is also from DIY Shop; love that it featured April on the ruler!  I covered it with Simon Says Stamp’s Mod window cut from birch wood veneer paper, also from SSS.

2014-04-07 14.22.07

2014-04-07 14.22.56

The inside and back are finished off with some fabric tape. The sentiment is from PTI’s Stitched with Love.

I love the hexagon patterned paper peeking over the edge.  I picked up some great new 12 x 12 papers a Impress a few week’s back.  Now I am wishing I bought two of each!  This particular double-sided paper is Cosmo Cricket “Sweet Disposition.”

Making this card was so much fun and definitely put me in a sweet disposition!

Hope you enjoy it as much as I do.

The clock is ticking down on this challenge, so I better link up!  Head over to Fusion to see what others have fashioned!

Have a stylish day!!


Happy Groundhog Day AND a Challenge

groundhogs2
No more winter! No more winter! “Give Me Five” by Miroslav Halama

The sight of the sun on February 2nd is a mixed blessing, according to Punxsutawney Phil and the tradition of Groundhog’s Day. This time of the year is associated with purification, fertility, and light, celebrated in ancient times by Greeks, Romans, and Celts, as well as Christians in later times, with large feasts honoring spirits, saints, and the Virgin Mary. The word February etymologically stems from Februa, meaning purification or expiatory rites.  It is of unknown origin, but perhaps stems from the Sabine, an ancient Italic people (Source).
In the second week of February, the ancient Romans held Lupercalia, a spring purification festival aimed at warding off evil spirits and preparing for spring. Imbolc, a Gaelic celebration, was held on February 1st, the midway point between winter solstice and the vernal equinox, heralding the onset of spring, and including divination of the weather to come. Candlemas on February 2nd, has a layered history and goes by a variety of names in the Christian church, but like the other festivals was a celebration of light (blessing of candles) and purification, specifically in honoring Jesus and Mary.

Additionally, for many cultures throughout history, the day is believed to be an indication of the weather and planting season to come.  The tradition was brought to America by Germans who initially looked to the hedgehog, and subsequently in America the groundhog, to foretell the weather.

For as the sun shines on Candlemas Day,
So far will the snow swirl until the May.
”  (Source)

So in honor of these ancient traditions, groundhogs everywhere, my birthday (!), and the CASology challenge “AND”, I decided to put together this little greeting:

2014-02-04 12.04.23

Darling, don’t you think?  I absolutely love this combination of stamps, of which the “groundhog,” logs, and swirl are wood-mounted rubber from Memory Box.  My groundhog is lightly shadowed with Copic E40, and the logs are colored with E13, E15, E19, and E47.

The sentiment’s font should look familiar to many, it being the popular Milo’s Alphabet from Lawn Fawn.  And what do you think of that amazing ampersand from the PTI set, Grand Ampersand?  Perfect little shadow, and complement to the font, isn’t it?

2014-02-04 12.05.00

Since this card was made for a client as a thanks for a birthday gift, the inside has a greeting of gratitude.  But other versions I am working on say “Wishing you a Happy Groundhog’s Day” inside.

2014-02-04 12.04.39

Here is an initial version of the card below:

2014-02-04 12.06.02

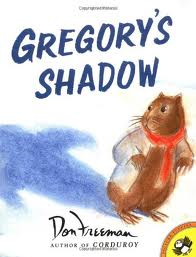
At this time of the year, I use Don Freeman’s fabulous book, Gregory’s Shadow with many of my early readers.  It is a delightful story filled with gorgeous illustrations.

untitled

Interested in learning more about Groundhog’s Day?  You can check out these sites:

http://www.groundhog.org/

http://www.cnn.com/2013/07/13/us/groundhog-day-fast-facts/index.html

AND last but not least, have you seen the classic, Groundhog Day, with Bill Murray?  Here’s a little clip, if you’ve not, or if it’s been awhile.

Although I love February 2nd, I certainly wouldn’t want to be doomed to repeat it over and over like Bill.  Once a year is quite enough for me, what with that whole getting older aspect… then again, if I were stuck in time, would it mean I wouldn’t age?  Hmmm…..

Here’s hoping your day is delightfully different from the last and that spring makes its way to you soon, if you are in a wintery clime!  My body is already registering the days of longer light, and 6 more weeks of winter or no, I will take all the sun I can get!

Head over to CASology to see what additional fun is happening there over and over and over again!

In a Word: Create & Give More Thanks!

I hope you were able to check out my other most recent posts here and here and here, as the cards featured in this post came out of a marathon of inspiration over the last few days!  I was working thematically and really enjoying the process!  Now to get these filled out and in the mail!

First up is the card that is connected to the one featured in my last post.  I am going to submit it to CAS-ual Fridays for their current challenge–

Though it is a bit hard to see, and not necessarily the focal point, I purposely chose the wonderful Graphic 45 button because it says “Create,” which is a goal of mine in 2014 and something I plan to do every day of this year.

IMG_20140102_152733.897

As you can see, similar design  to my last card, but definitely more clean and simple.  I had been dying to use the Tim Holtz brick embossing folder and it seemed the perfect background for this version.  Here the wreath was cut from woodgrain paper and then dyed with the Distress Inks.  The button die cut is from Papertrey Ink and also dyed.

IMG_20140102_152530.956

Here you can see more of the wreath’s colors.

IMG_20140102_152503.109

And for the inside of the card:

IMG_20140102_152559.314

Next up, a more wintery wreath with some of my clustering.

IMG_20140102_151331.492

I mixed a little bit of mica with white Flower Soft for the bird’s nest.  My mom sent me the K & Company woody snowflake stickers, which were a perfect addition for the cluster.  The metallic stars were cut from POW glitter paper with Lawn Fawn star dies.  The sentiment should look familiar– Paper Smooches– it never gets old!

IMG_20140102_151305.893

IMG_20140102_151347.056

I realize I did not take a photo of the inside of the card!  The scalloped edge is a Martha Stewart punch, and I punched the green paper overlay the same way and adhered to the inside of the card, so it is the same as the outside of the card!  Papers are a combination of Amuse Studio, Ellen Hudson, Gina K, and Bazzill.

And one more!

Last up for this post, a card I made specifically for a student who gave me a really cool mug that looks like lined paper, since I am a writer and his writing teacher! You can click on it to link to a local store here in Seattle!

I love it!  So here is his thank you:

IMG_20140102_151135.020

I absolutely love how this turned out!  I was able to use my brand new Memory Box Tiny Mug dies, which I had hoped to use for a Seattle Christmas tree, but that idea didn’t come to fruition just yet!

IMG_20140102_151053.821

The logs were stamped in cocoa ink and embossed; I have once again mixed Melissa Frances mica flakes and some Flower Soft.  The background is embossed with Tim Holtz’s woodgrain folder.  Paper Smooches features prominently for the outside and inside sentiments– but there’s a twist!

IMG_20140102_151157.740

The original stamp says “from the bottom of my heart”, but I just inked part of the stamp and die cut a mug from notebook paper cardstock (how awesome!!) and voila!  Looks almost like the mug I received!

That’s it for me today!  I have to get down to business and prep for teaching.

Thanks is also a watch-word for 2014, as I am so thankful to be able to work for myself with wonderful kids and families, have a partner who supports my creative pursuits, and have viewers and fellow creators like you out there with whom I can share my work!

Keep creating & keep in touch!  Head over to CAS-ual Fridays for some great words & work to get you thinking about your mantra for 2014!

Thank You for Being So Cool!

Well, hello again!  I am sliding in with my little friend for one more post this evening before I settle in for a short winter’s nap!  Today’s first post can be found here.

As with my earlier post, this little card is also based on the current CAS(E) sketch:

77daa-cts_sketch_58

IMG_20140102_152117.041

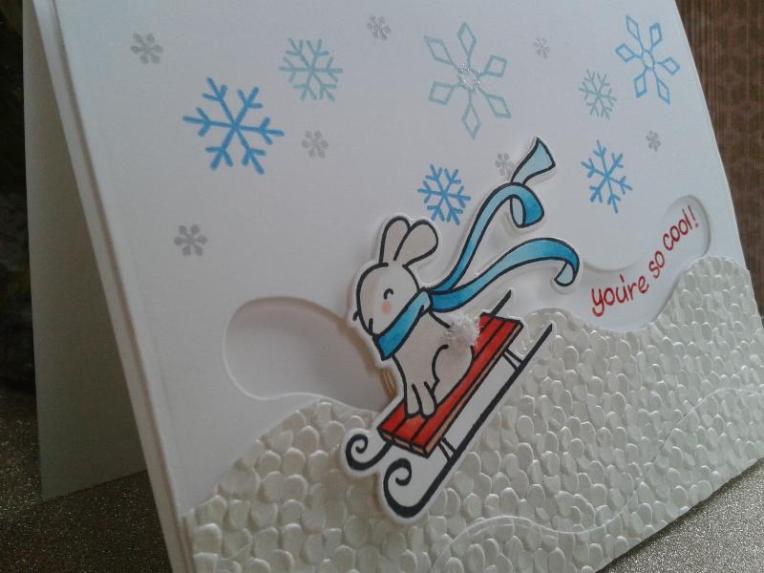
This wonderful Lawn Fawn sledding bunny made another appearance earlier this winter here in one of my favorite cards of the season.  I am not sure this tops it, but I *was* sure excited to use my new Papertrey Ink Movers and Shakers die to get him moving up and down the hills!

Once you slide him along the path, the sentiment is revealed:

IMG_20140102_152138.102

So stinking cute, isn’t it?  I made this card with a specific student and her family in mind and I am so excited to give it to them as a thank you for their Christmas present!

IMG_20140102_152151.181

All stamps here are from Lawn Fawn; the bunny is colored with Copics; I used Brilliance Inks in blue, silver & red, Flower Soft, and Stickles.  The amazing snowy hill is actually cut from a sheet of wrapping paper I found at our local Northwest Art and Frame store.  $8 for a sheet of wrapping paper– YIKES!  But it is so worth it– gorgeous texture, sheen, weight–and it should last awhile and come in handy for a variety of cards.

IMG_20140102_152242.521

We have no snow here in our damp, coastal clime–has a blizzard caught you in your tracks, yet?  If so, I hope you are warm, safe and maybe enjoying some wintery wonderland adventures!

And if you are stuck inside with many feet of snow impeding travel (or even if you’re not!!), head over to CAS(E) and spend some time hopping around the inspiring blogs linked up there!

Check back tomorrow for more of my thank you cards!

And thank you for dropping by!