I think it’s fun to create thank you cards that reflect the gift you were given, so I have been doing just that for a few of my recipients this week. I have so many to fill out and get into the mail, as well as some lingering holiday gifts to send (yes, that’s right–my 12 days of Christmas may just turn into 12 weeks at this point), and of course so many card photos still from December to post here! Thus I’m on my third entry of the day, so I can make another challenge deadline!
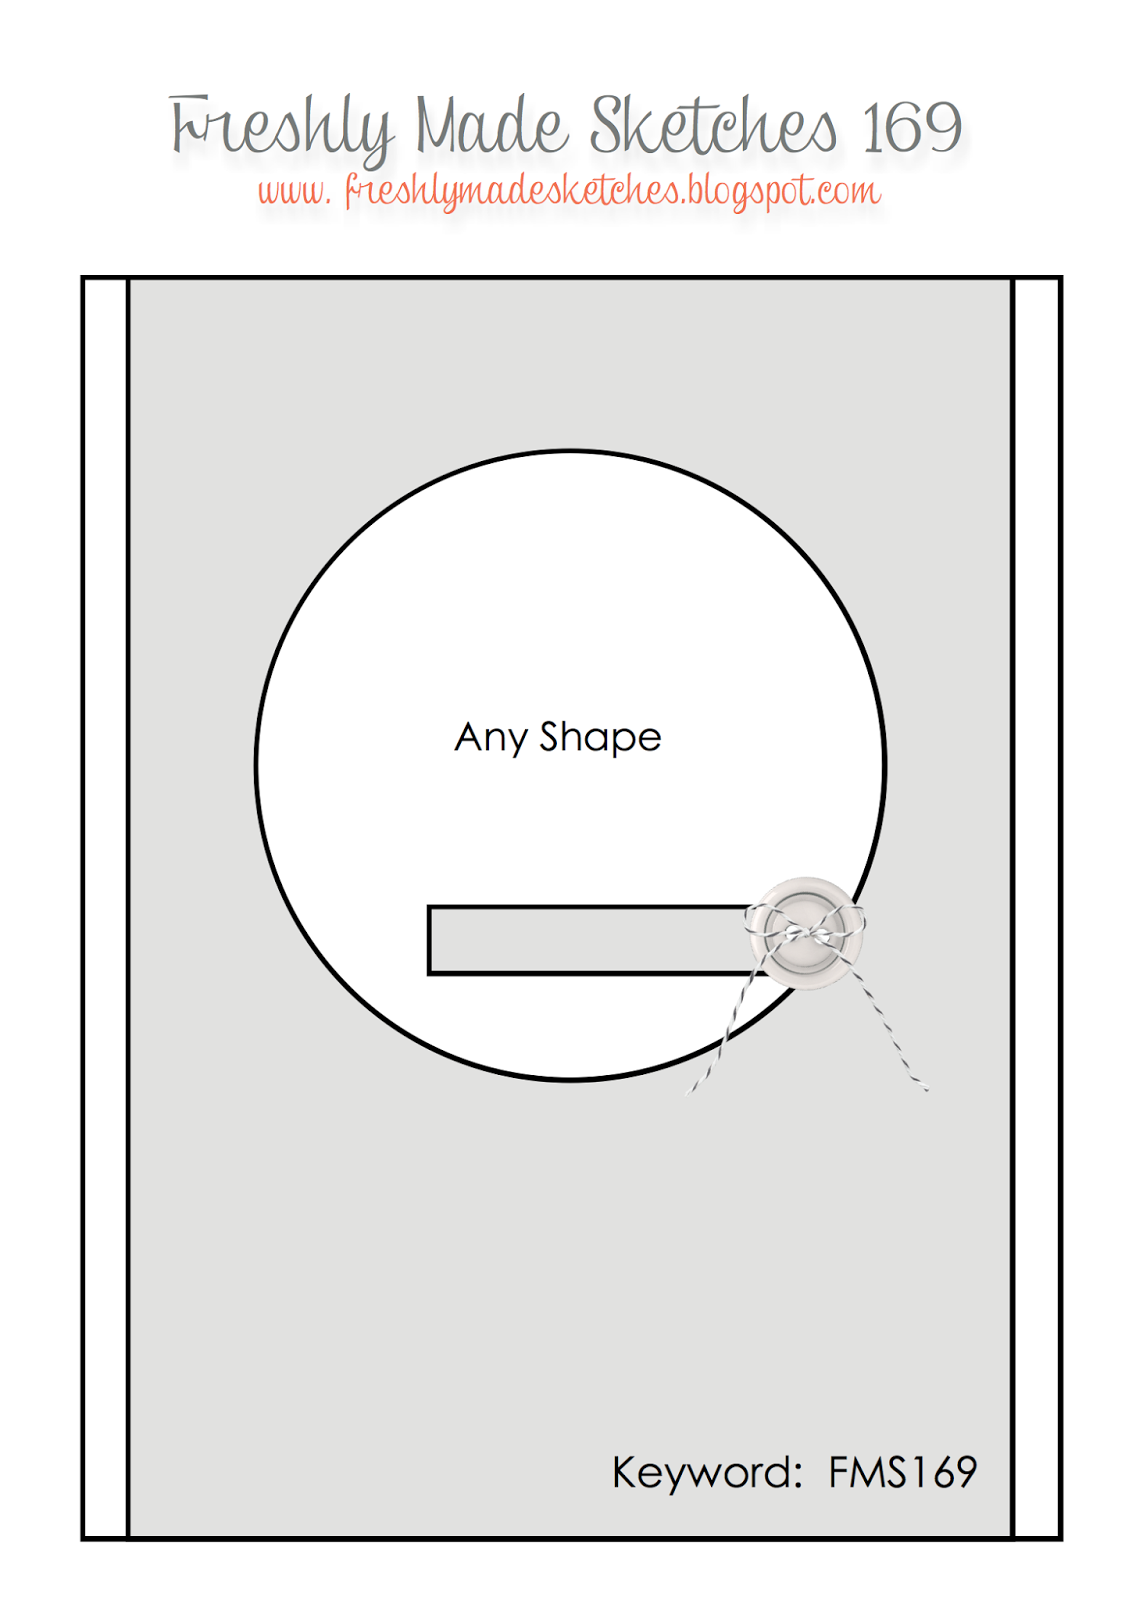
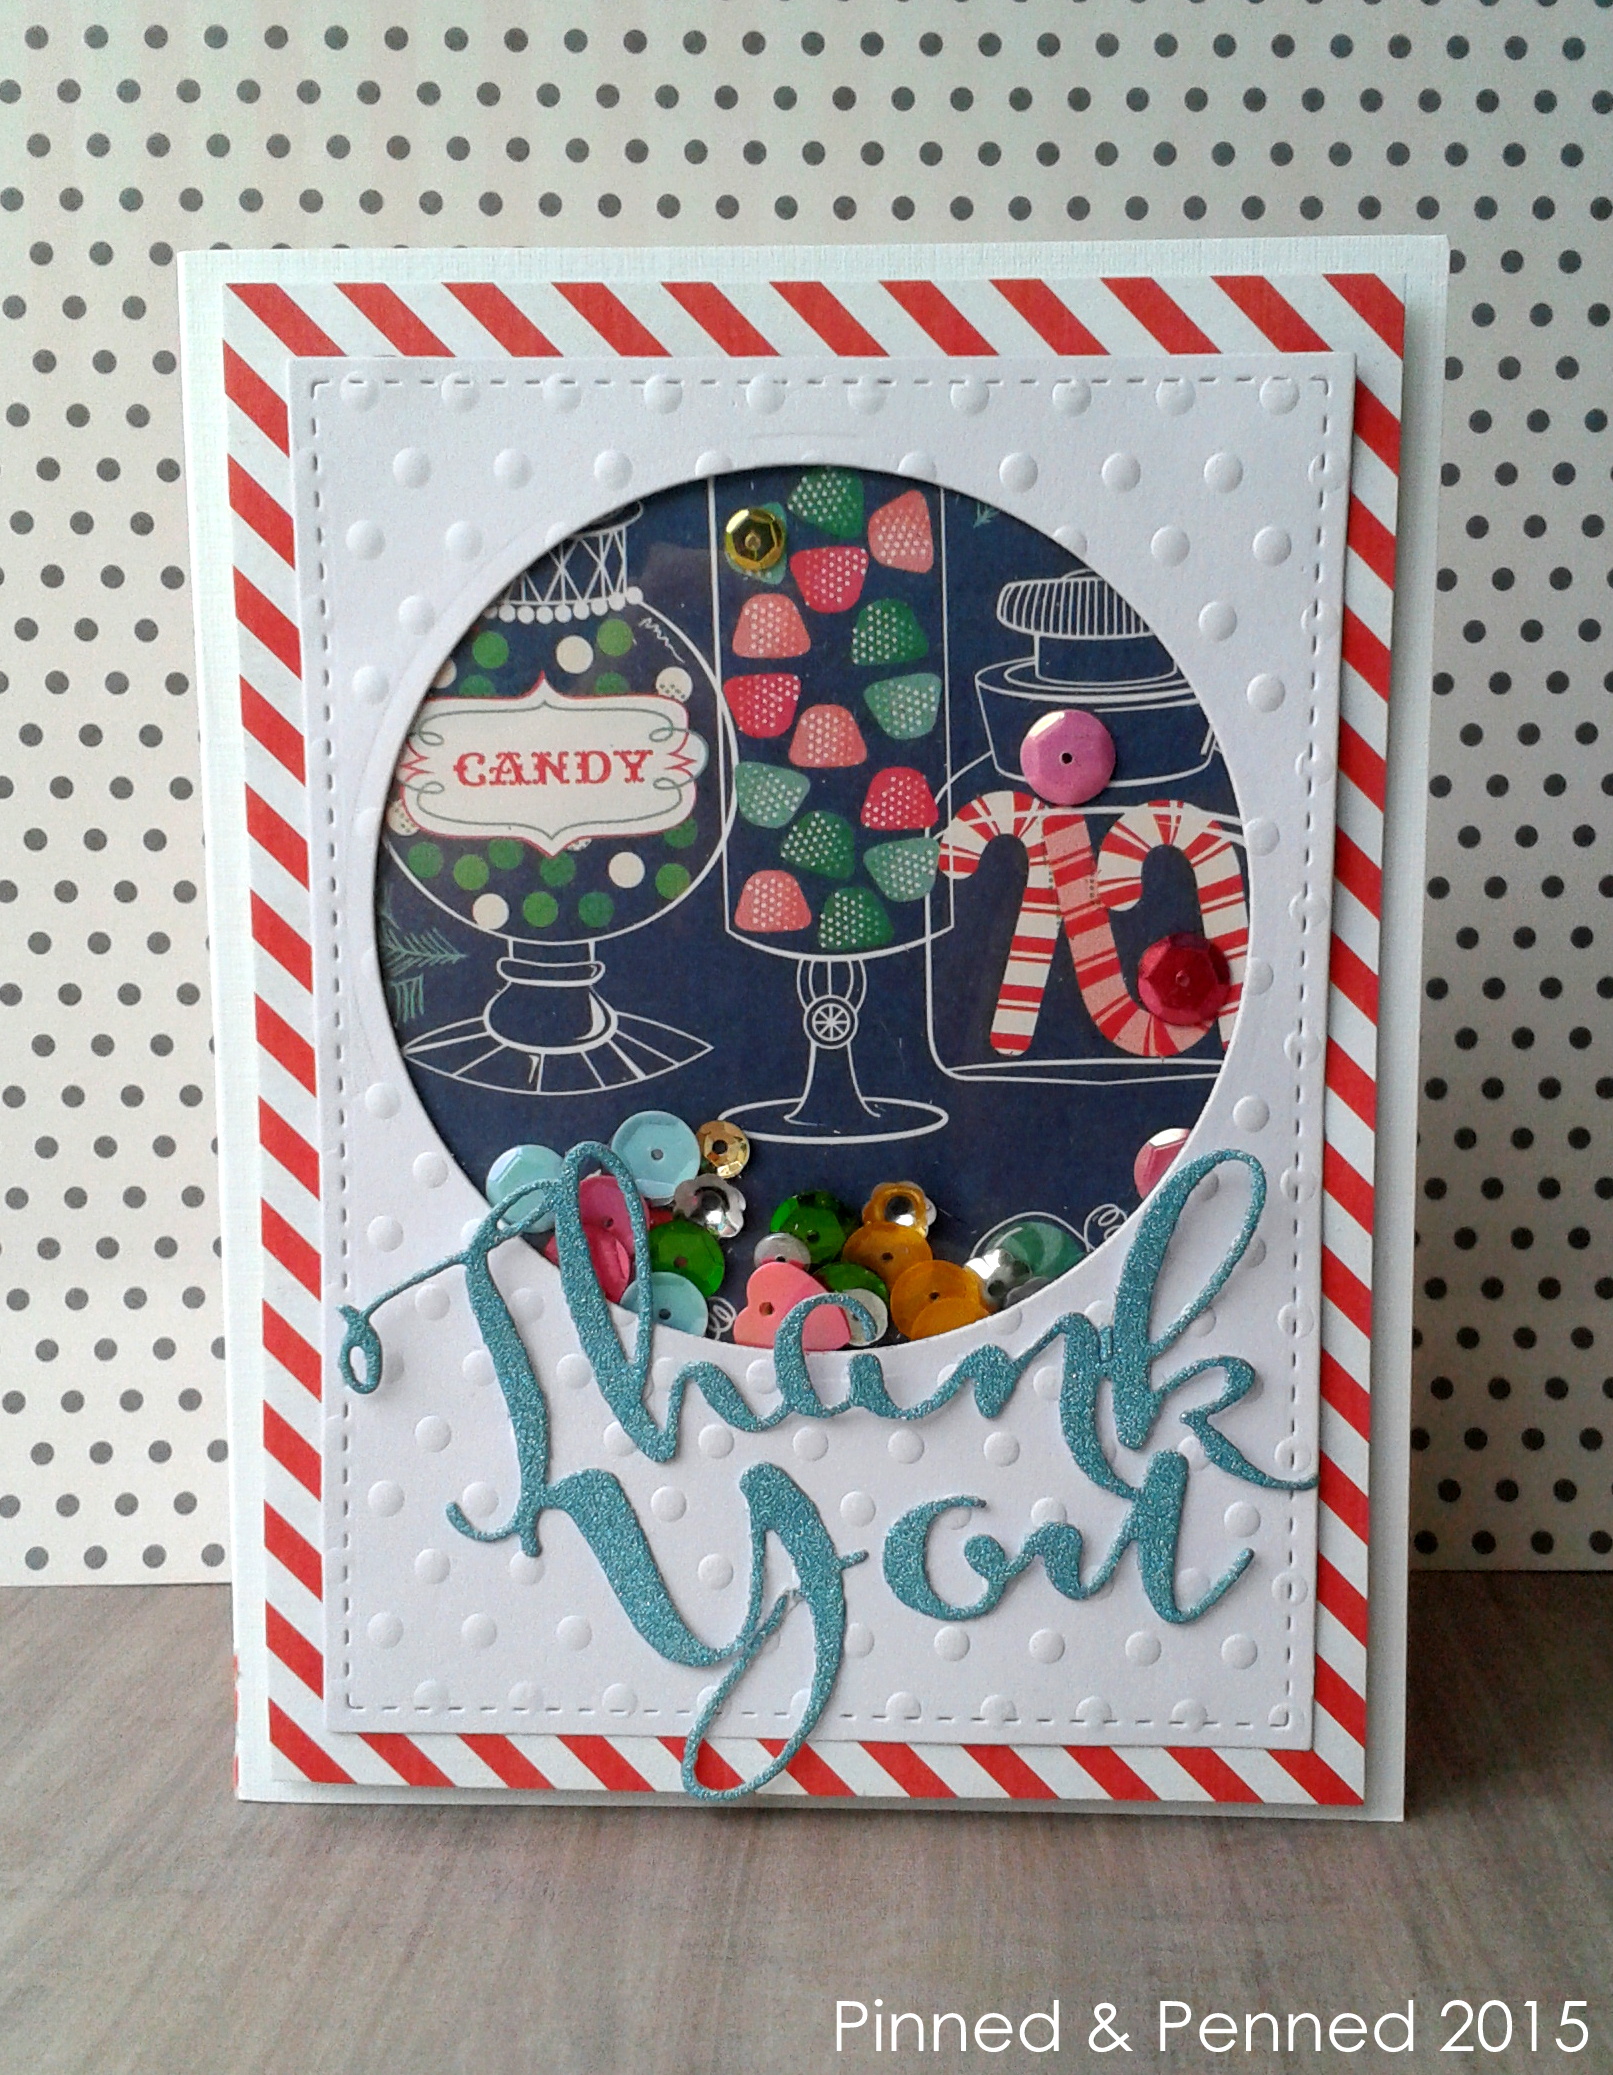
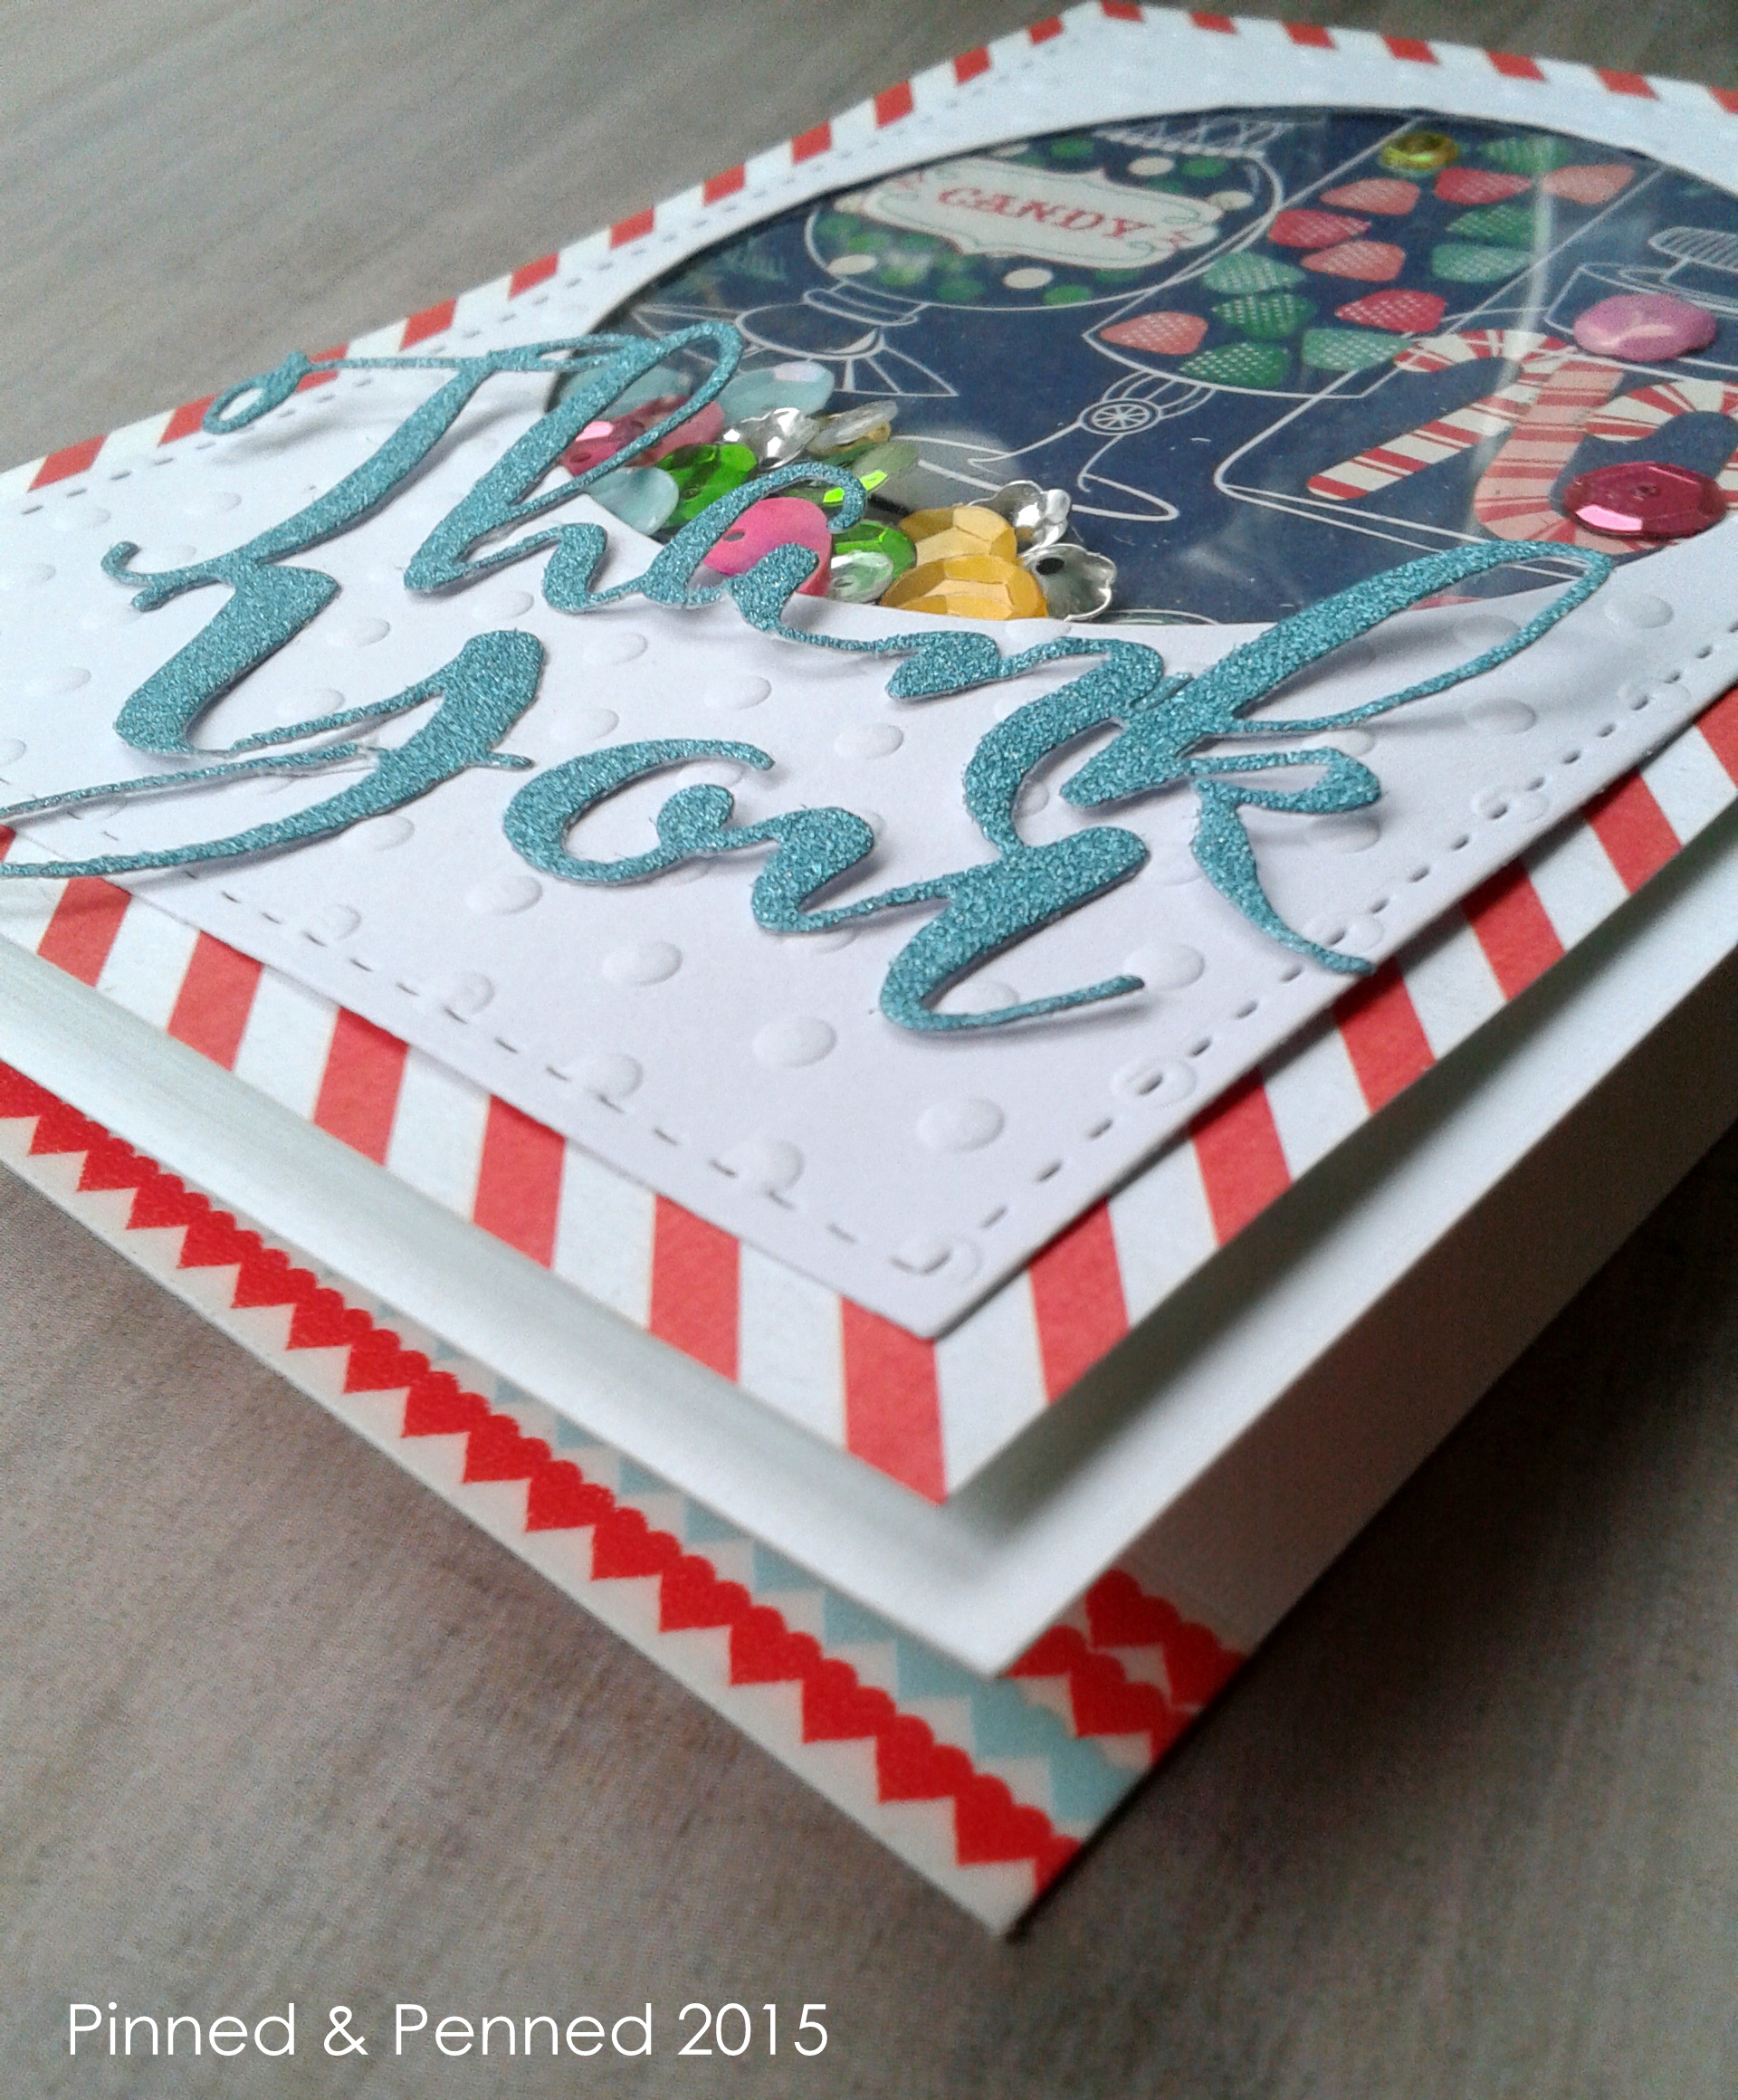
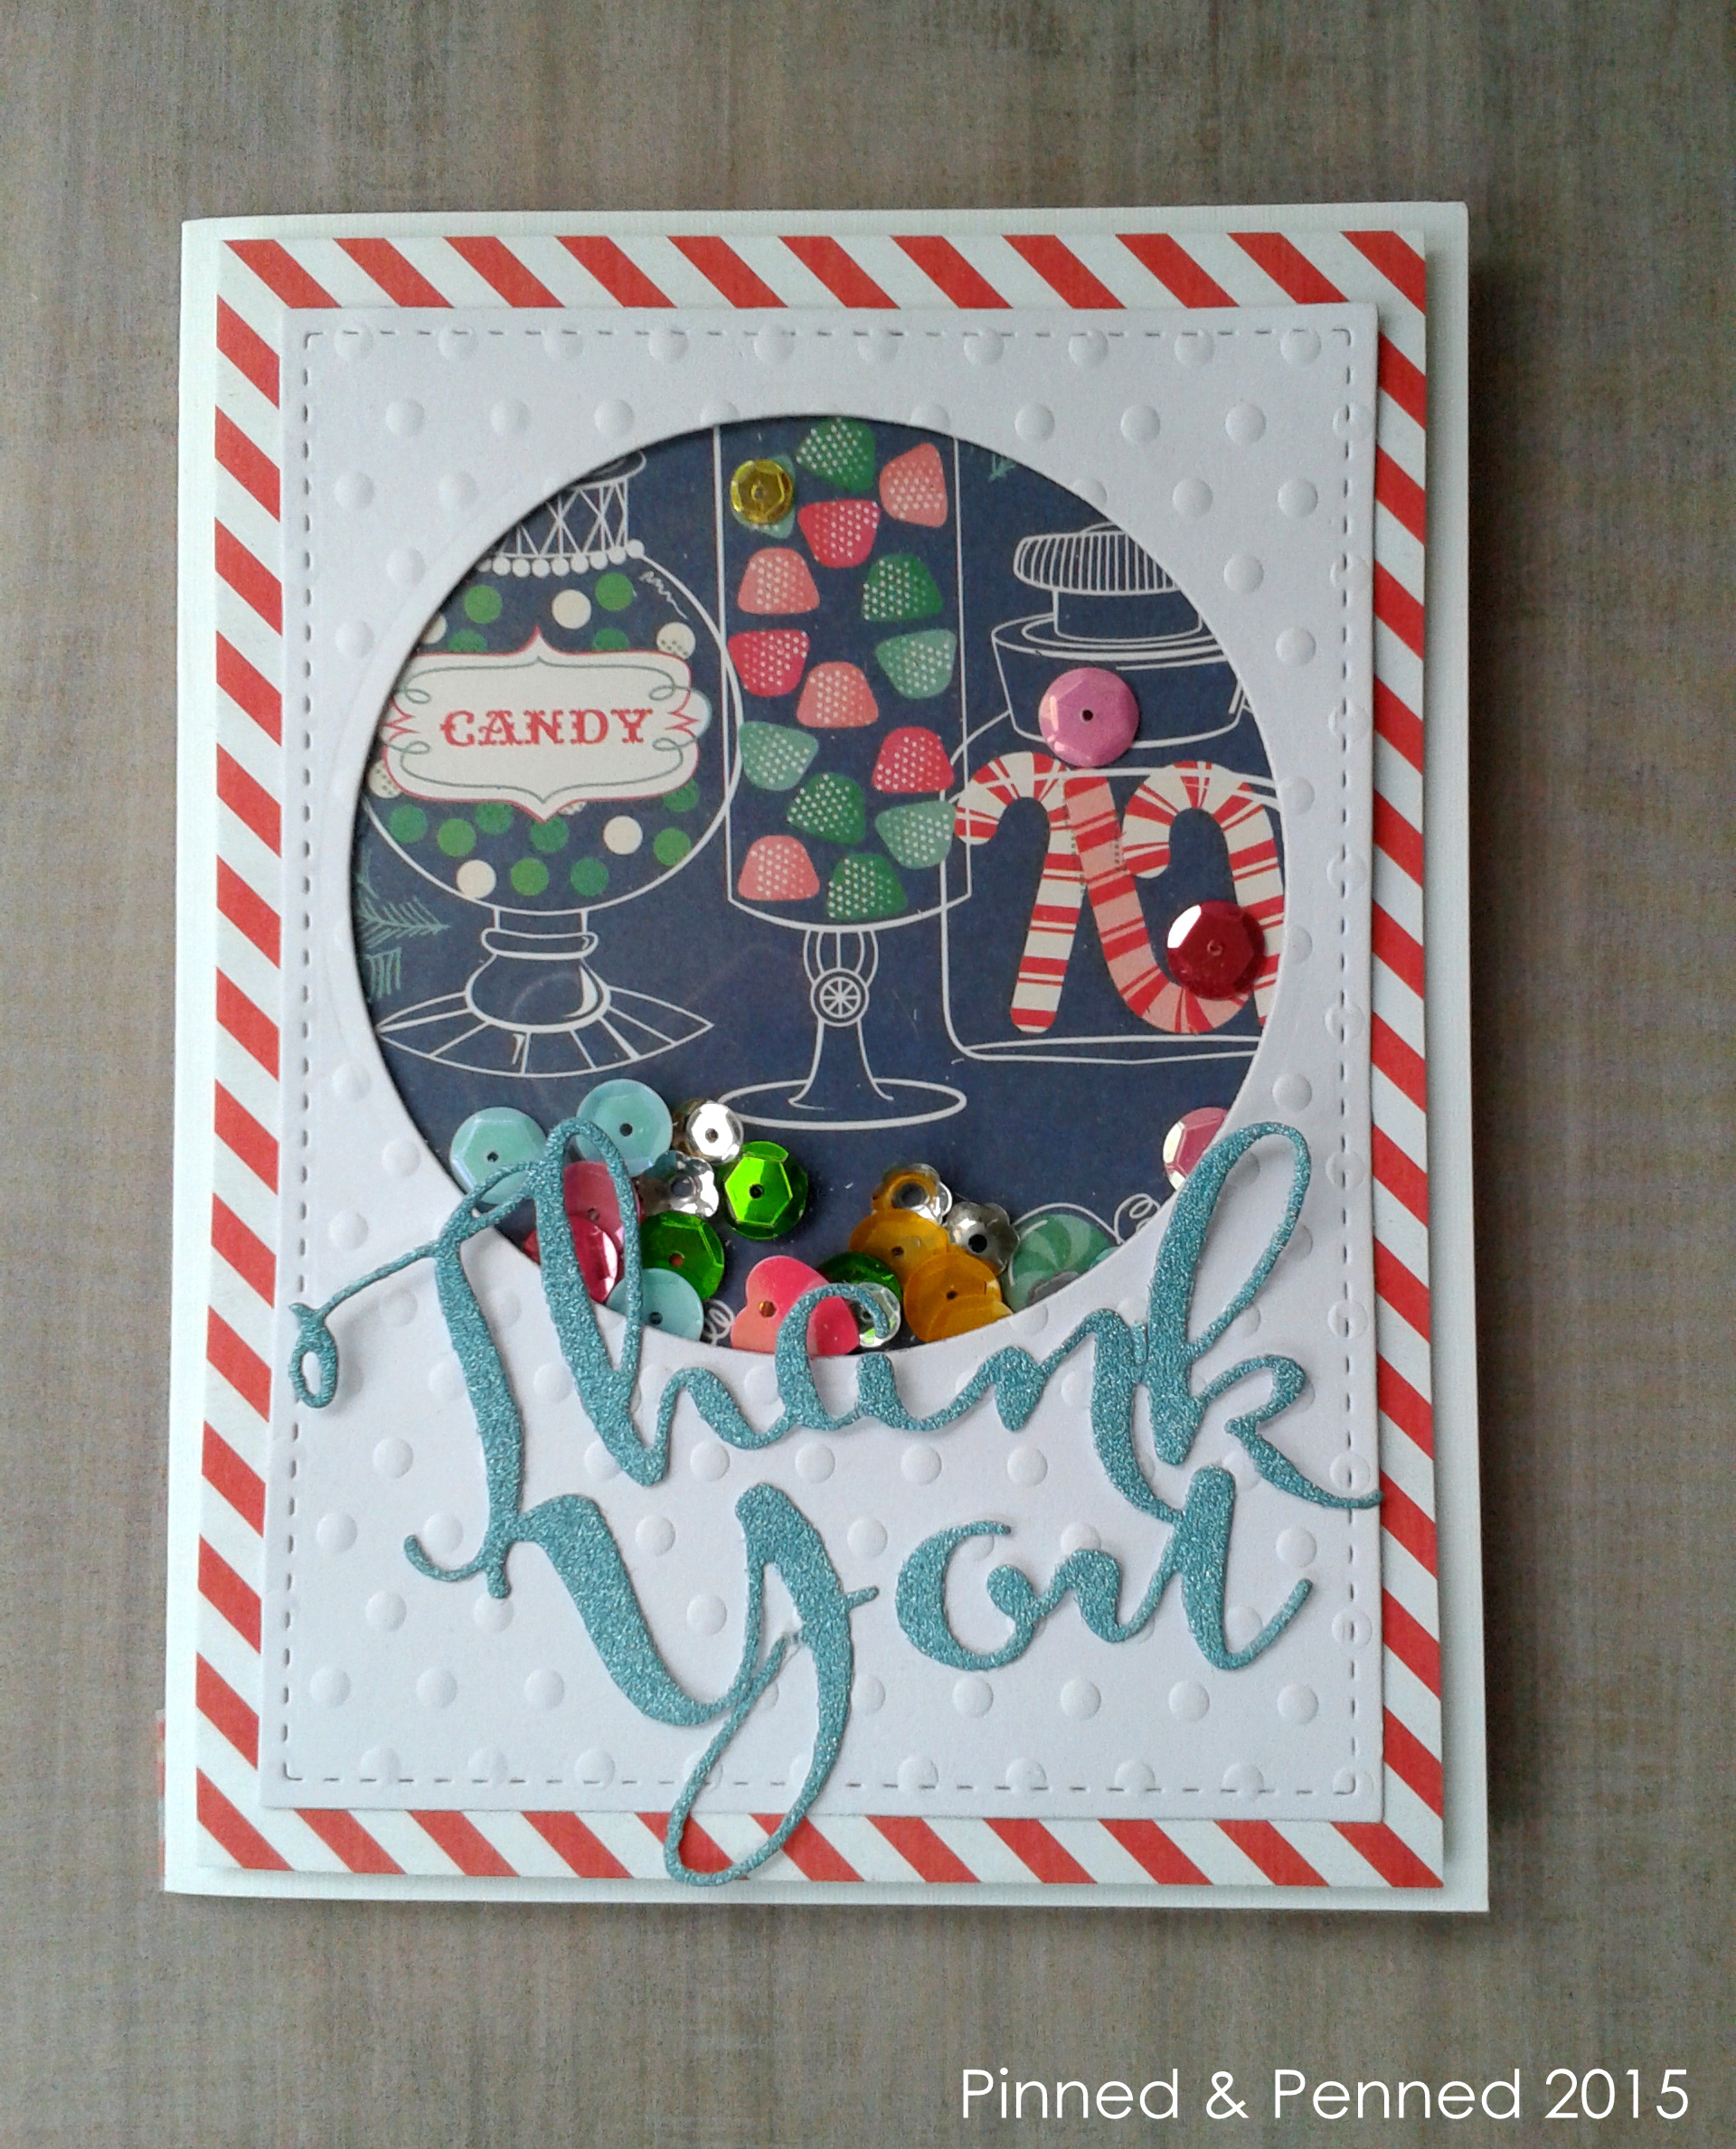
One of my crafty goals is to find some new challenges to play this year, and so far I’ve come across two thanks to some fellow crafters. So for this recent card, I joined Freshly Made Sketches. I love the sketch and it reminds me of a card I saw earlier in the week over at Studio Calico for their upcoming release. I think the theme of my card fits perfectly with the sketch, it’s like a window into a jar of candy!
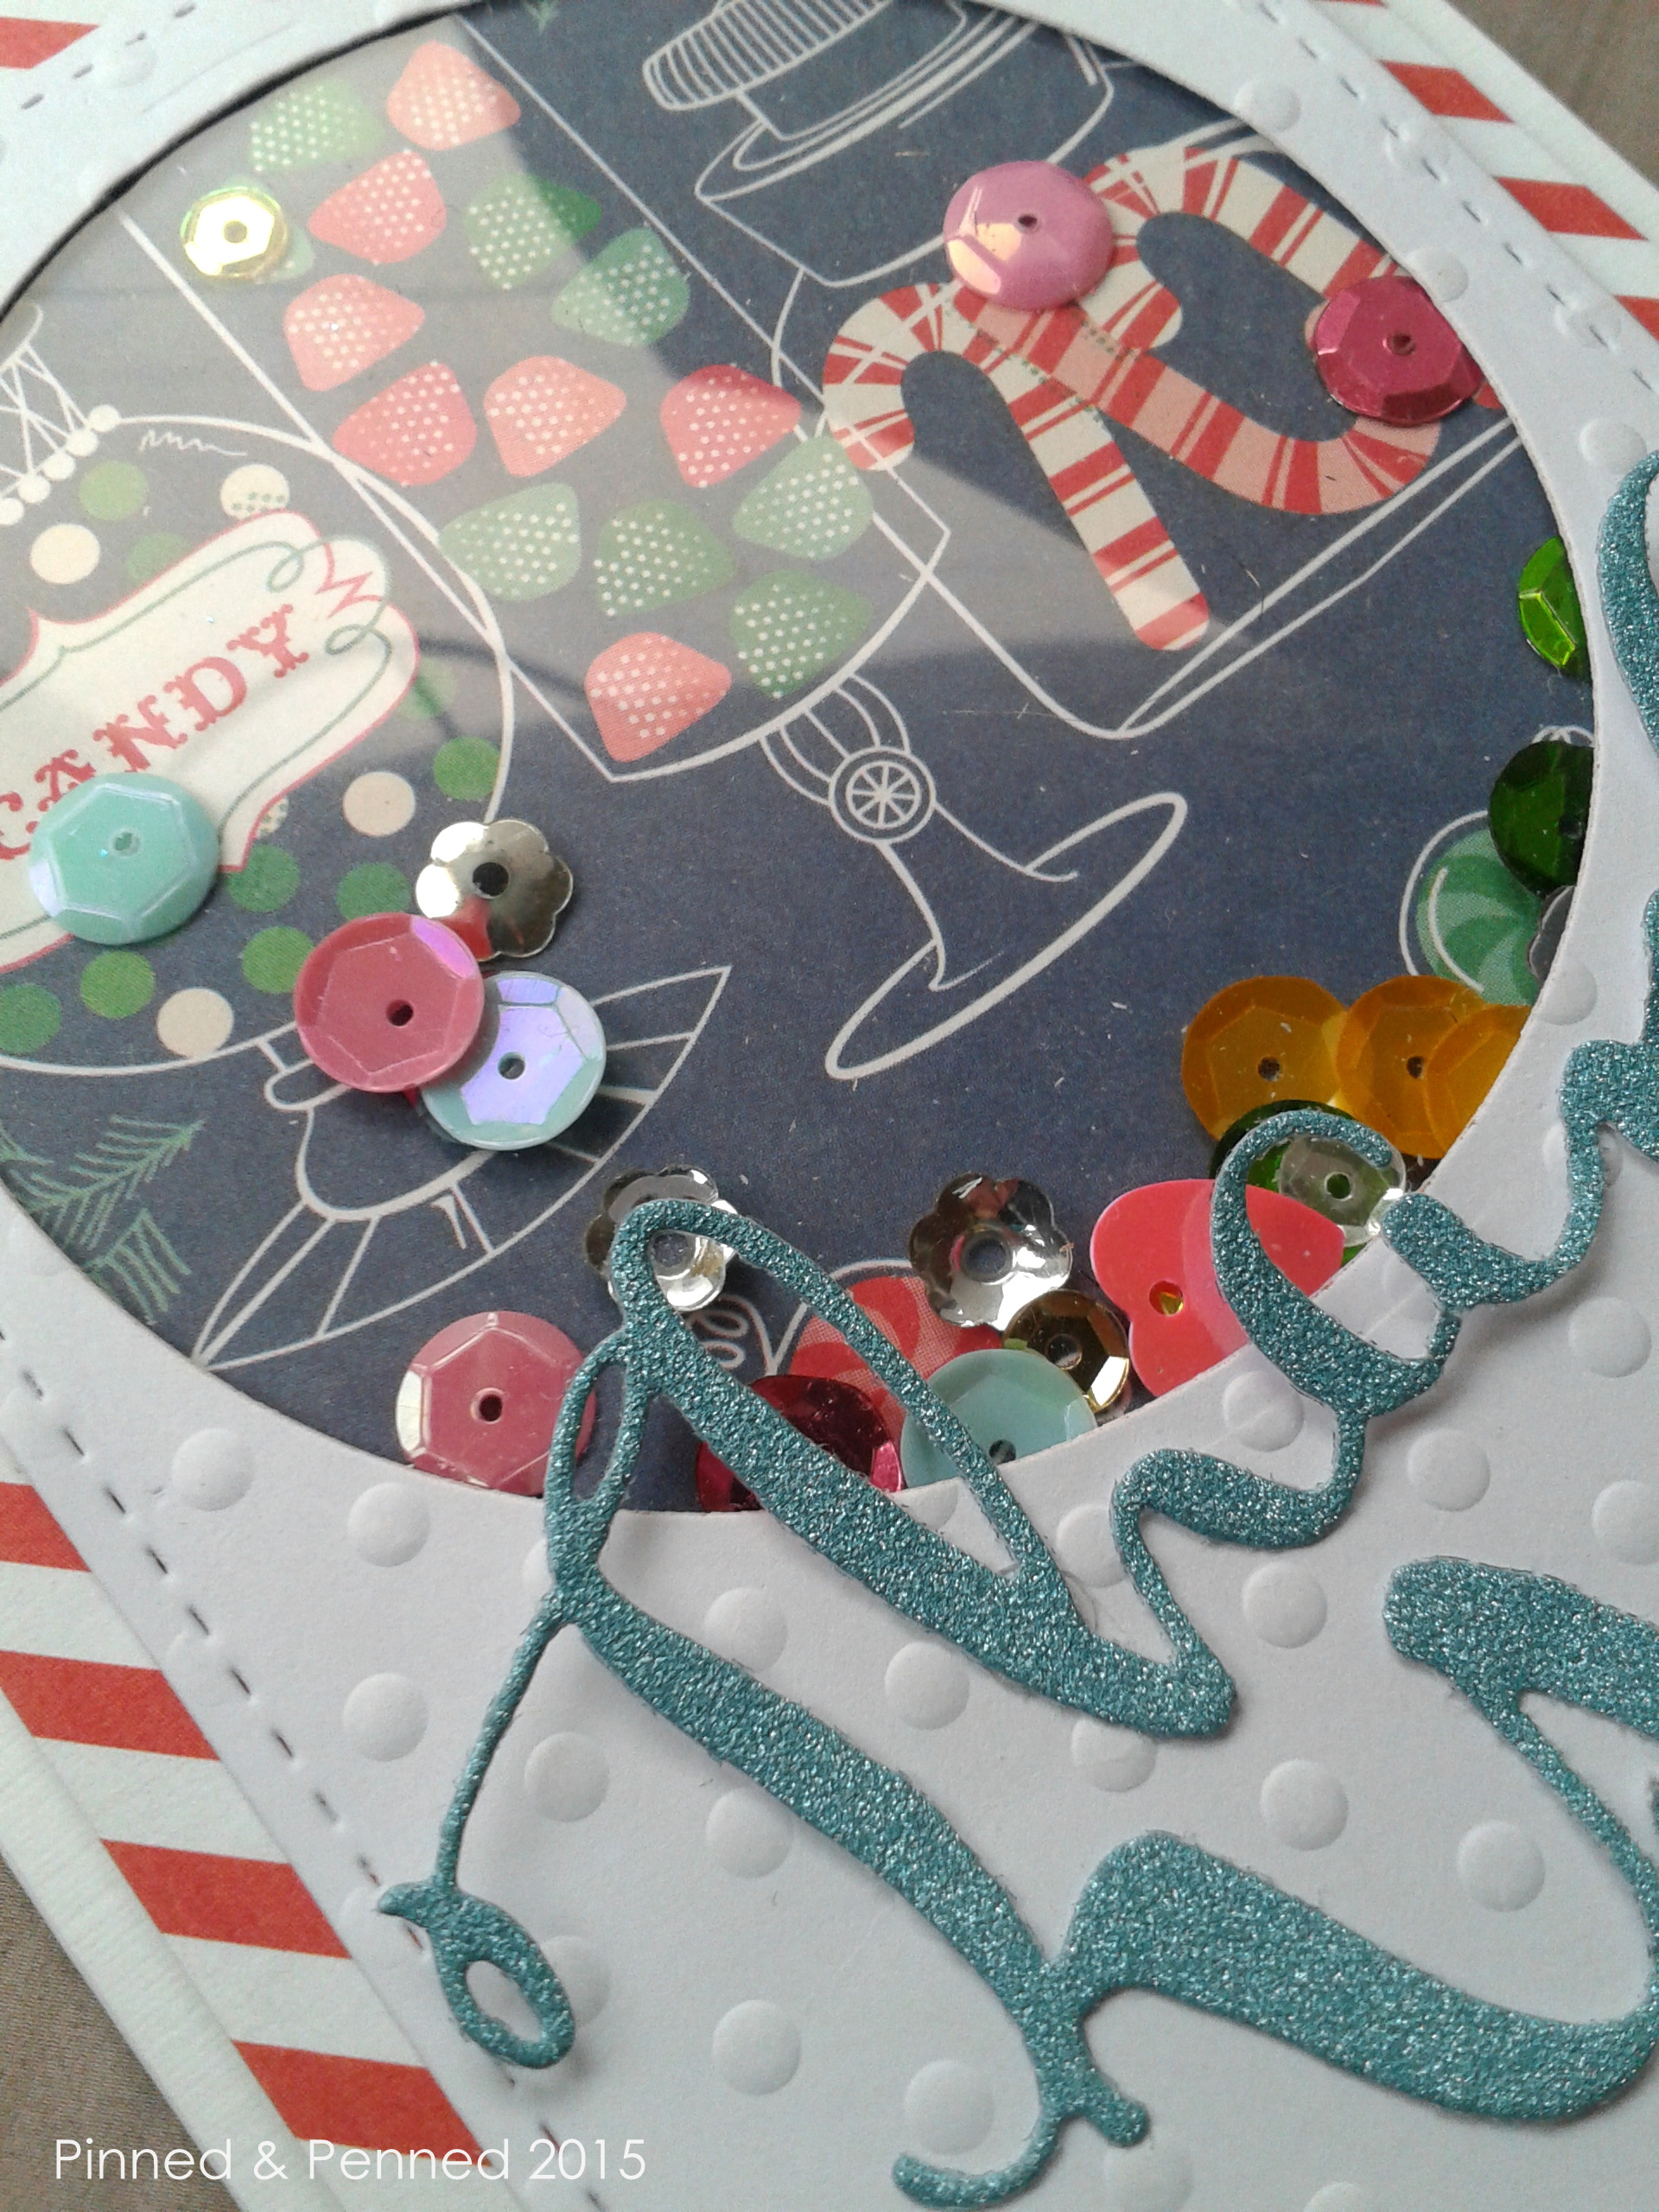
It’s a fun little shaker with a simple window covered with some acetate. The candy paper is an older release from Webster’s Pages. The Avery Elle “Thank You” die is proving quite the worthy purchase! The stitched rectangle is also Avery Elle, another indispensable die!
The inside is lined with some Valentine’s washi from My Mind’s Eye.
Thank you for stopping by! Hope you enjoy a sweet start to your week!
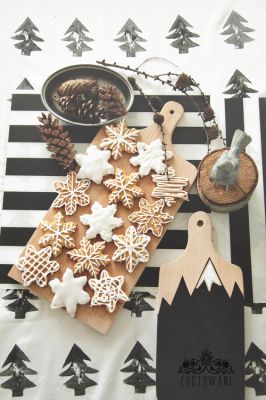
I’m not one to rush the seasons, so thinking about Christmas cards when there are only a few summery days left to savor isn’t really my inclination. However, after seeing Festive Friday’s last few challenges and the inspiring work by the design team, I felt inclined to play along. I loved the non-traditional palette of the inspiration photo. There are so many fabulous elements to chose from–the wood stump, pinecones, grey bird, frosted cookies. I’ve made two cards, but the image has me thinking of many other designs that perhaps I will have a chance to execute before the deadline.
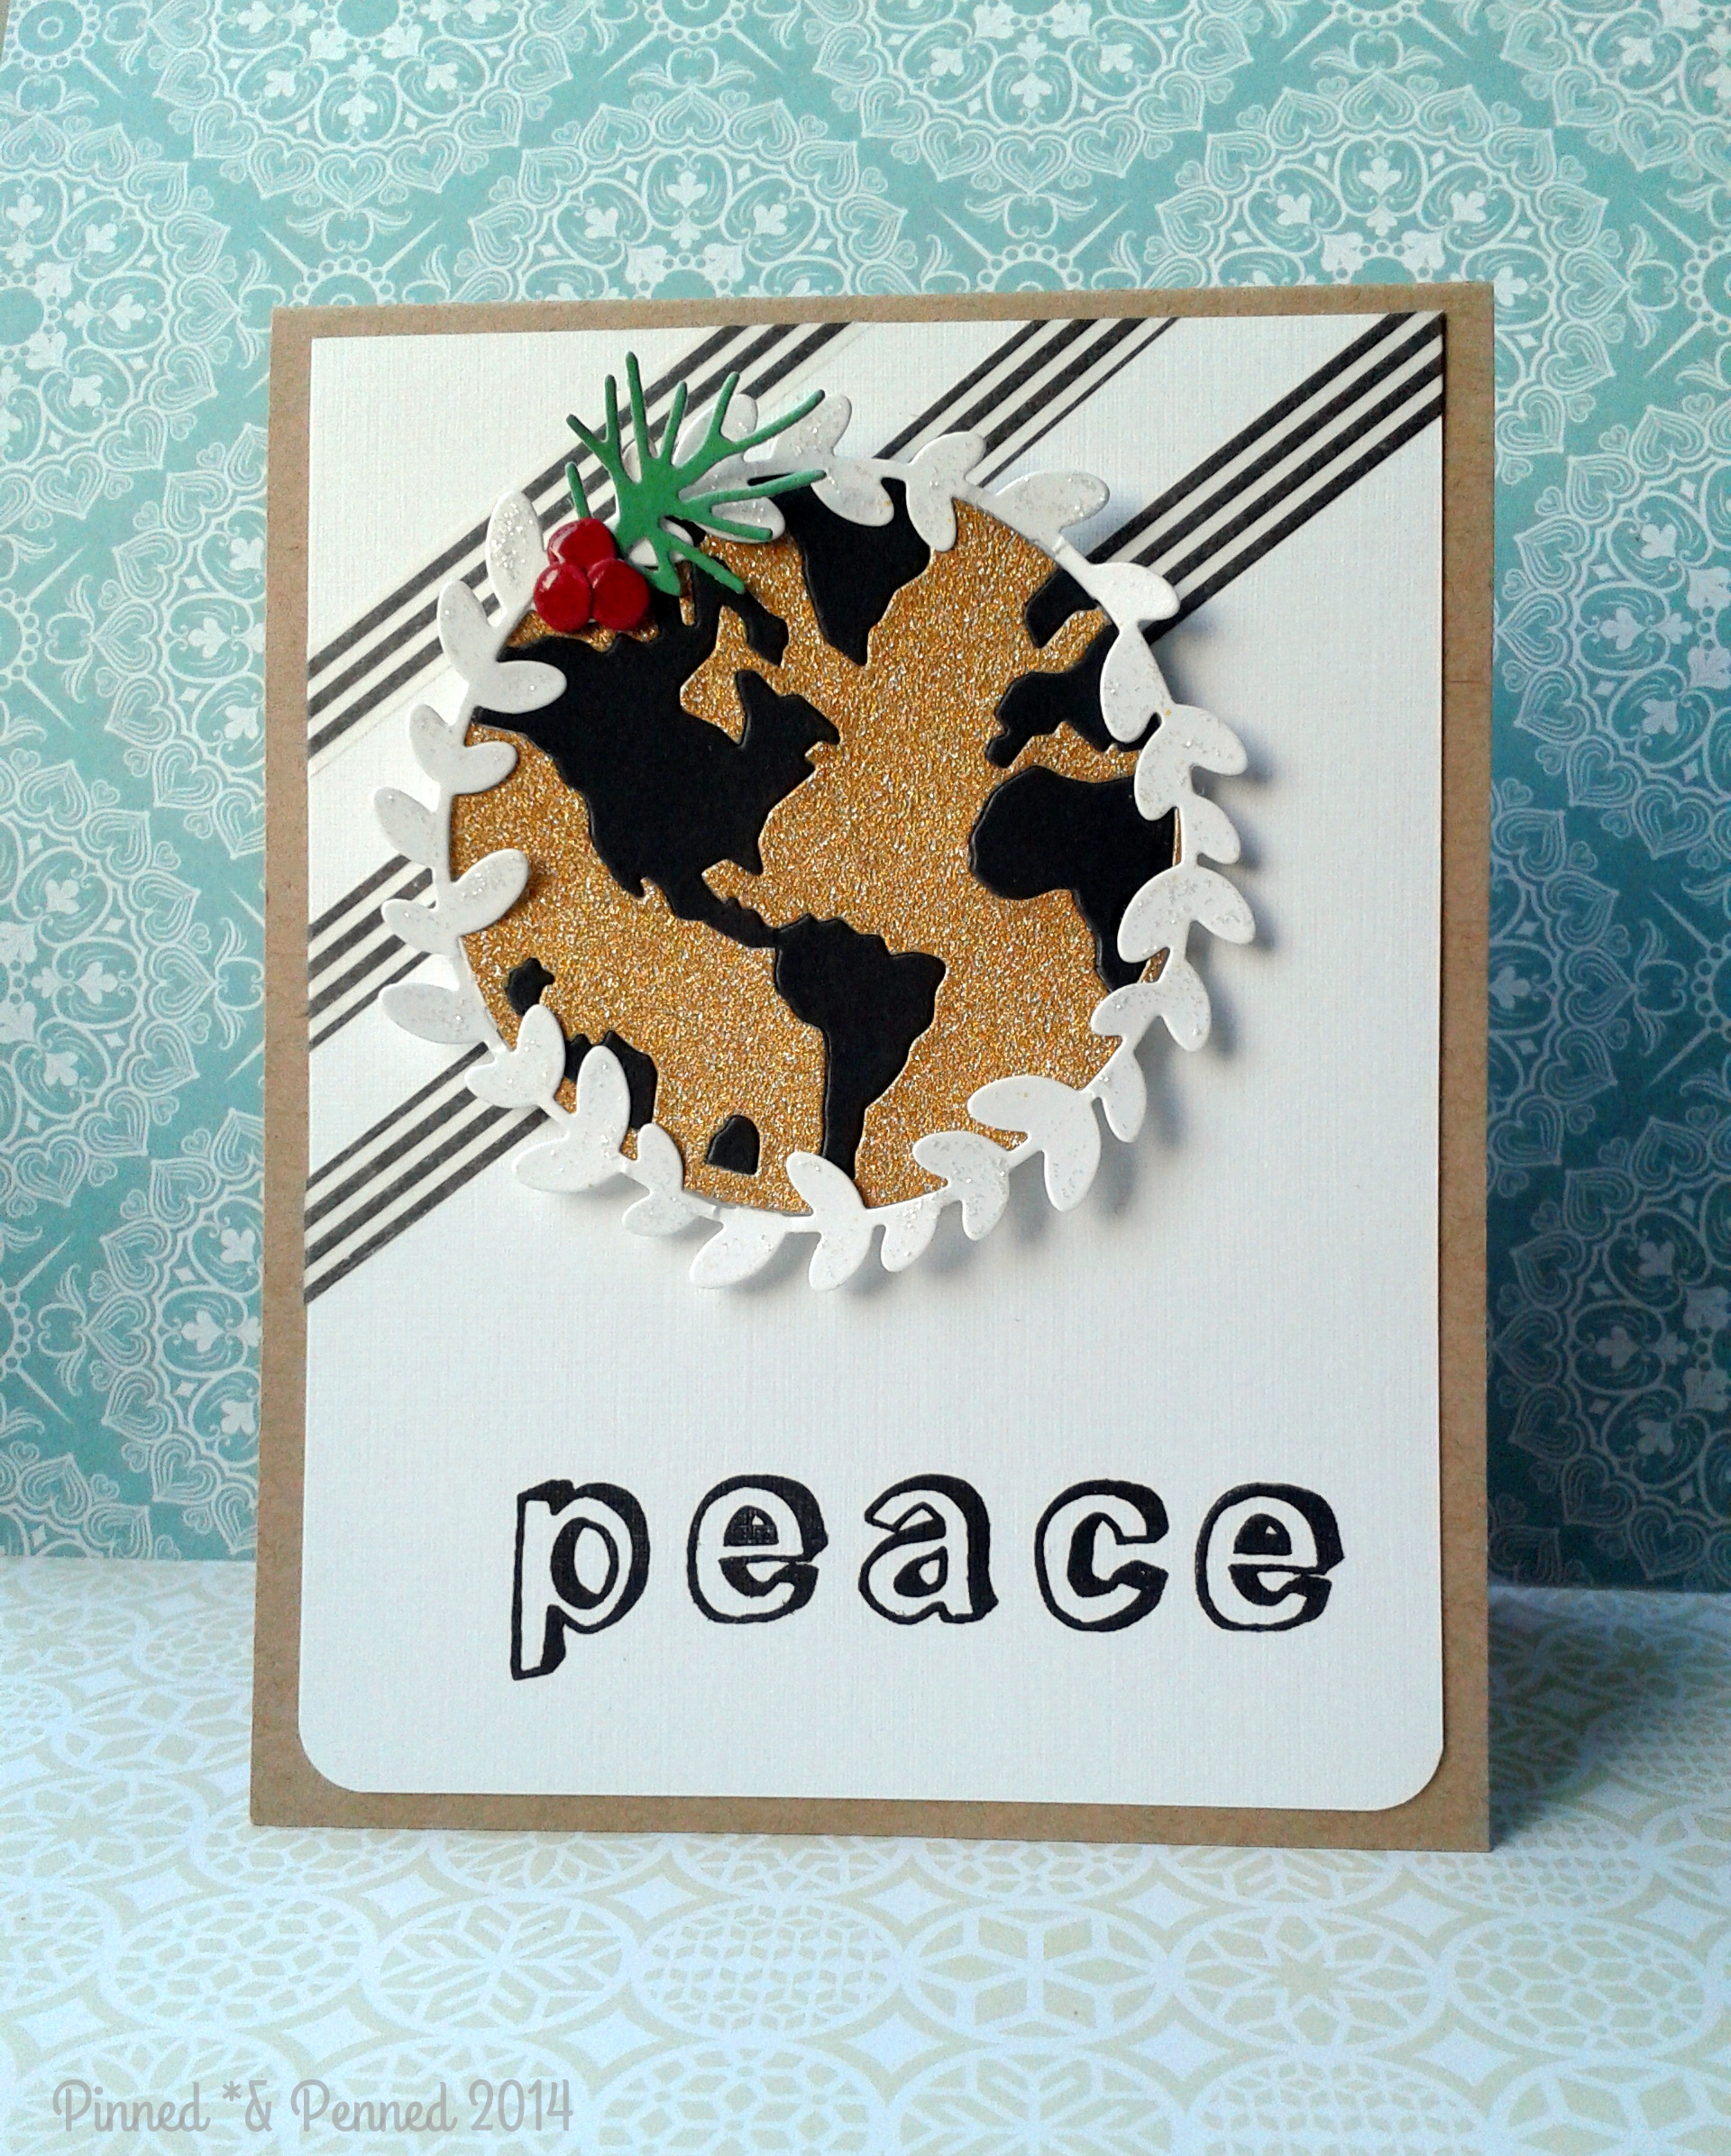
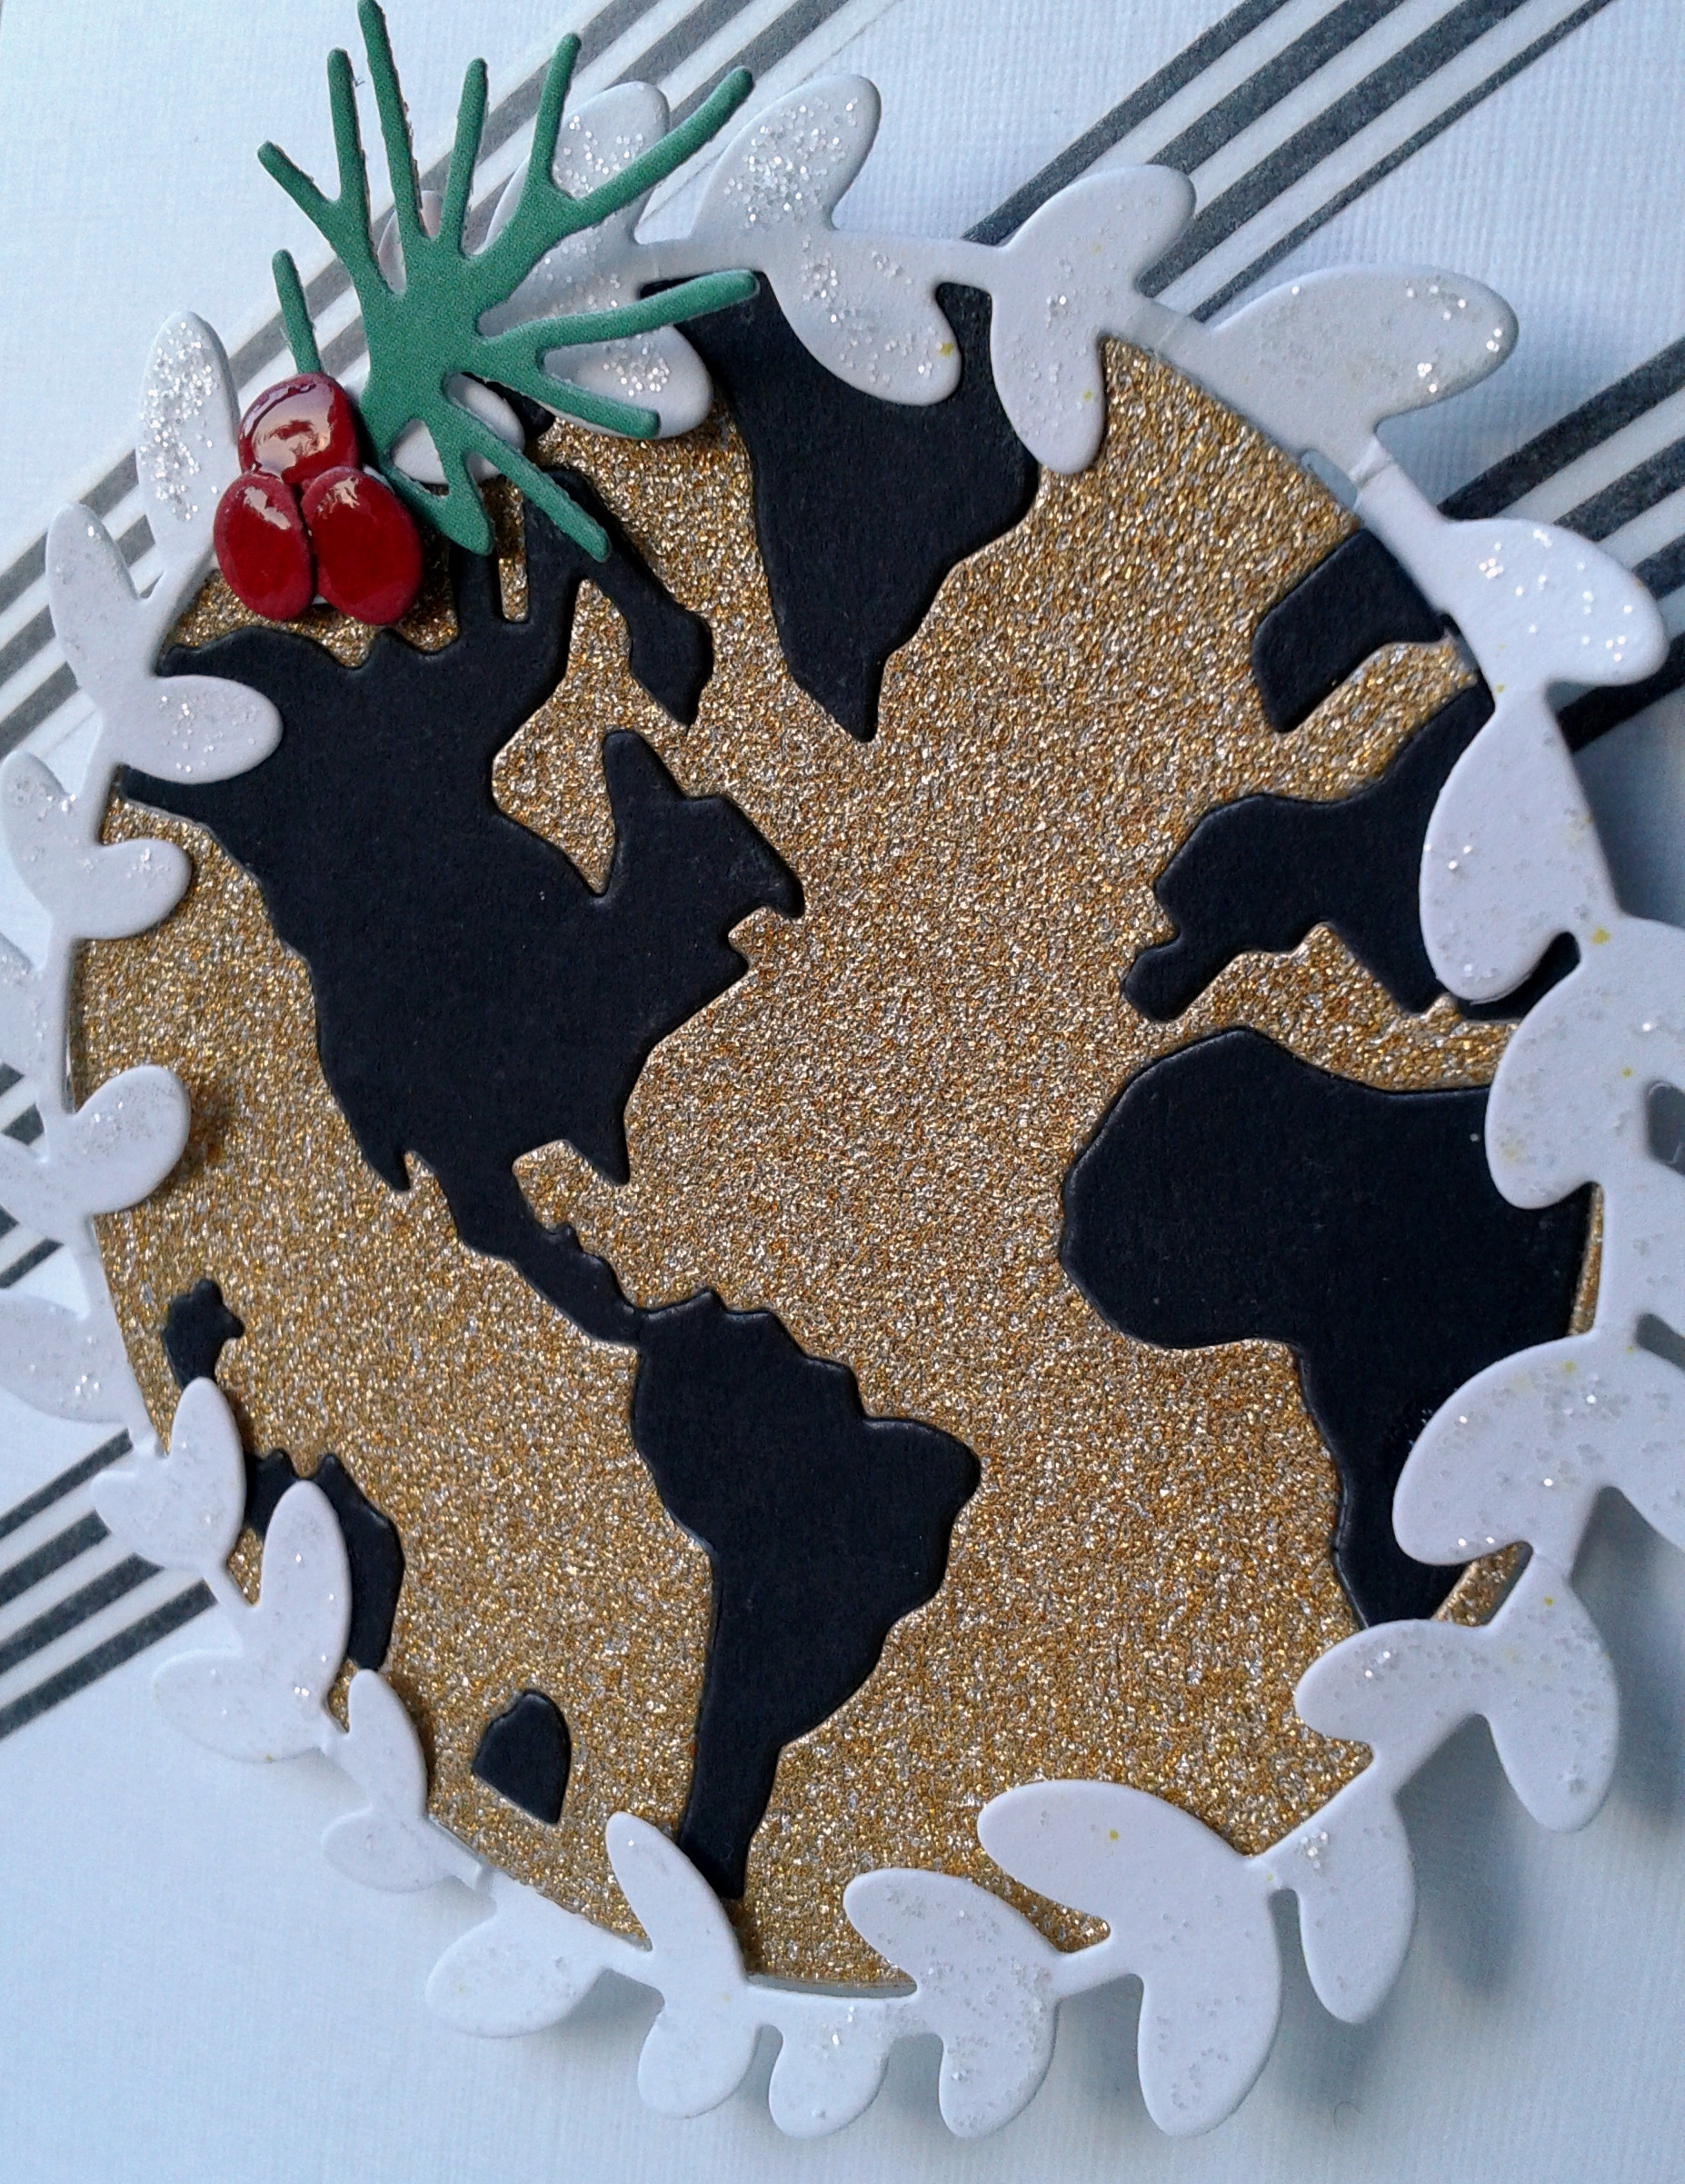
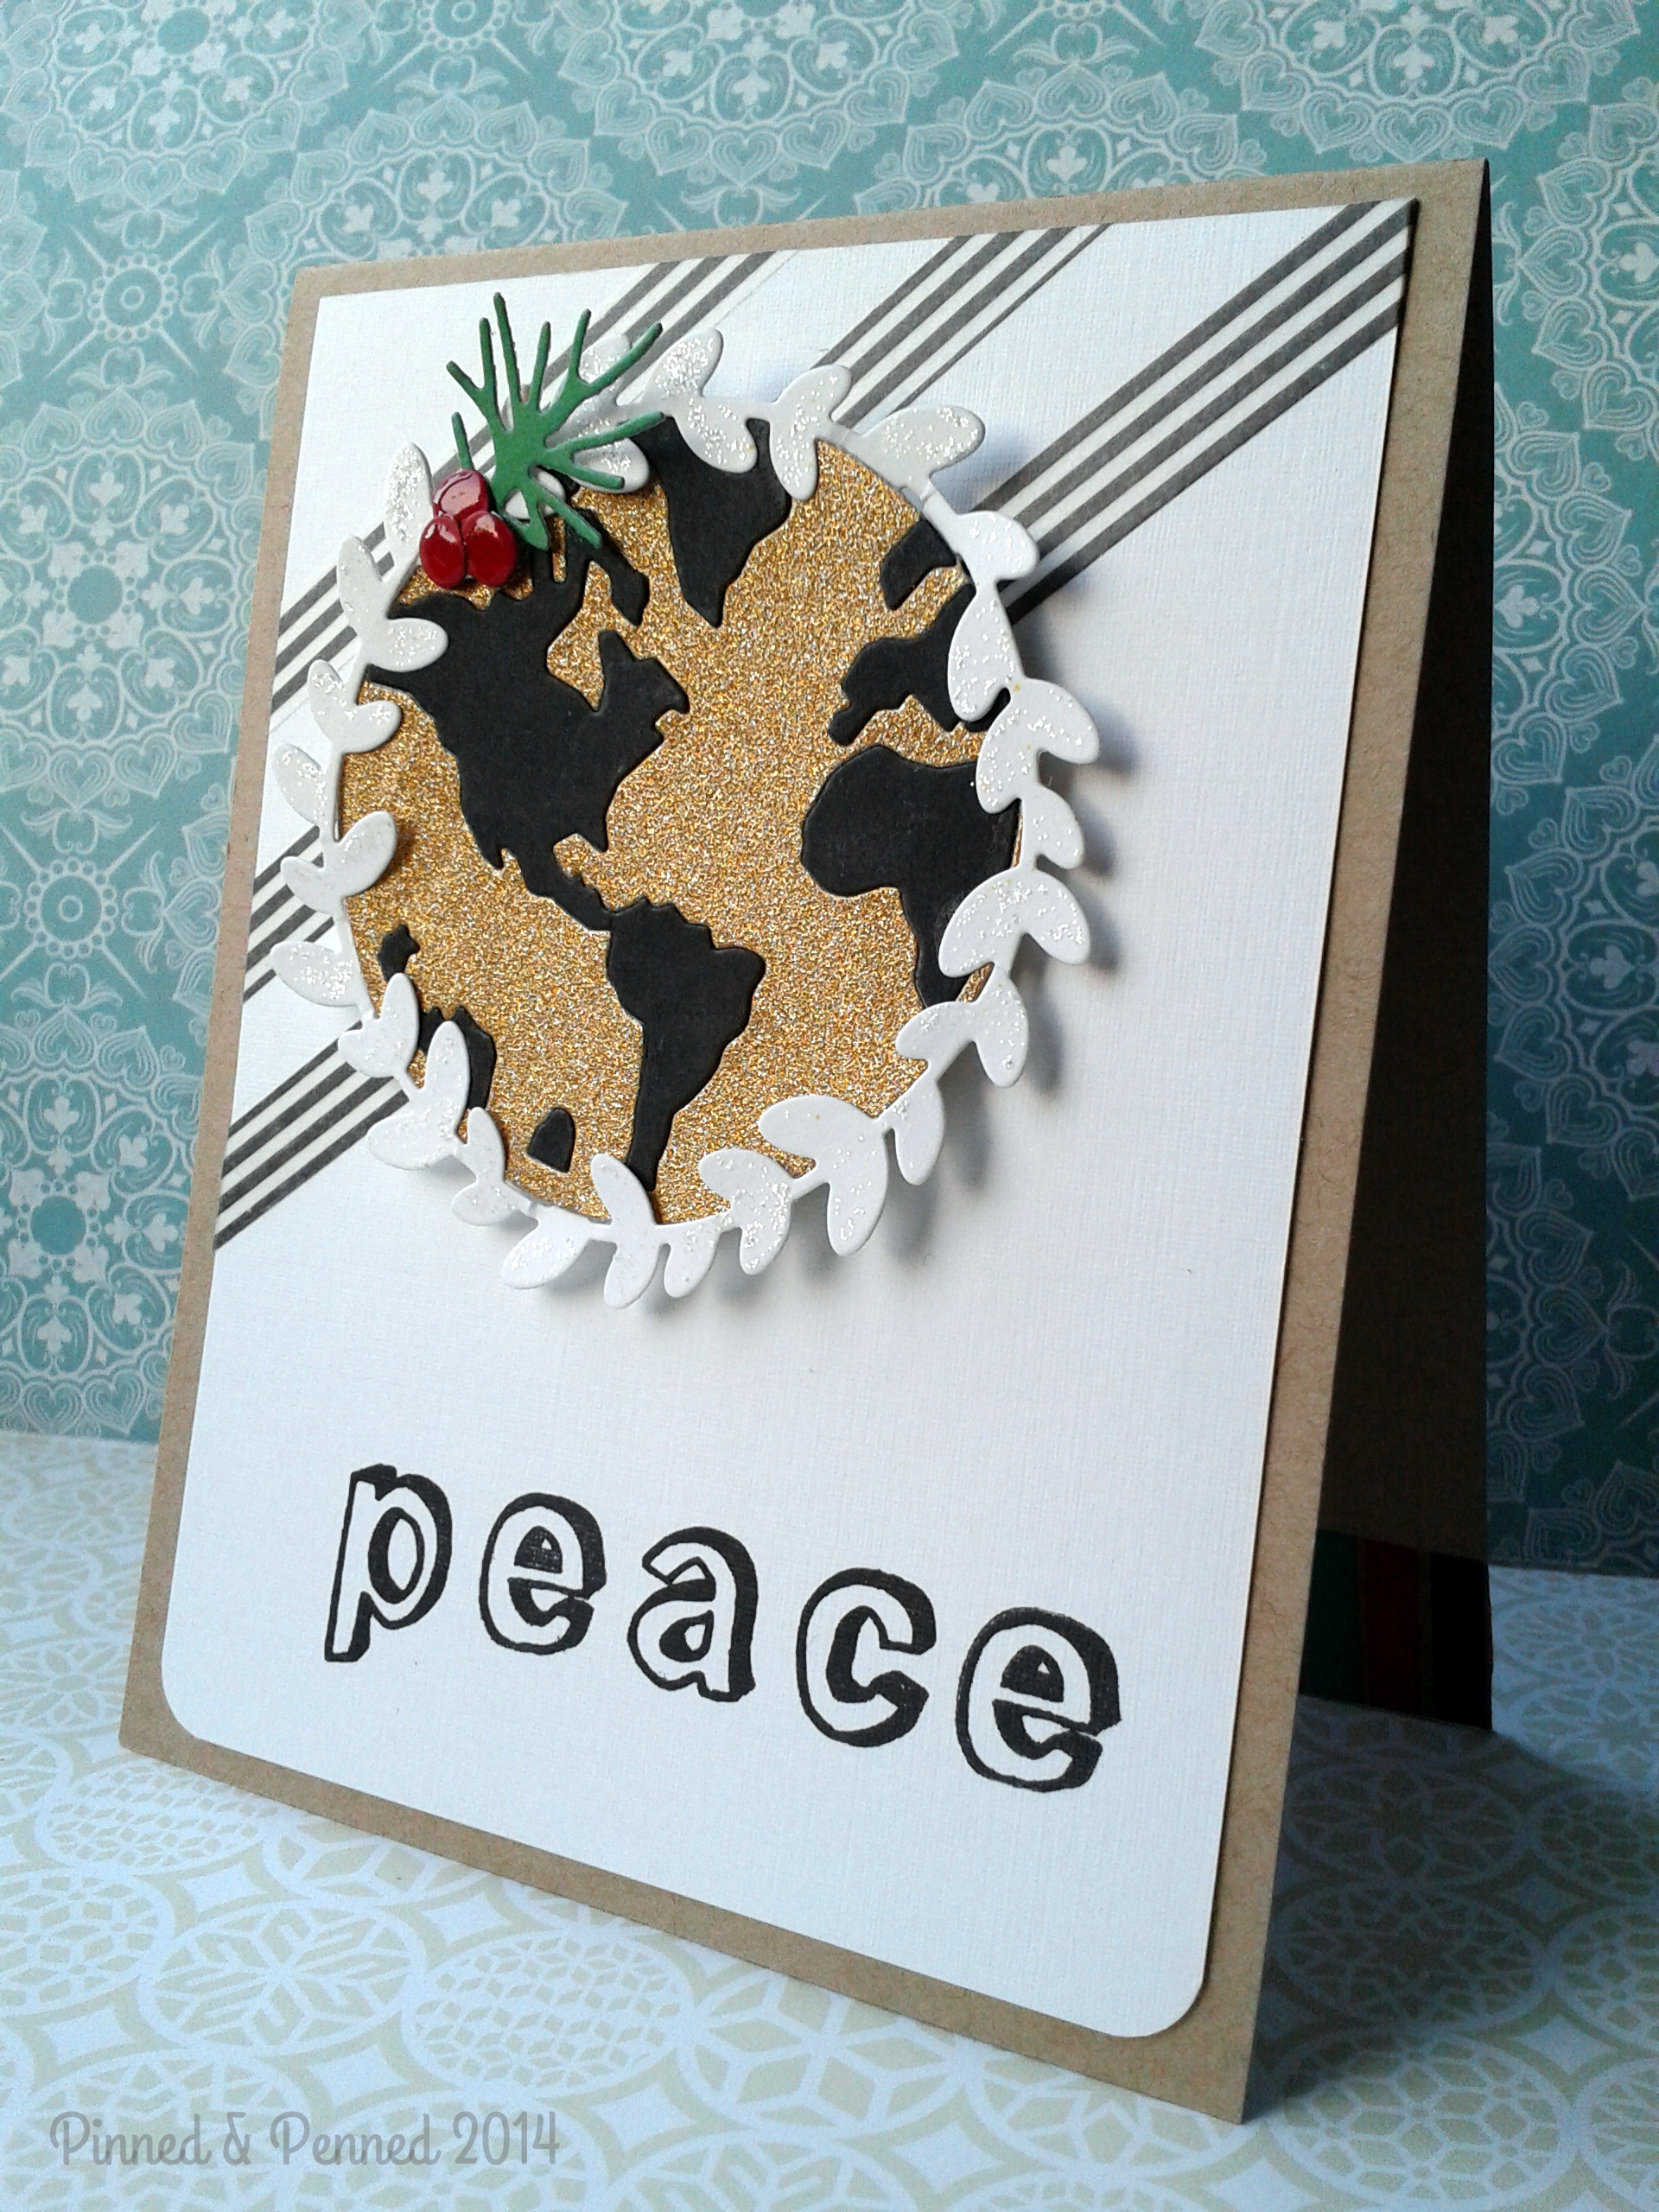
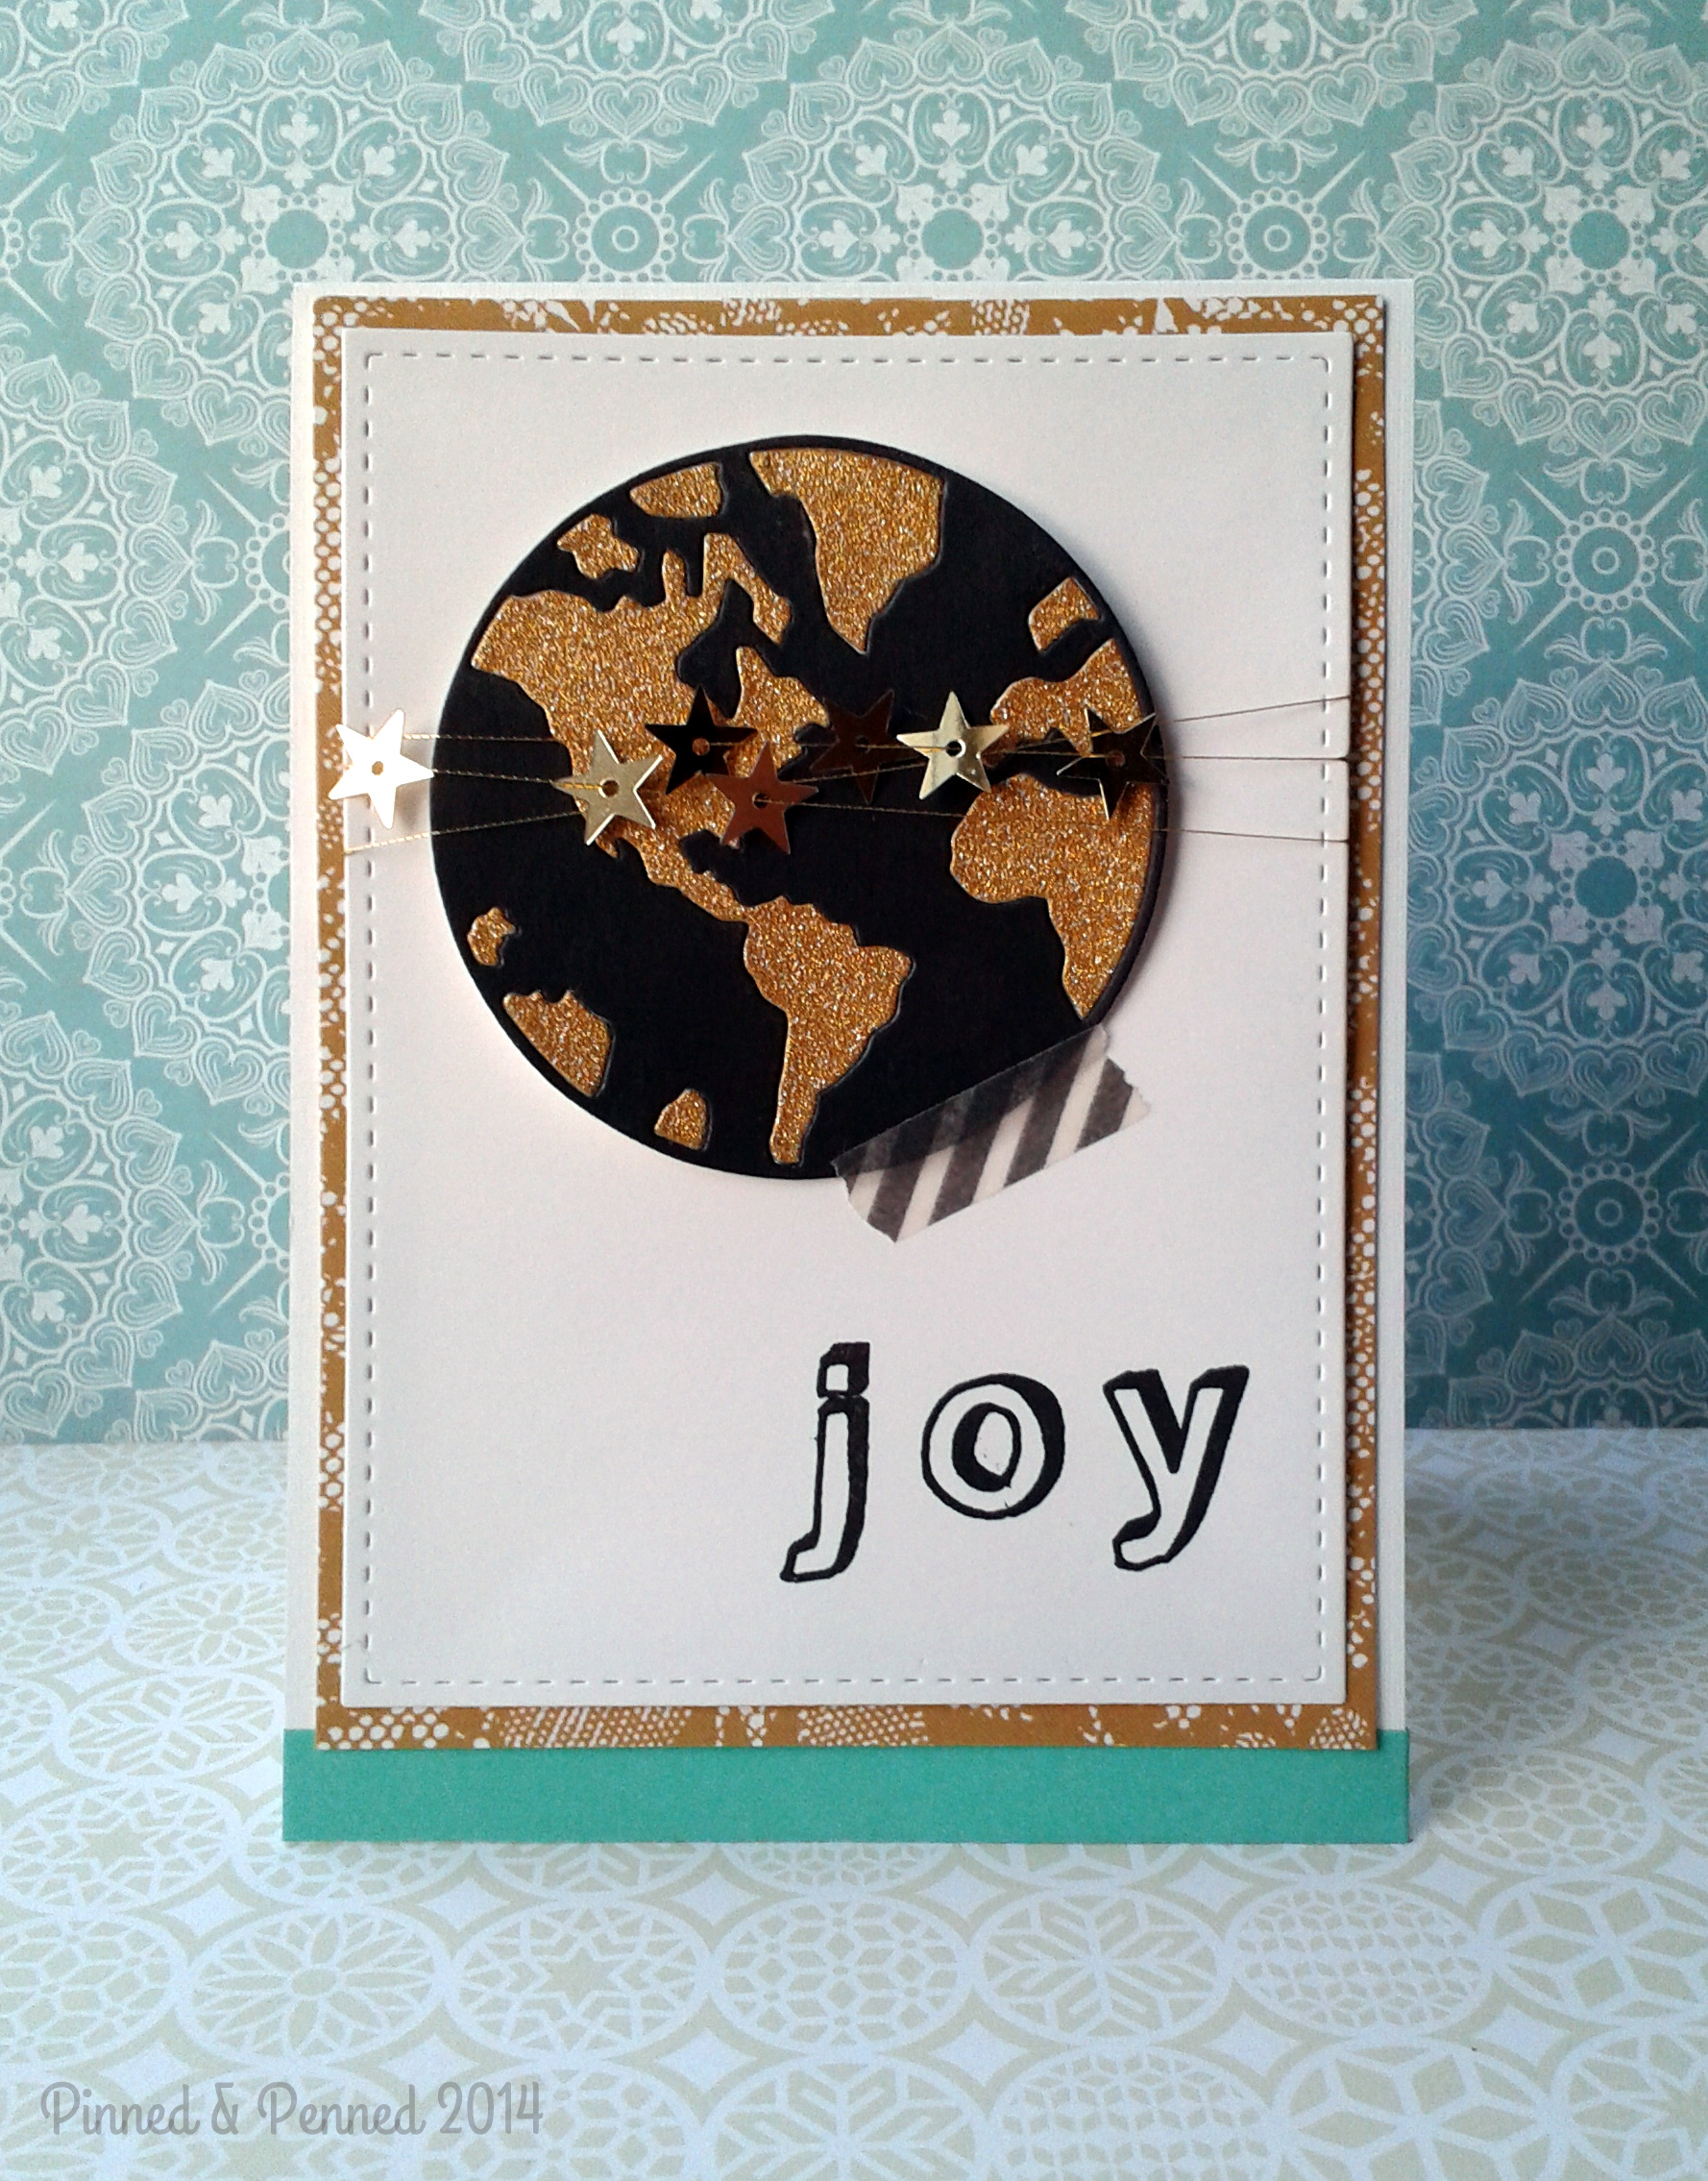
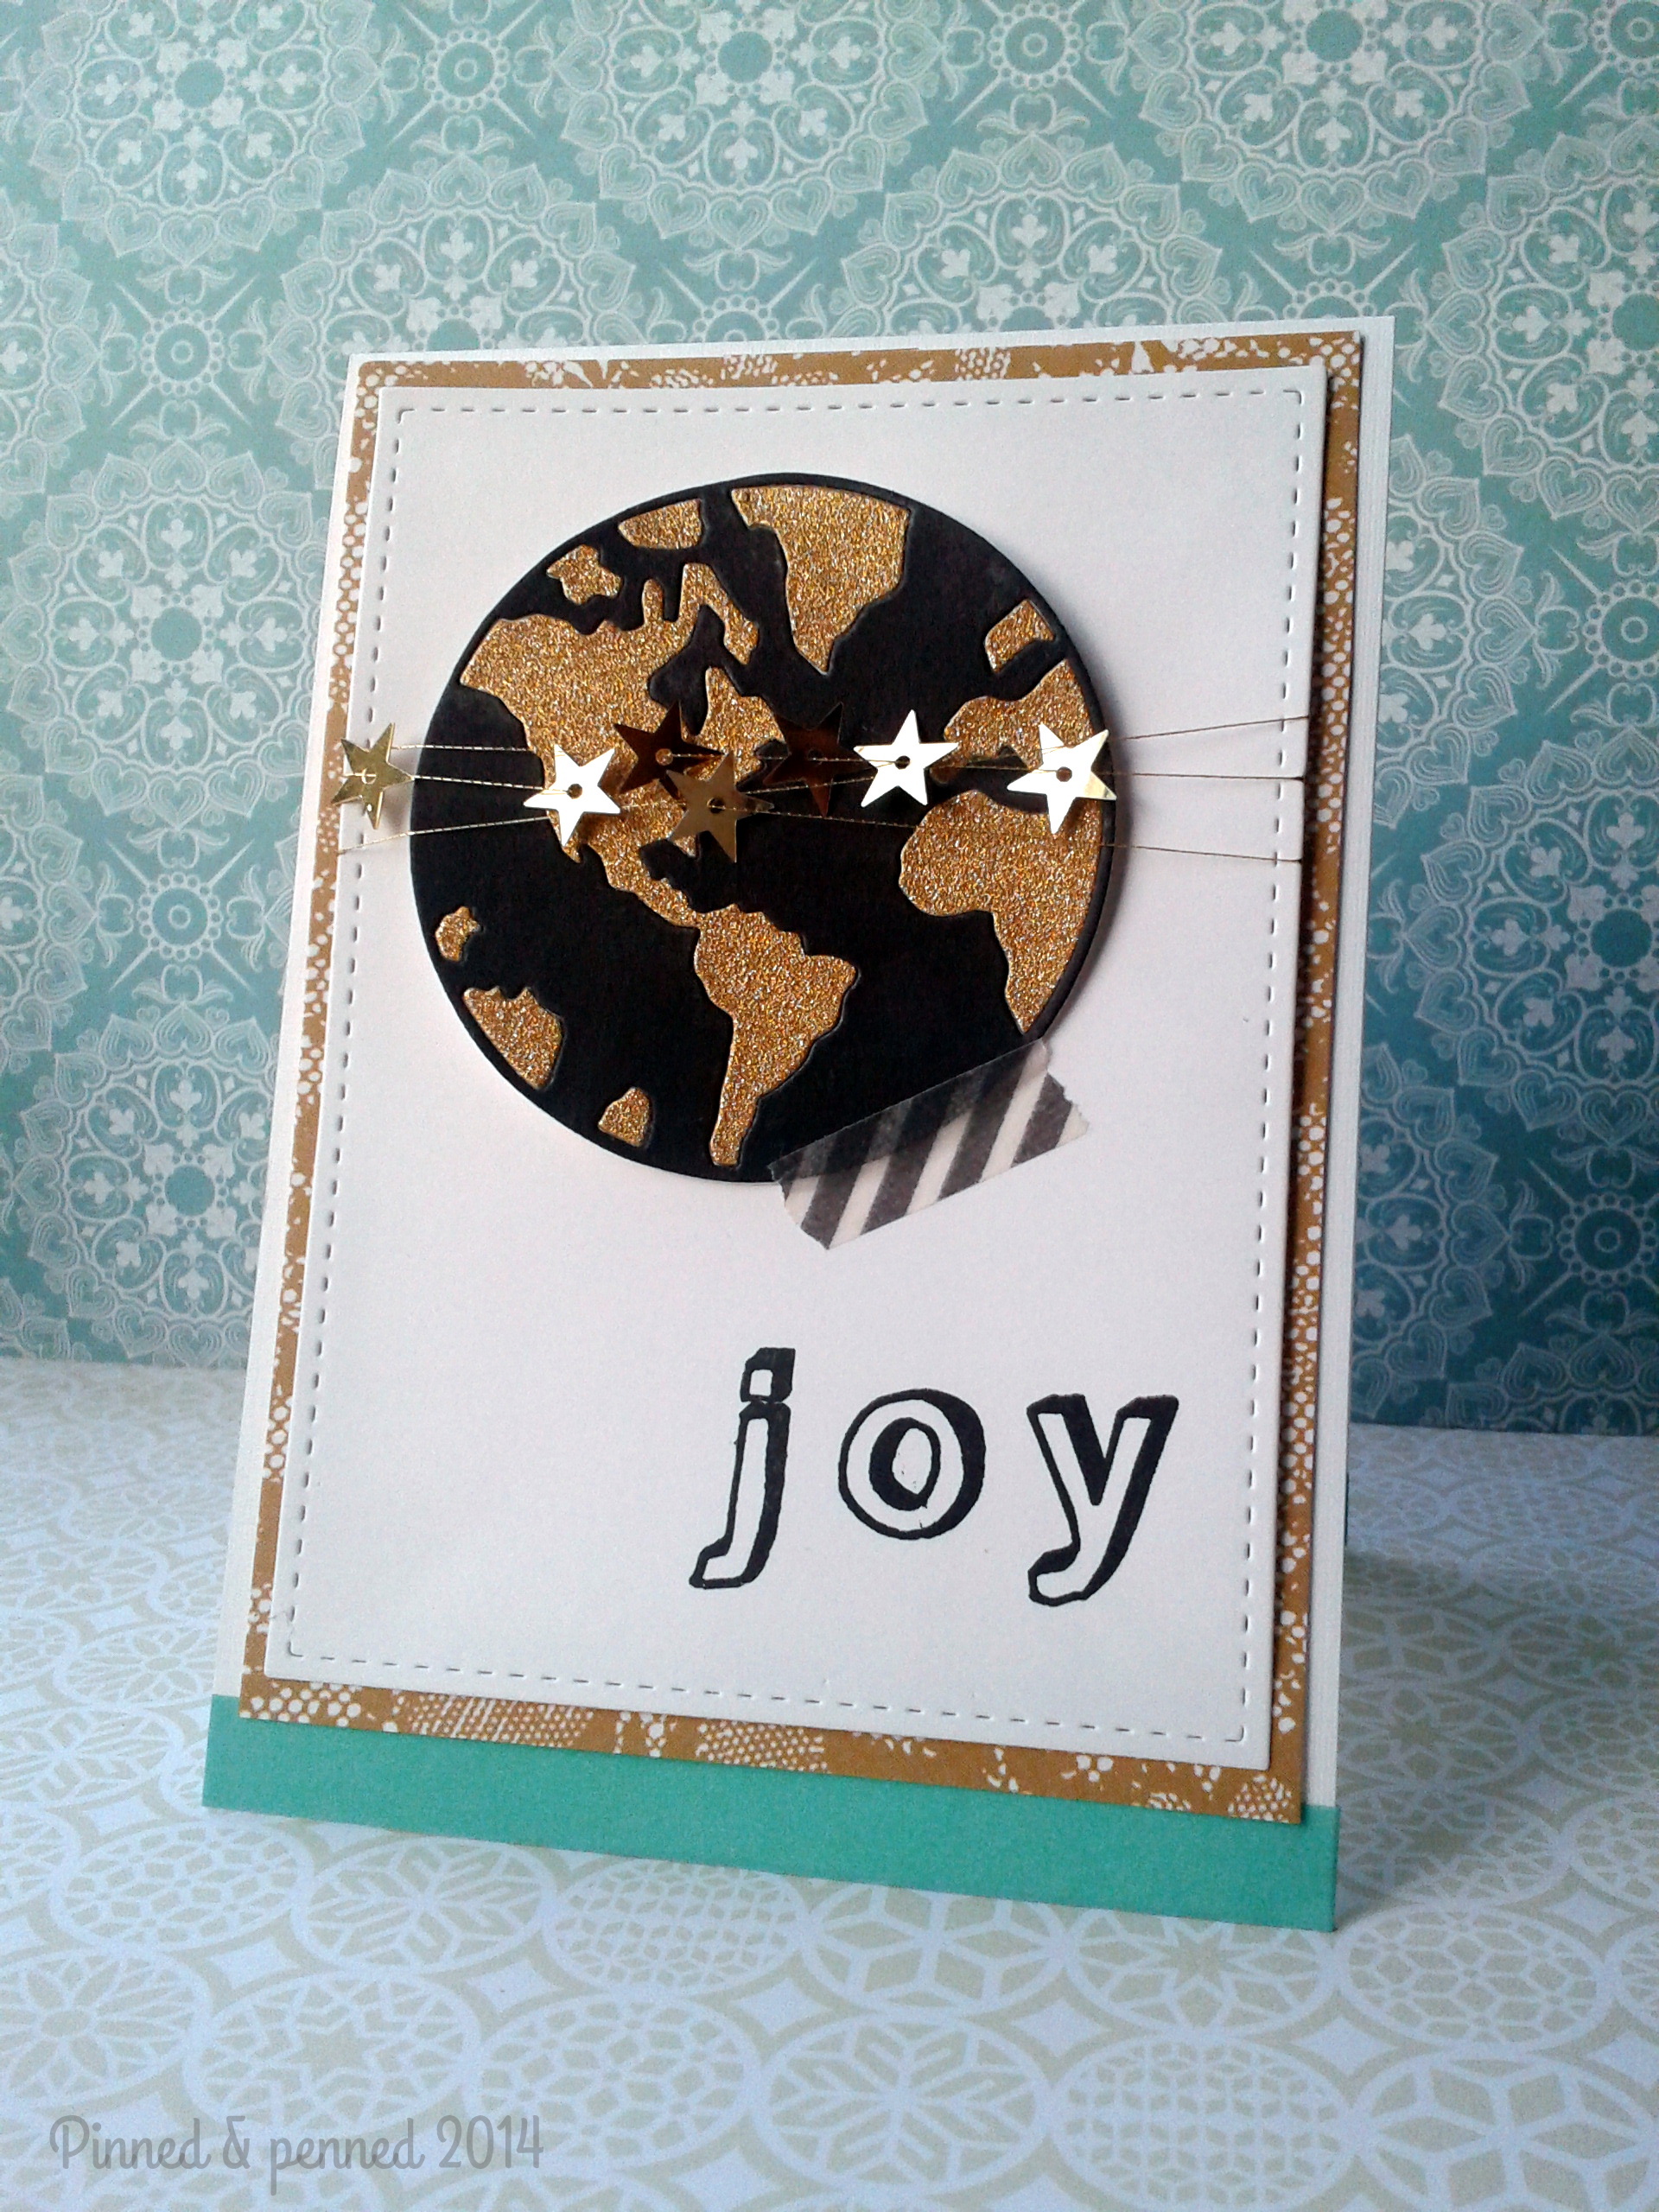
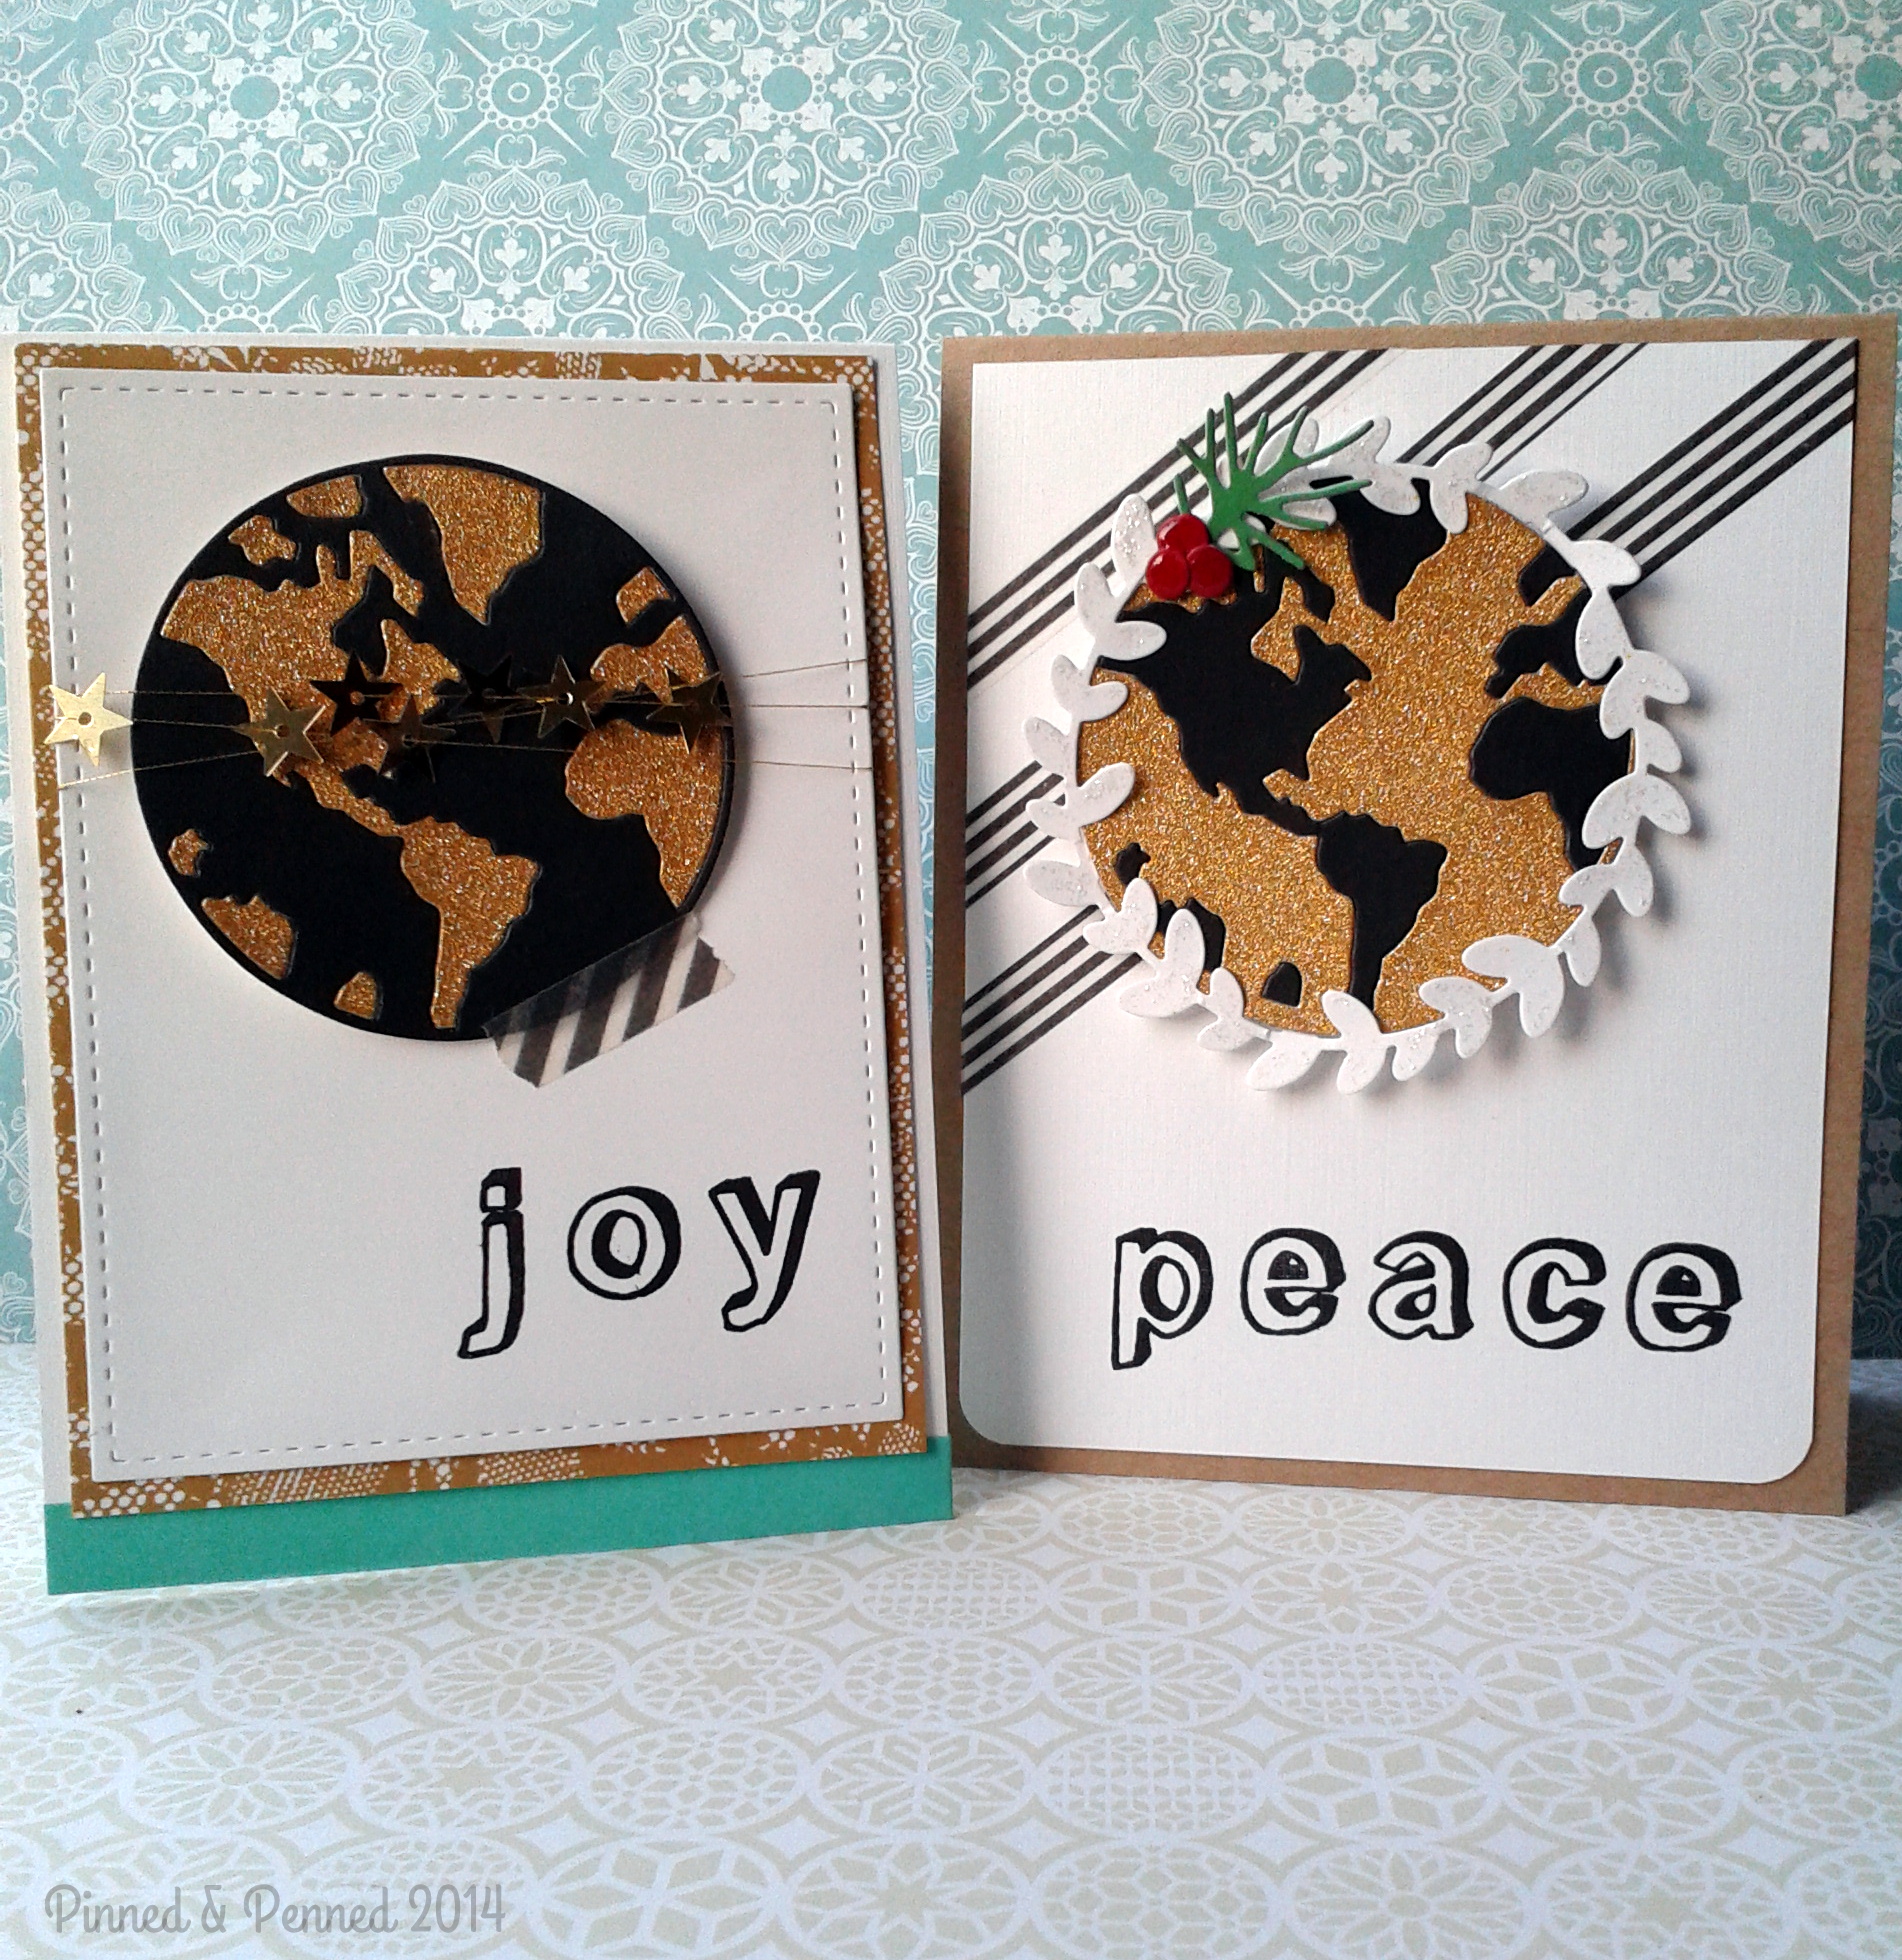
A few of us gathered for a festive day of crafting on the beach this weekend, so I was able to complete the second of my two holiday cards. I will start with that one! Given the state of affairs in the nation and world at the moment, this seems an appropriate sentiment. But then again, when in history hasn’t it?
This card features the black and white elements, the stripes, branch, and kraft.
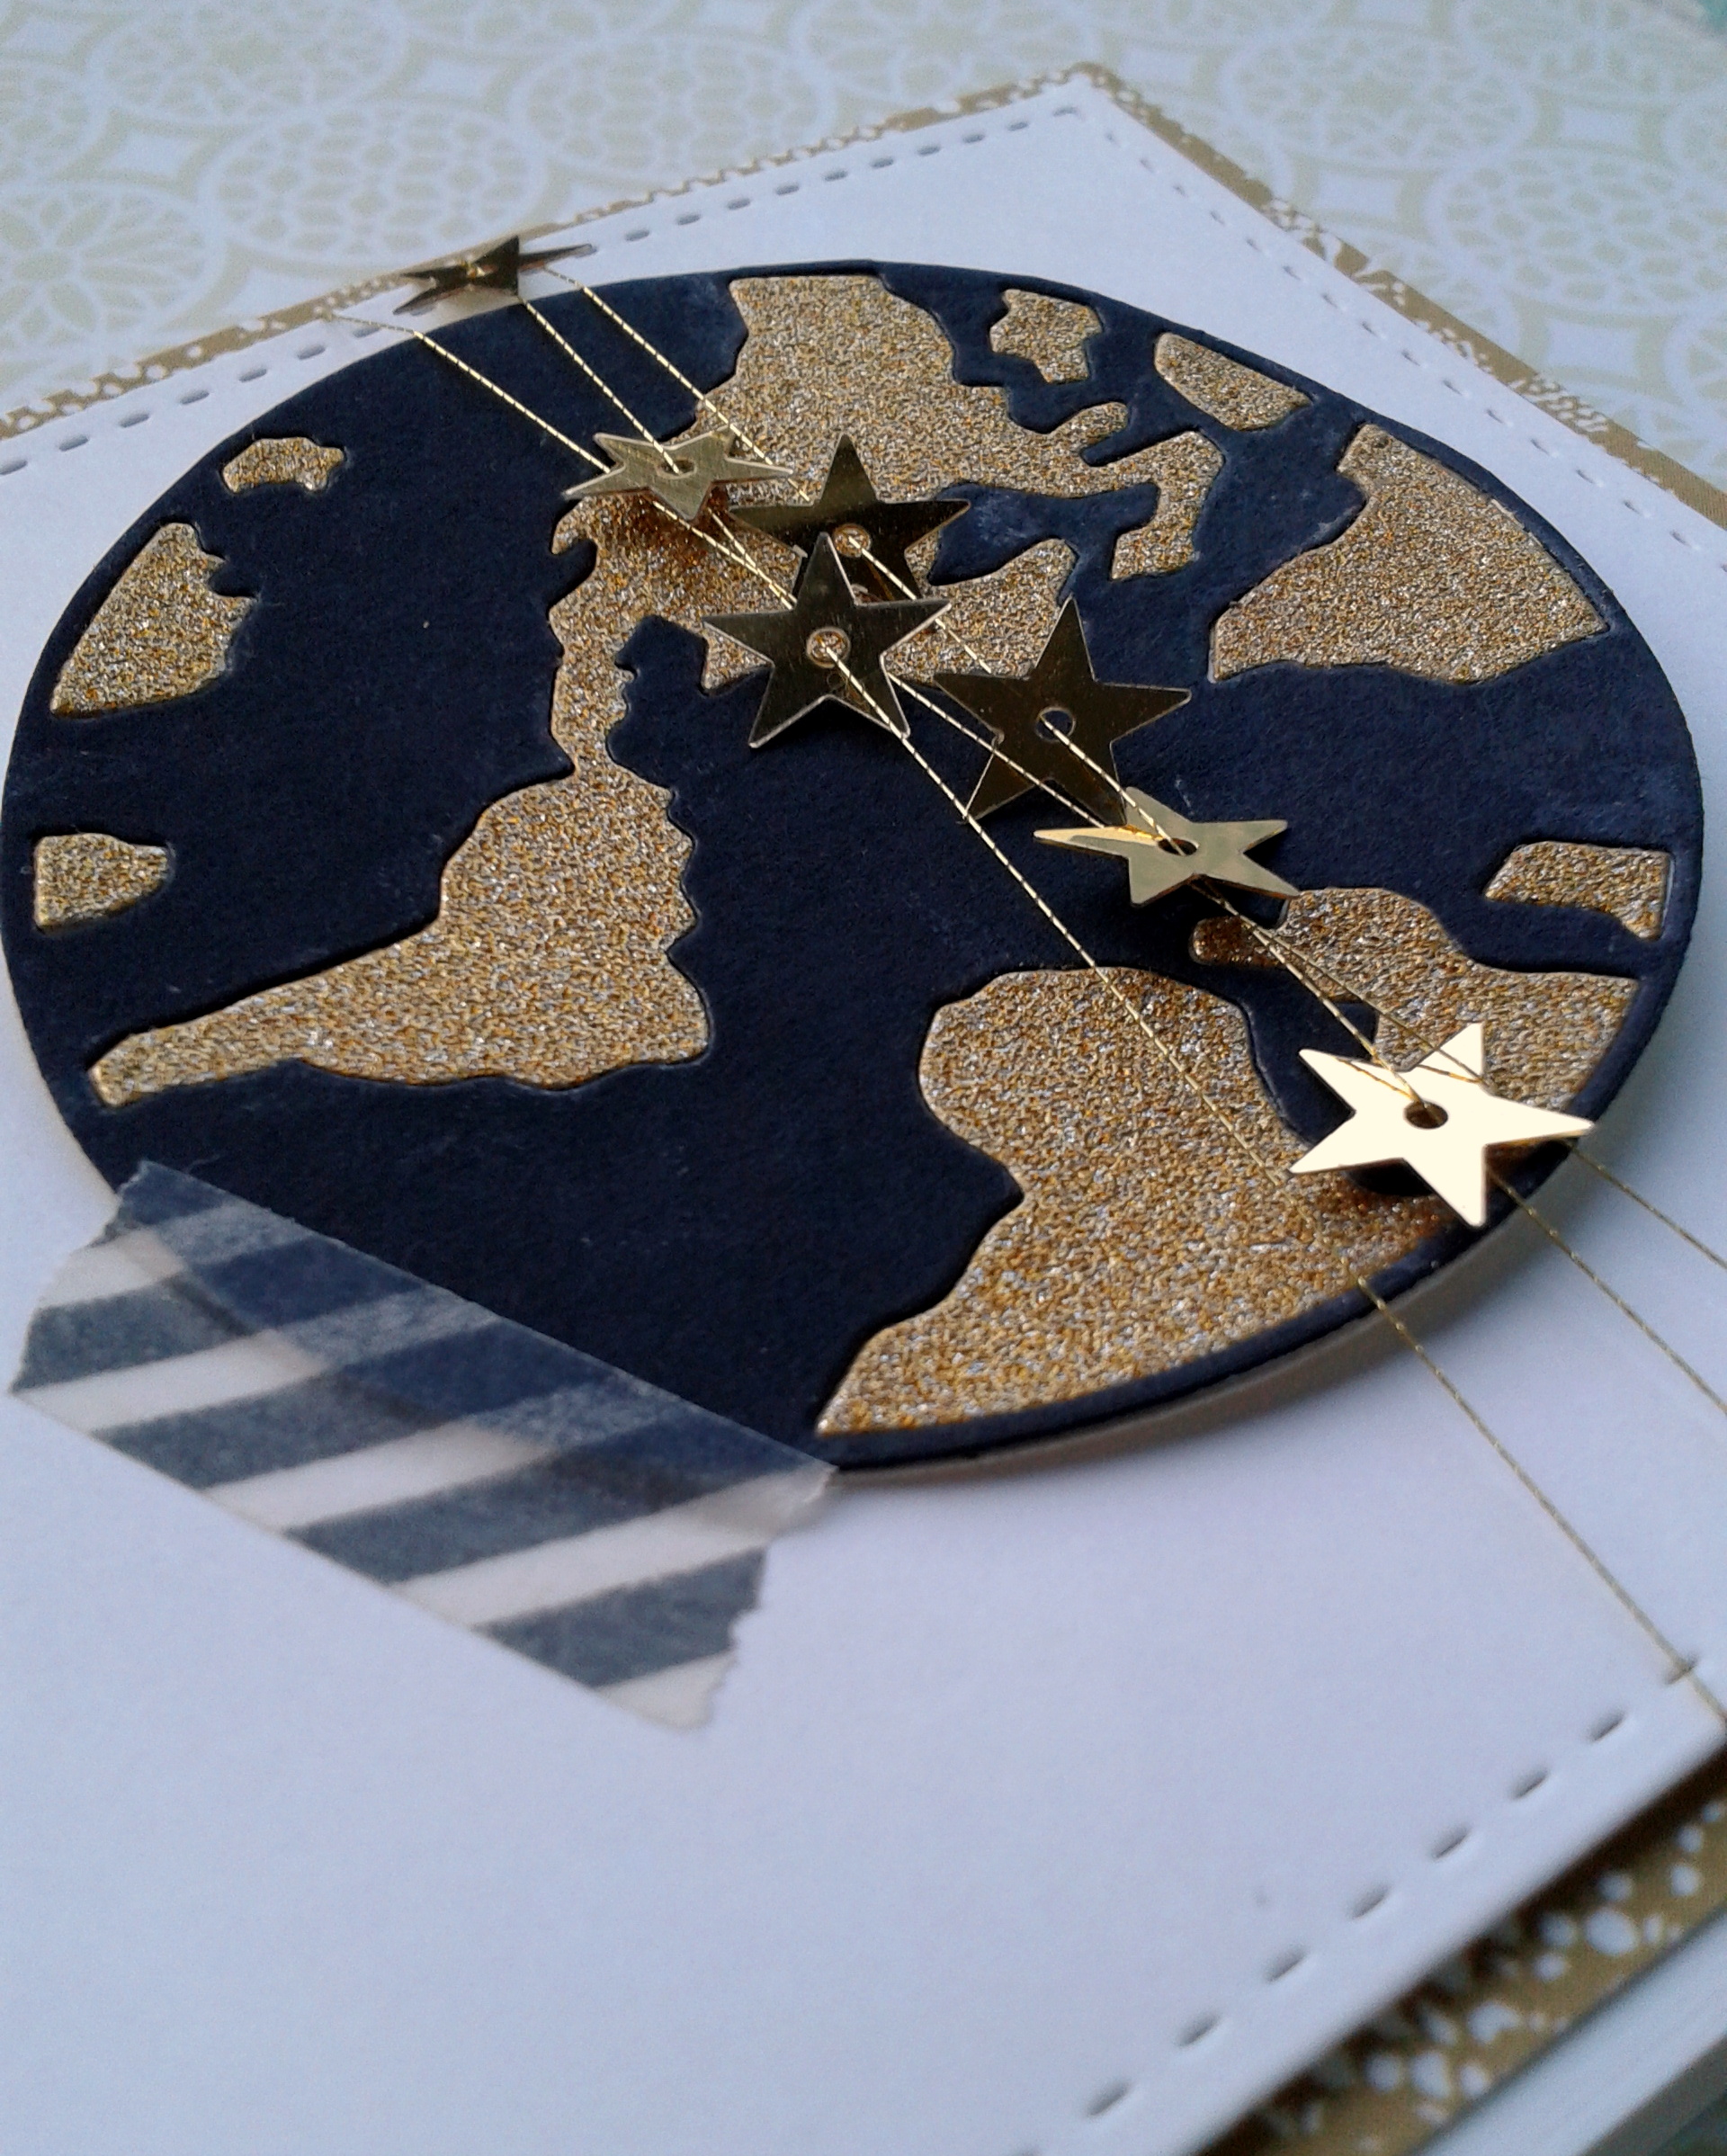
After finally inking up my Hero Arts letters, which I have been dying to use for months, and stamping on Ellen Hutson White Linen paper, I put together my earth and wreath.
I felt that my card needed a pop of color, so I added a sprig of pine from a deconstructed Savvy die branch, and some red berries, glazed with glossy accents. They look like cinnamon candies!
I added some icicle Stickles to the PTI rustic wreath. I cut some Lifestyle Crafts Shape and Tape into strips and adhered after placing my centerpiece.
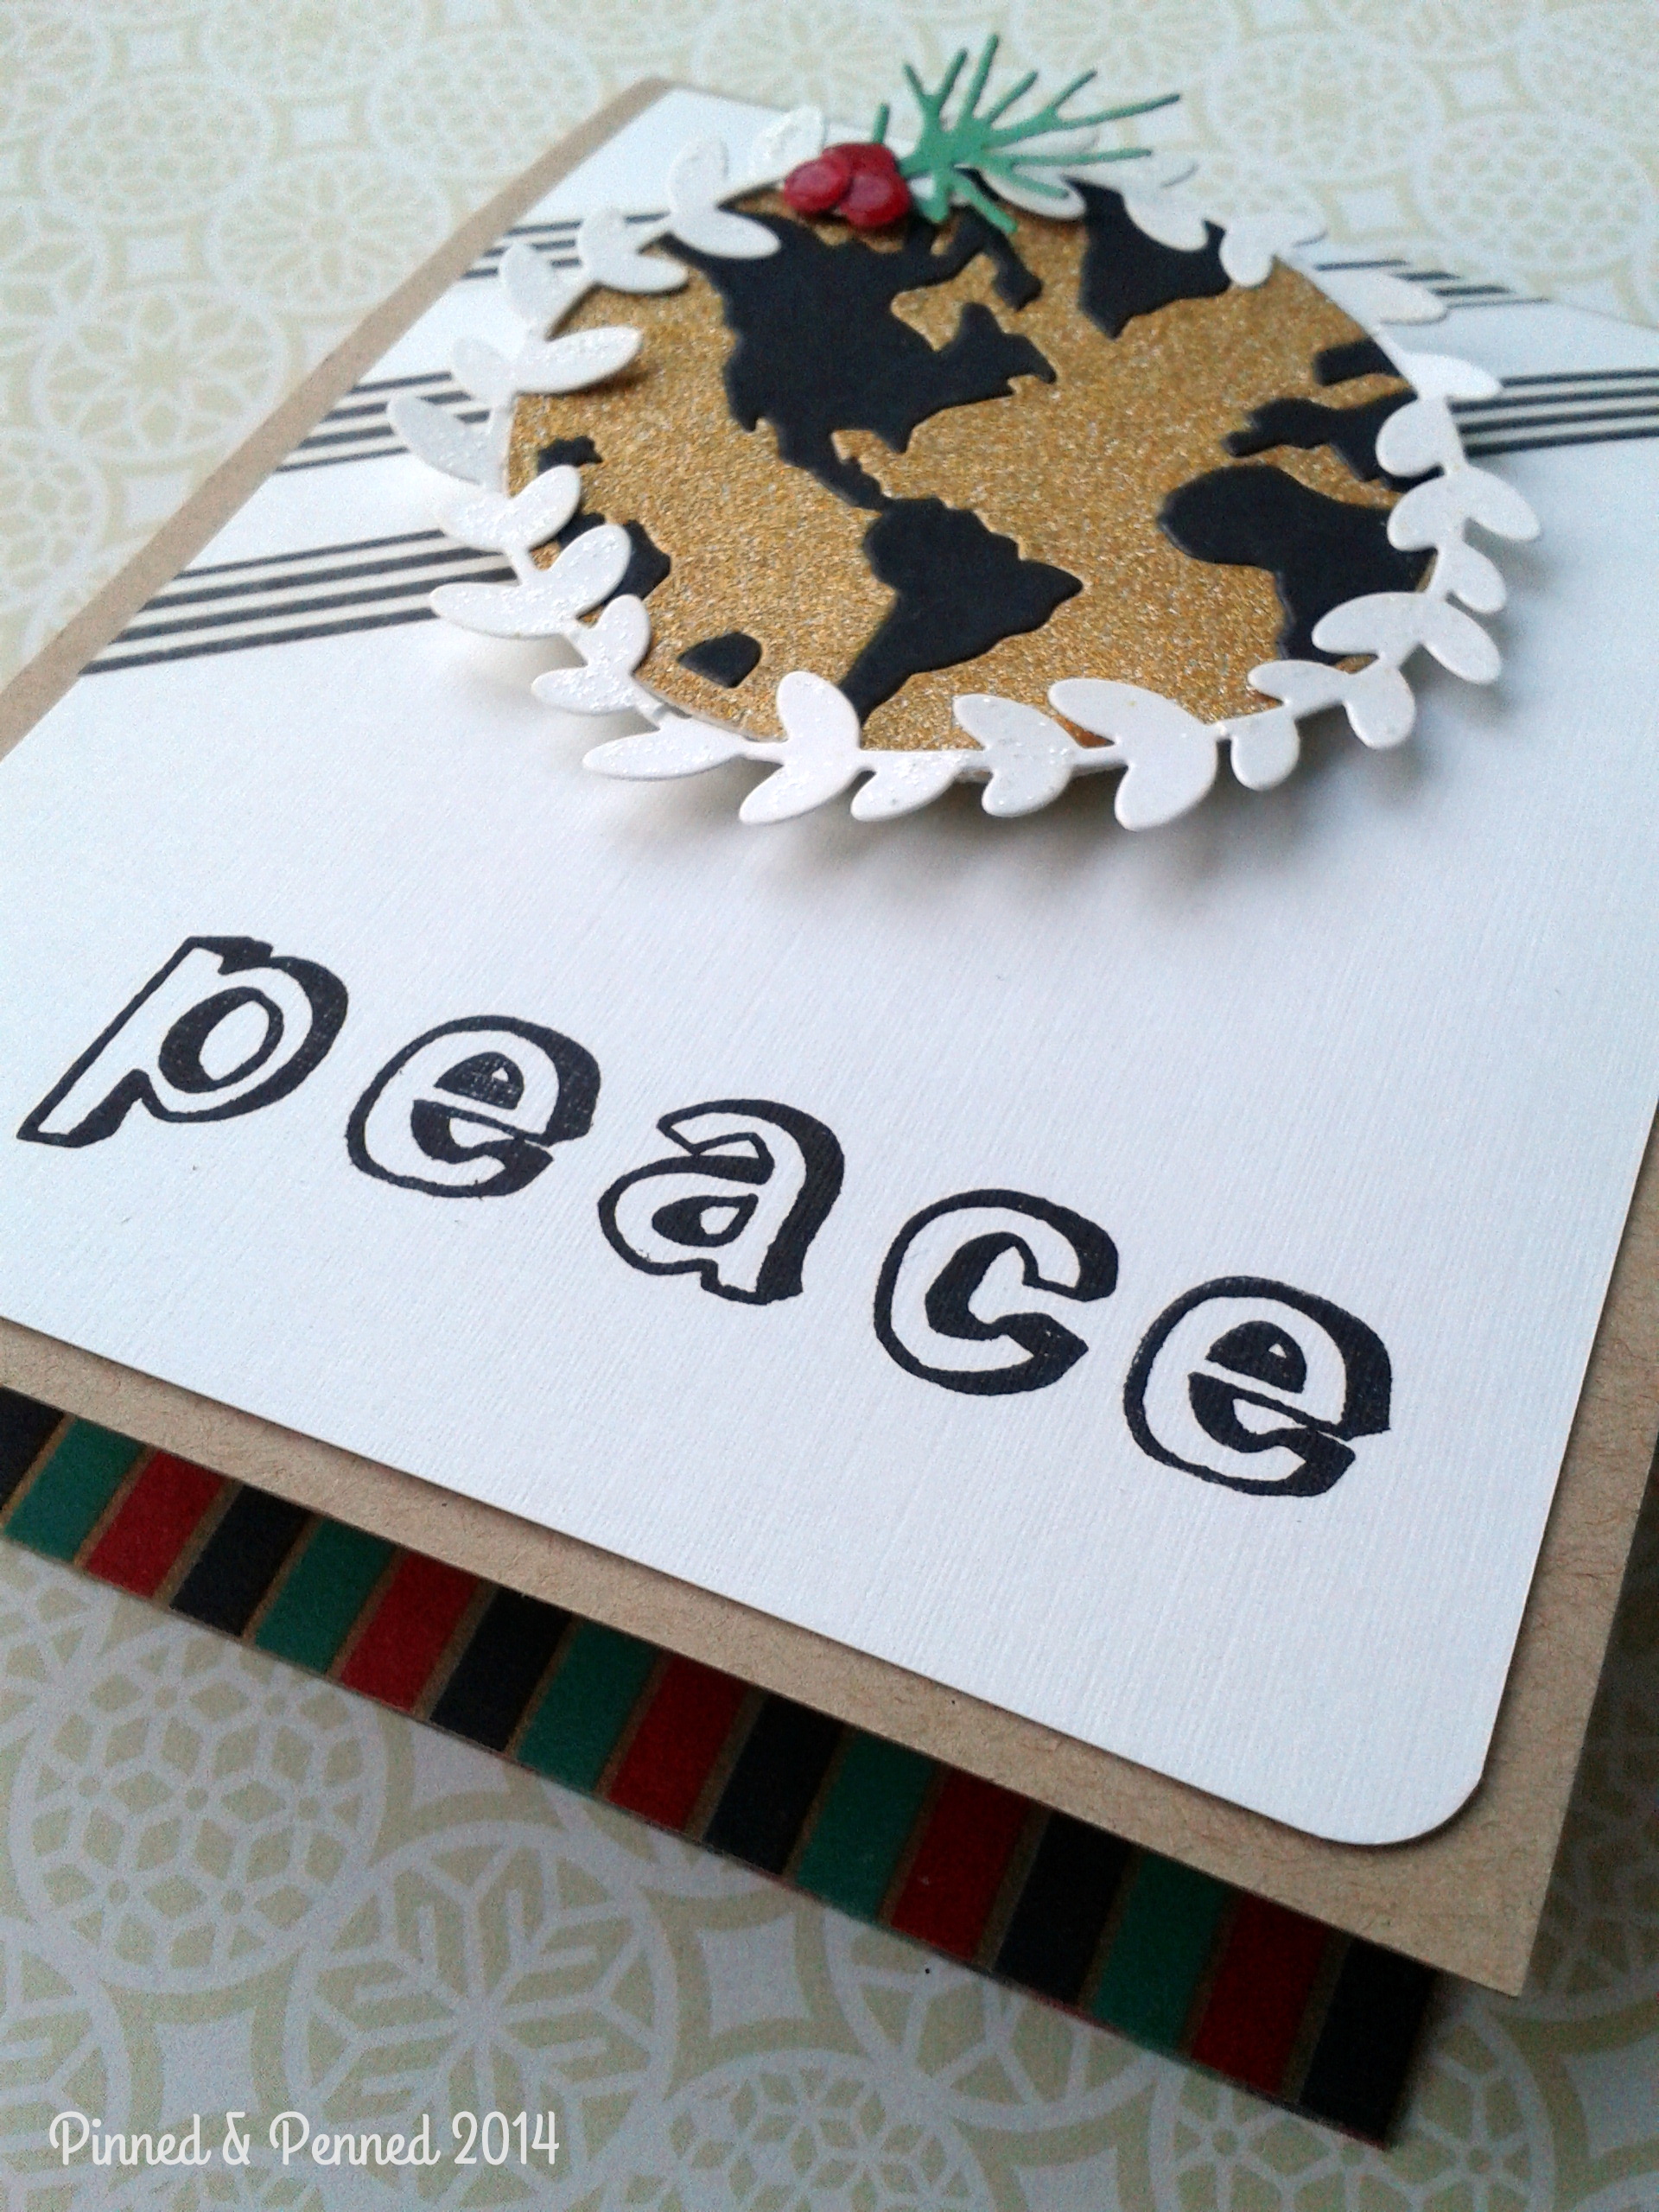
To echo the sprig and berries, I finished off the inside and back with some striped washi from My Mind’s Eye.
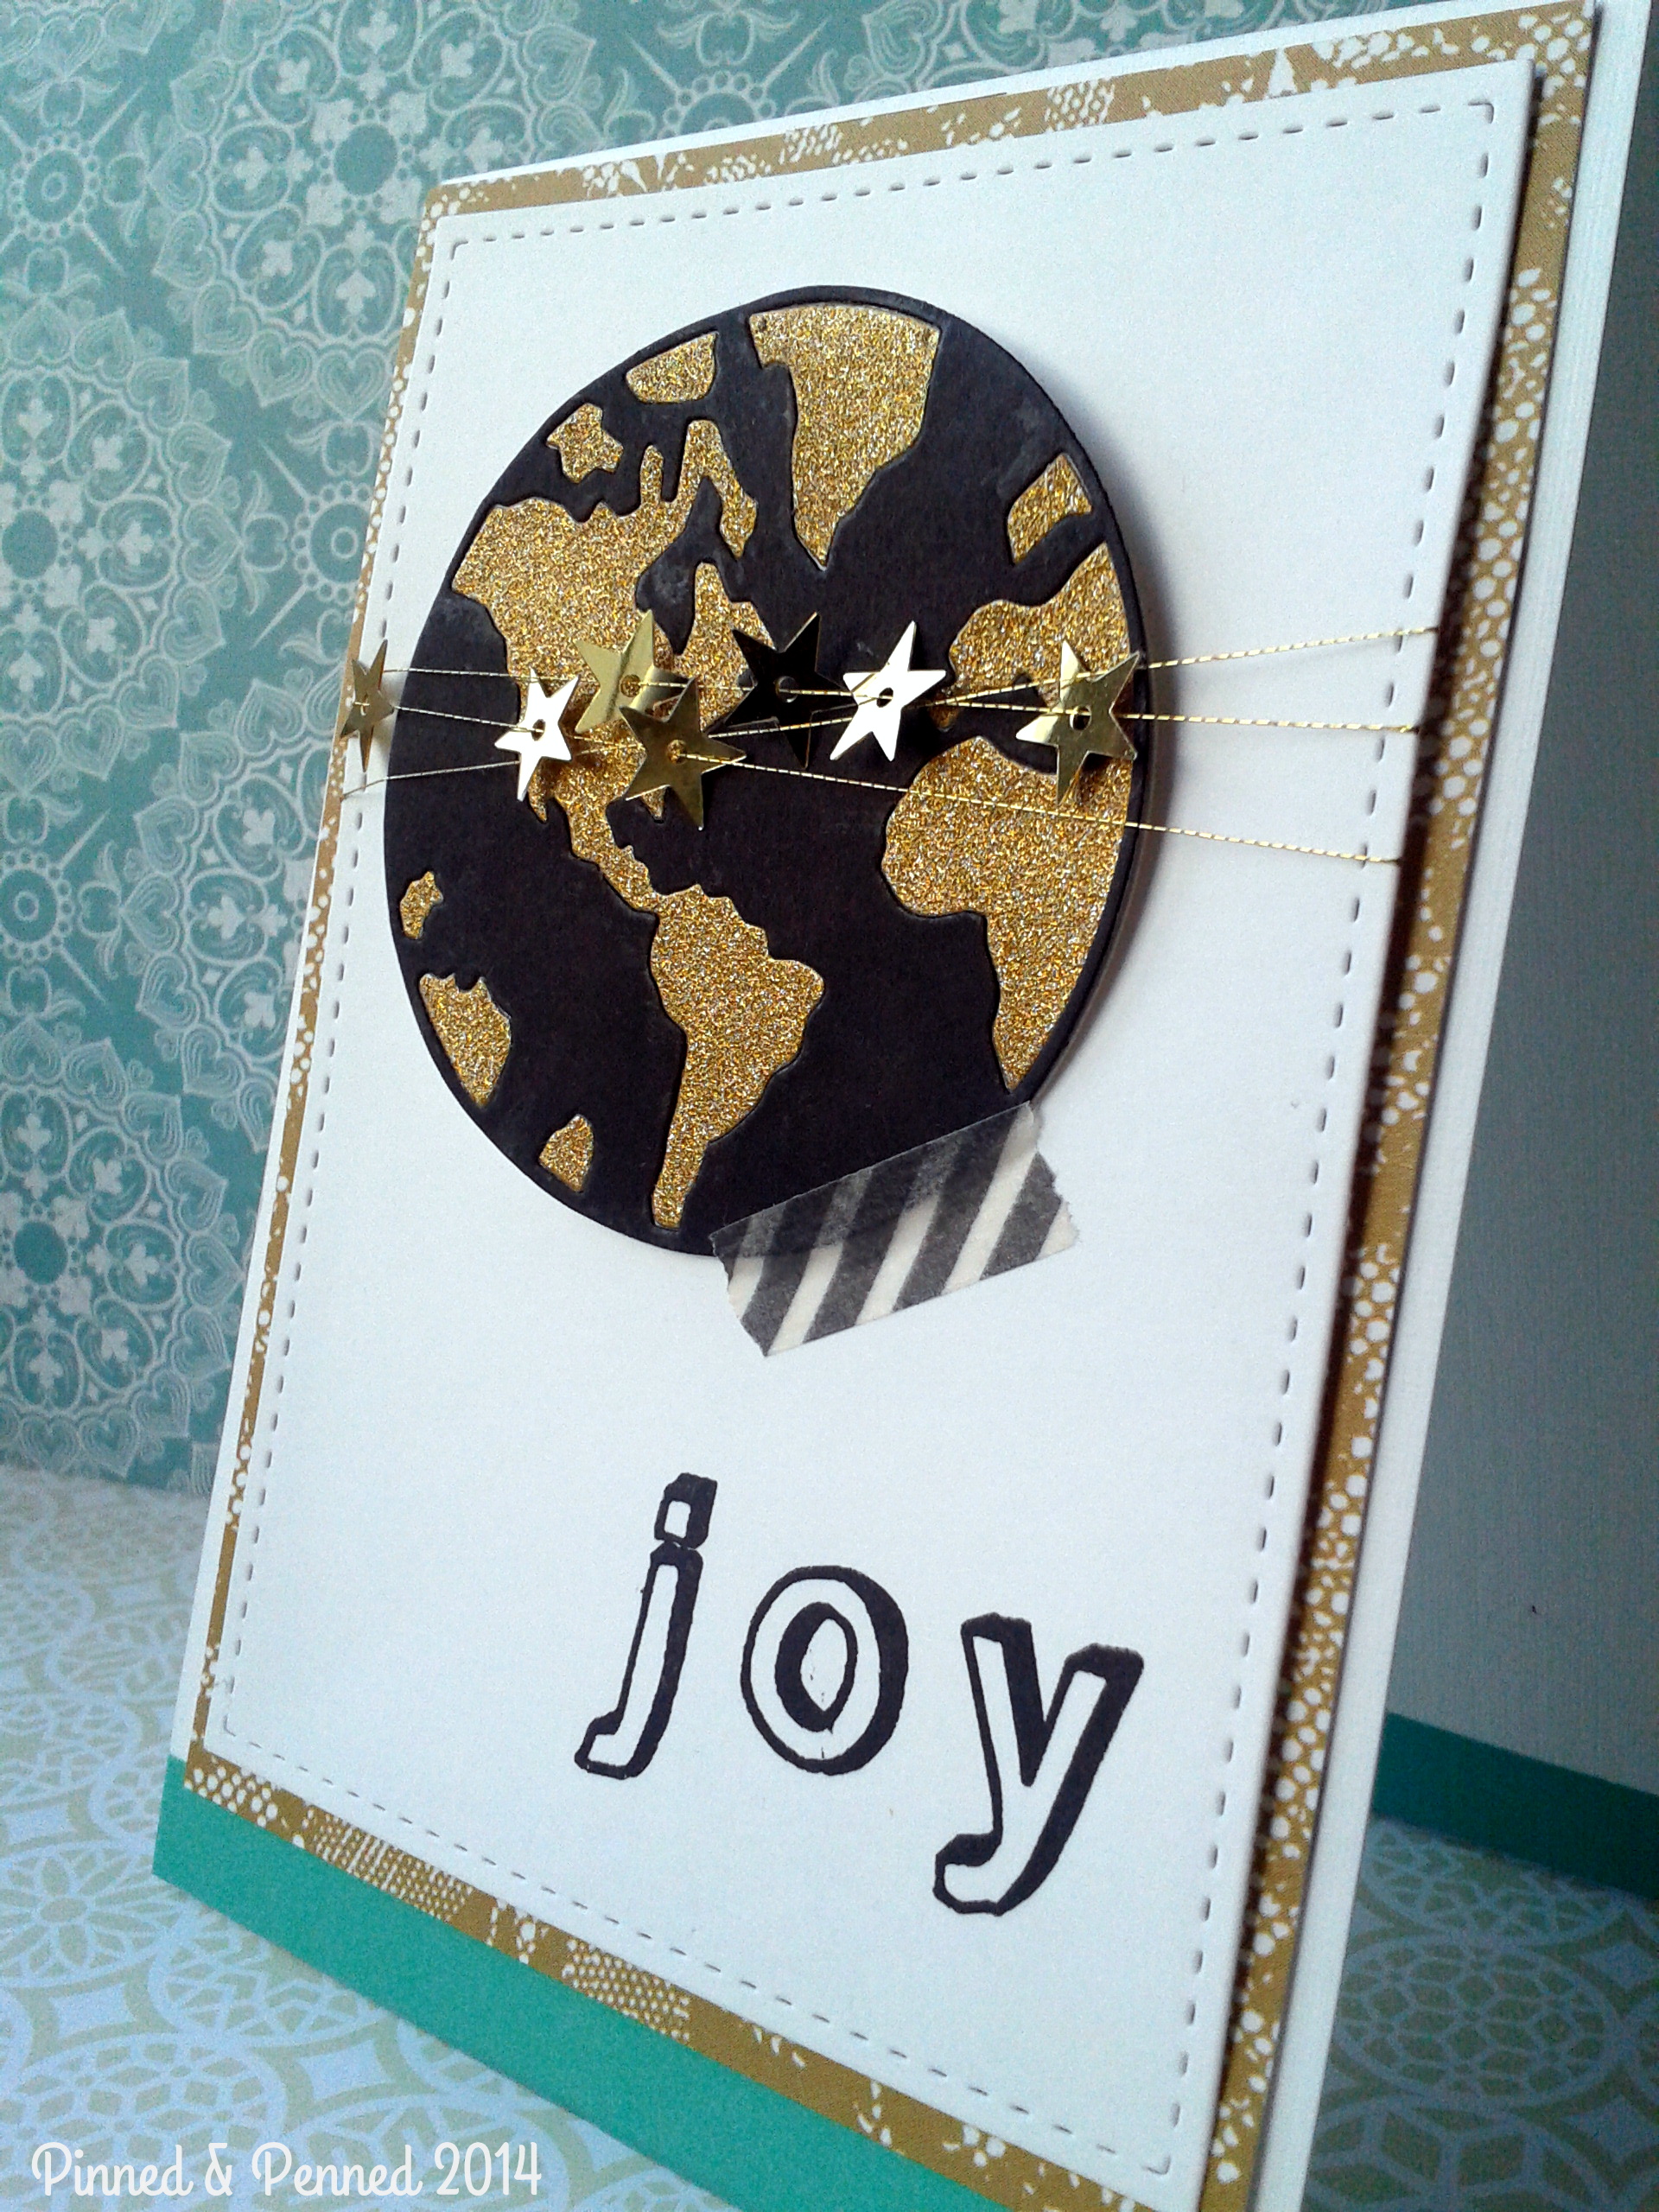
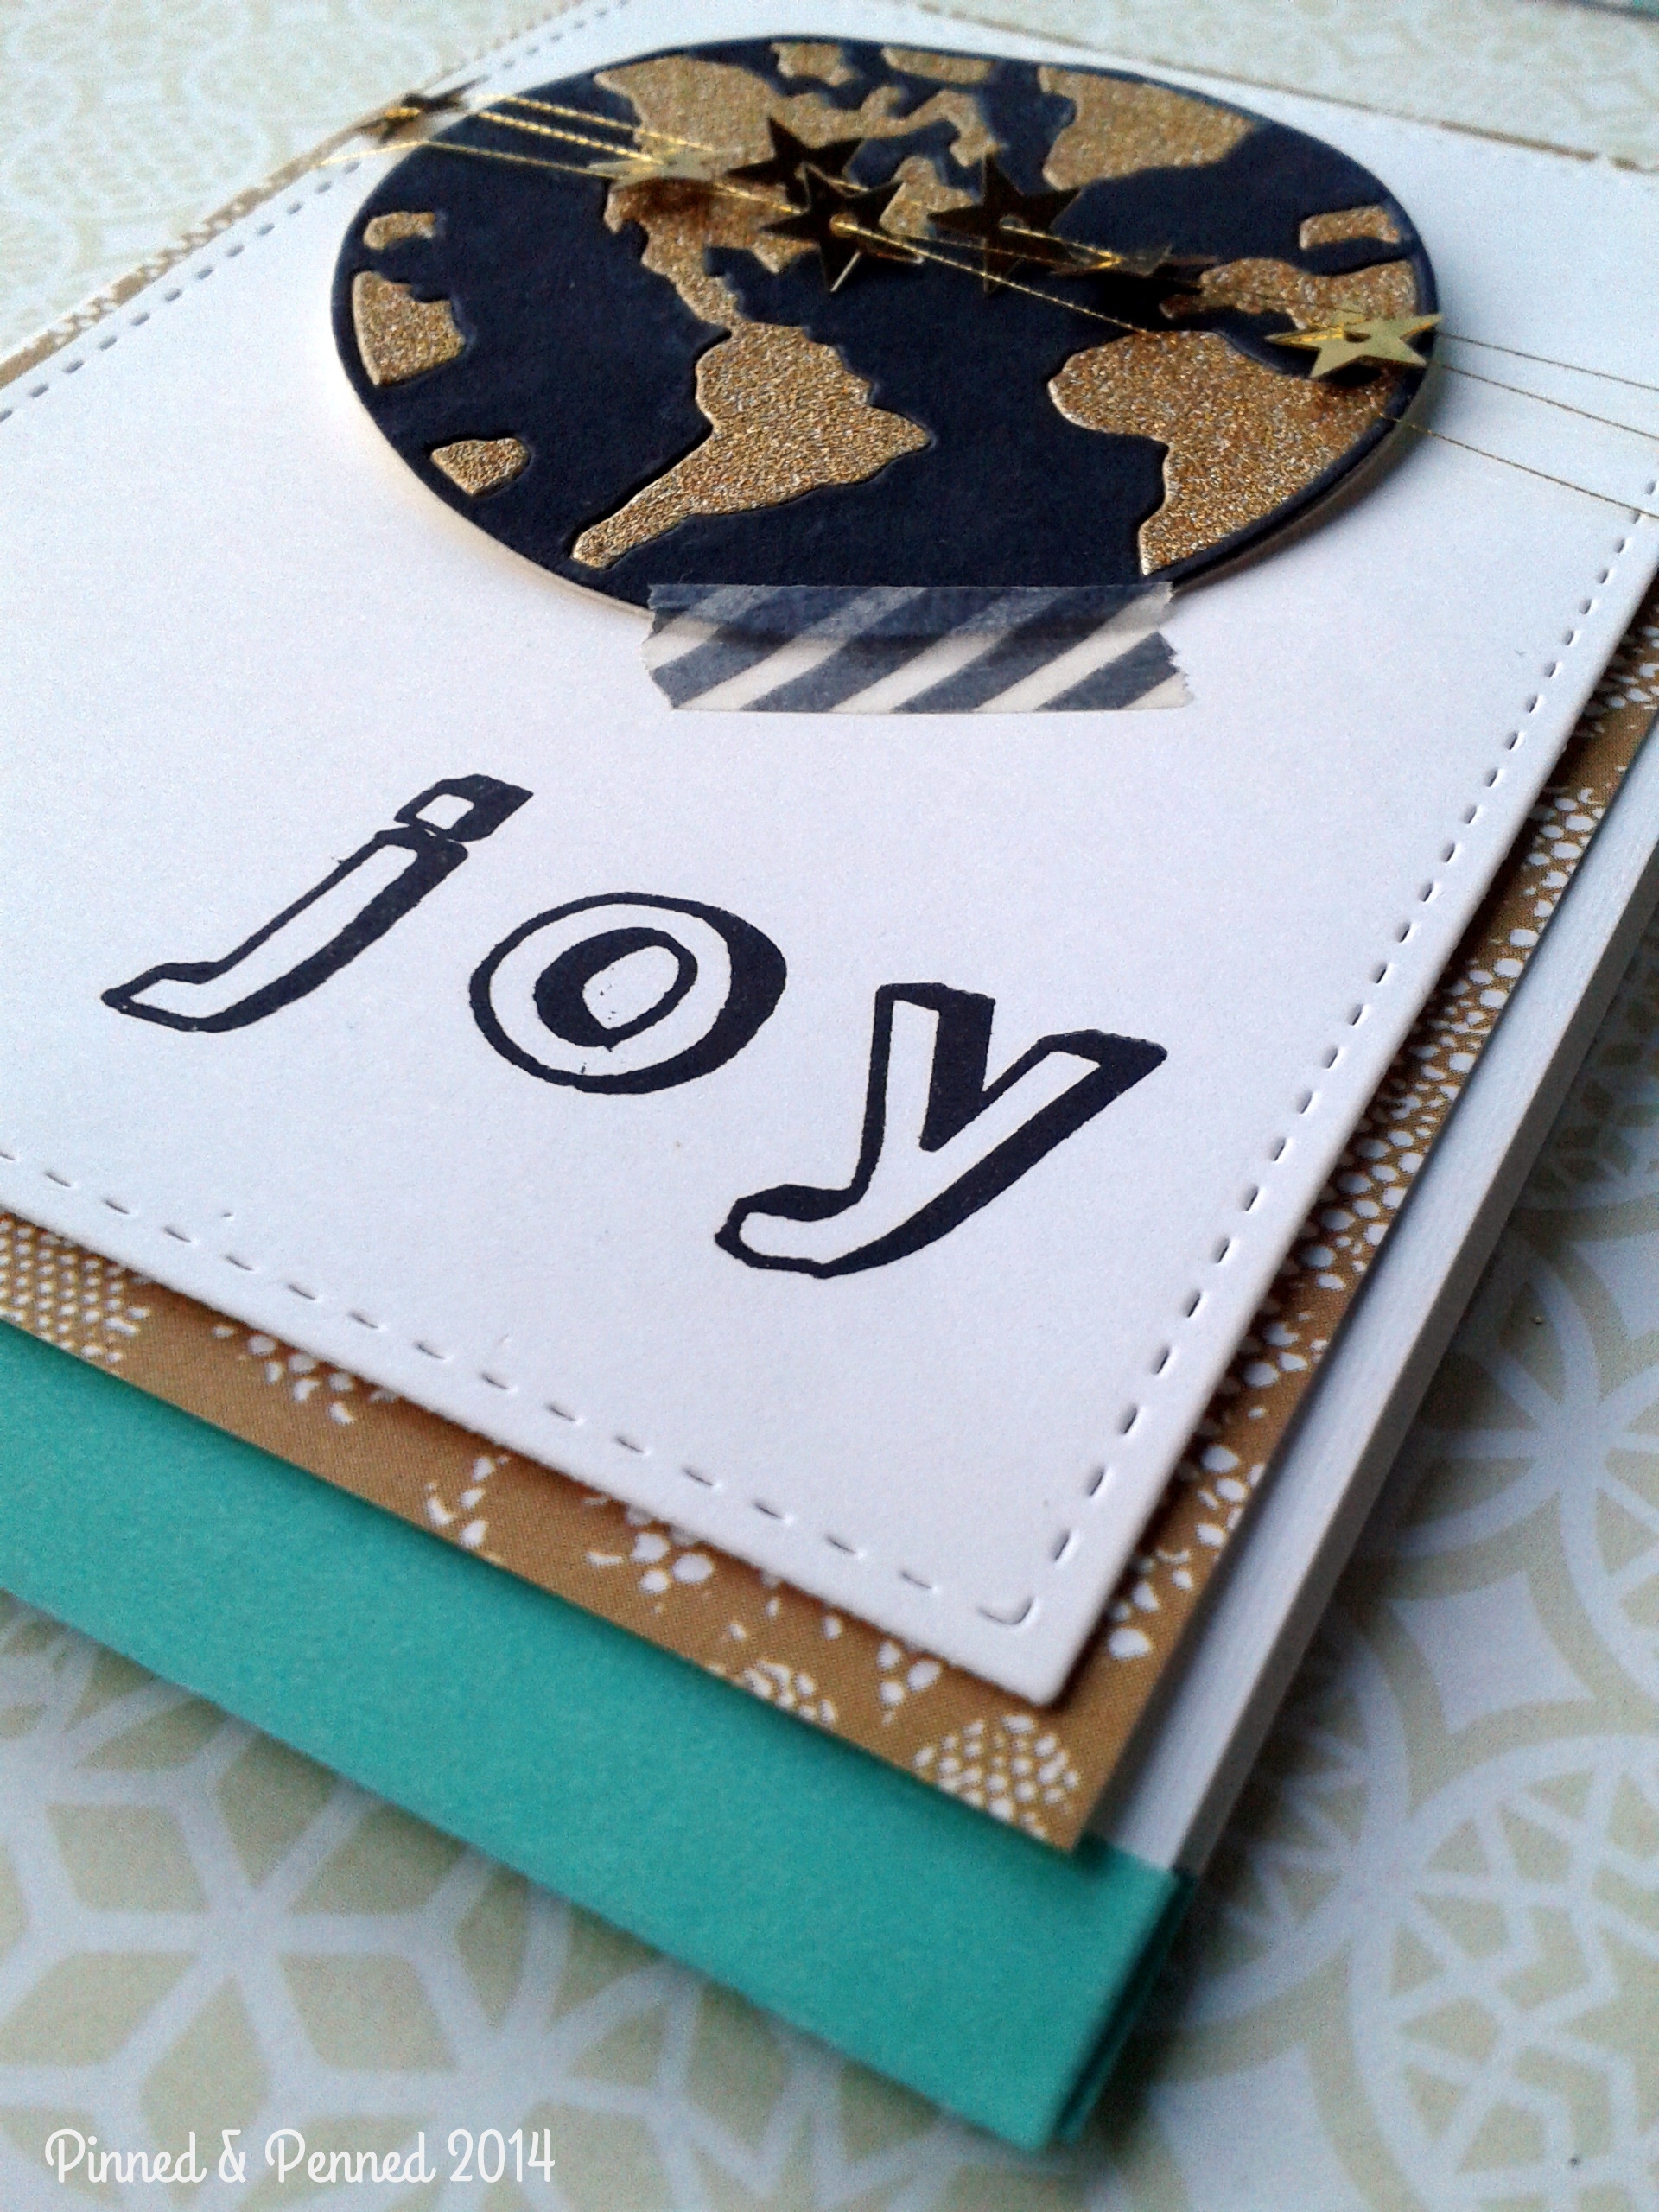
JOY TO THE WORLD
My first card was not only inspired by the inspiration photo, but also the gorgeous creation by Rebecca Luminarias.
I always love Rebecca’s style. I pulled some of the gold elements from her card into both of mine.
I absolutely love the combination of turquoise and gold, so when my card was finished, I realized it needed a pop of color. The turquoise washi felt perfect for the bottom stripe on the outside and inside of the card.
I love the gold lace paper from My Mind’s Eye Market Street pack.
TIP: Because I only have two pieces of this paper, I didn’t want to waste a bit of it. So I cut out the middle of it before layering– a good way to preserve paper when creating lots of layers!
“Hello, yeah, it’s been a while.
Not much, how ’bout you?
I’m not sure why I called,
I guess I really just wanted to talk to you.
And I was thinking maybe later on,
We could get together for a while.
It’s been such a long time,
And I really do miss your smile.”
–England Dan and John Ford Coley, 1976
“Oh – stop
With your feet on the air and your head on the ground
Try this trick and spin it, yeah
Your head will collapse
But there’s nothing in it
And you’ll ask yourself
Where is my mind?
Way out in the water
See it swimmin’ ”
–The Pixies, 1988
Ever feel like you’ve been existing in a time-warp, floating between dimensions, touching down lightly into reality and then off again? That’s what the last ten days have been like for me!
Over the last two decades, as a migraineur, I have had to adapt to an uncooperative brain, which is not easy for someone who could be working, creating, reading, and writing 24/7! Last week, I was hit with a three day migraine, the effects of which lasted for the remainder of the week–what migraineurs not-so-affectionately call “a migraine hangover.” So all creative and professional work was curtailed, and I’ve been playing catch-up, and taking life a little more slowly the last five days.
With a reduced teaching load due to spring break, I’ve had a bit more time to get back into my craft room and resume work on a few projects. It has been so good to just play with colors and patterns and experiment with some new styles. I will showcase some of those very soon!
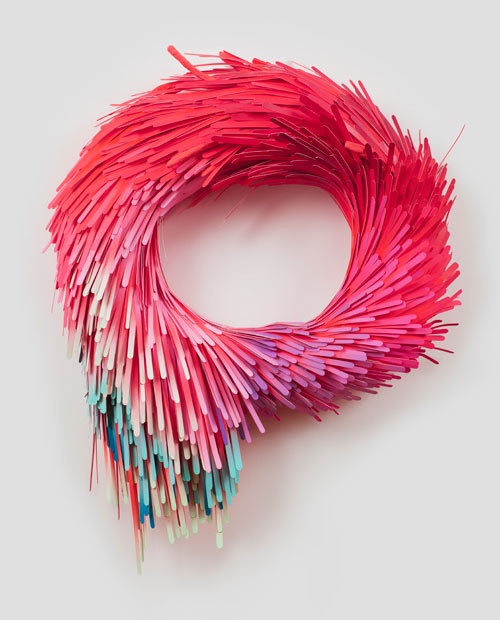
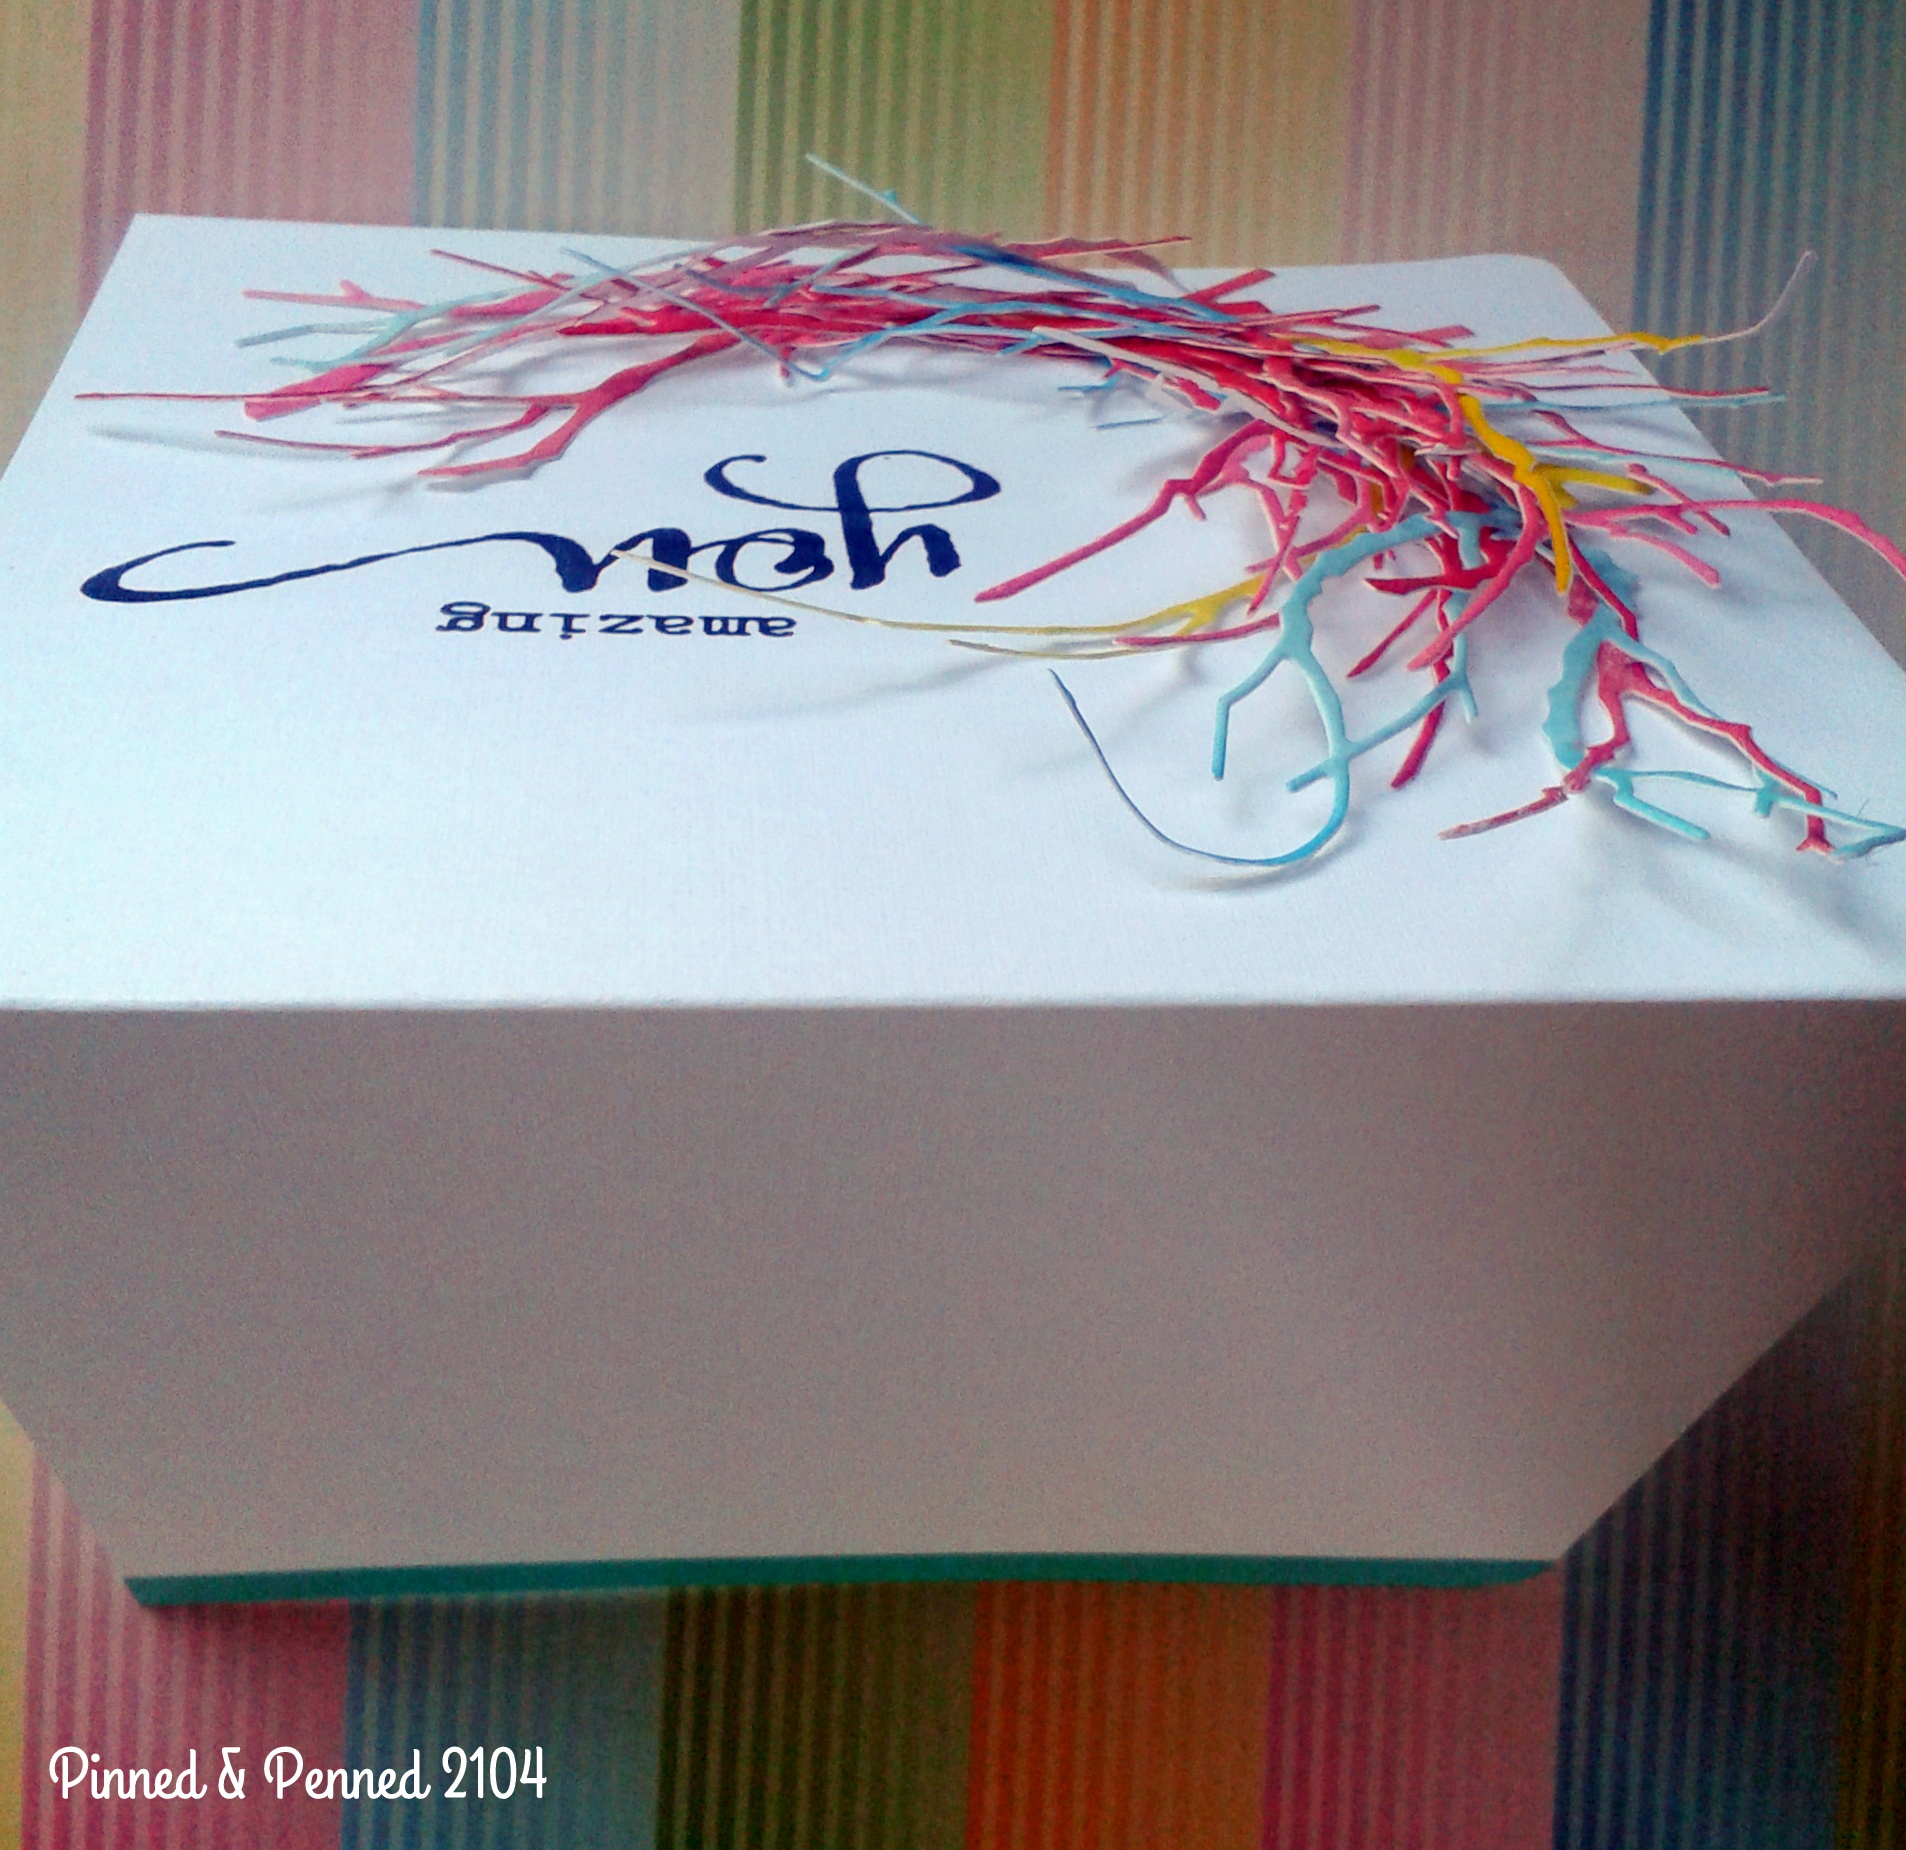
Today, though I want to share a project I had completed right before I was derailed. I took my inspiration from an art piece I found on Pinterest. It is called “The unending amends we’ve made (imperishable wreath) 2010,” (acrylic on cut paper, papier-mâché, wire, wood) by Brooklyn-based artist Lauren Clay. Her work is delicious in terms of color, and at times unsettling in terms of contrasting hard geometric elements with the soft colors.
The unending amends we’ve made (imperishable wreath), 2010, Lauren Clay
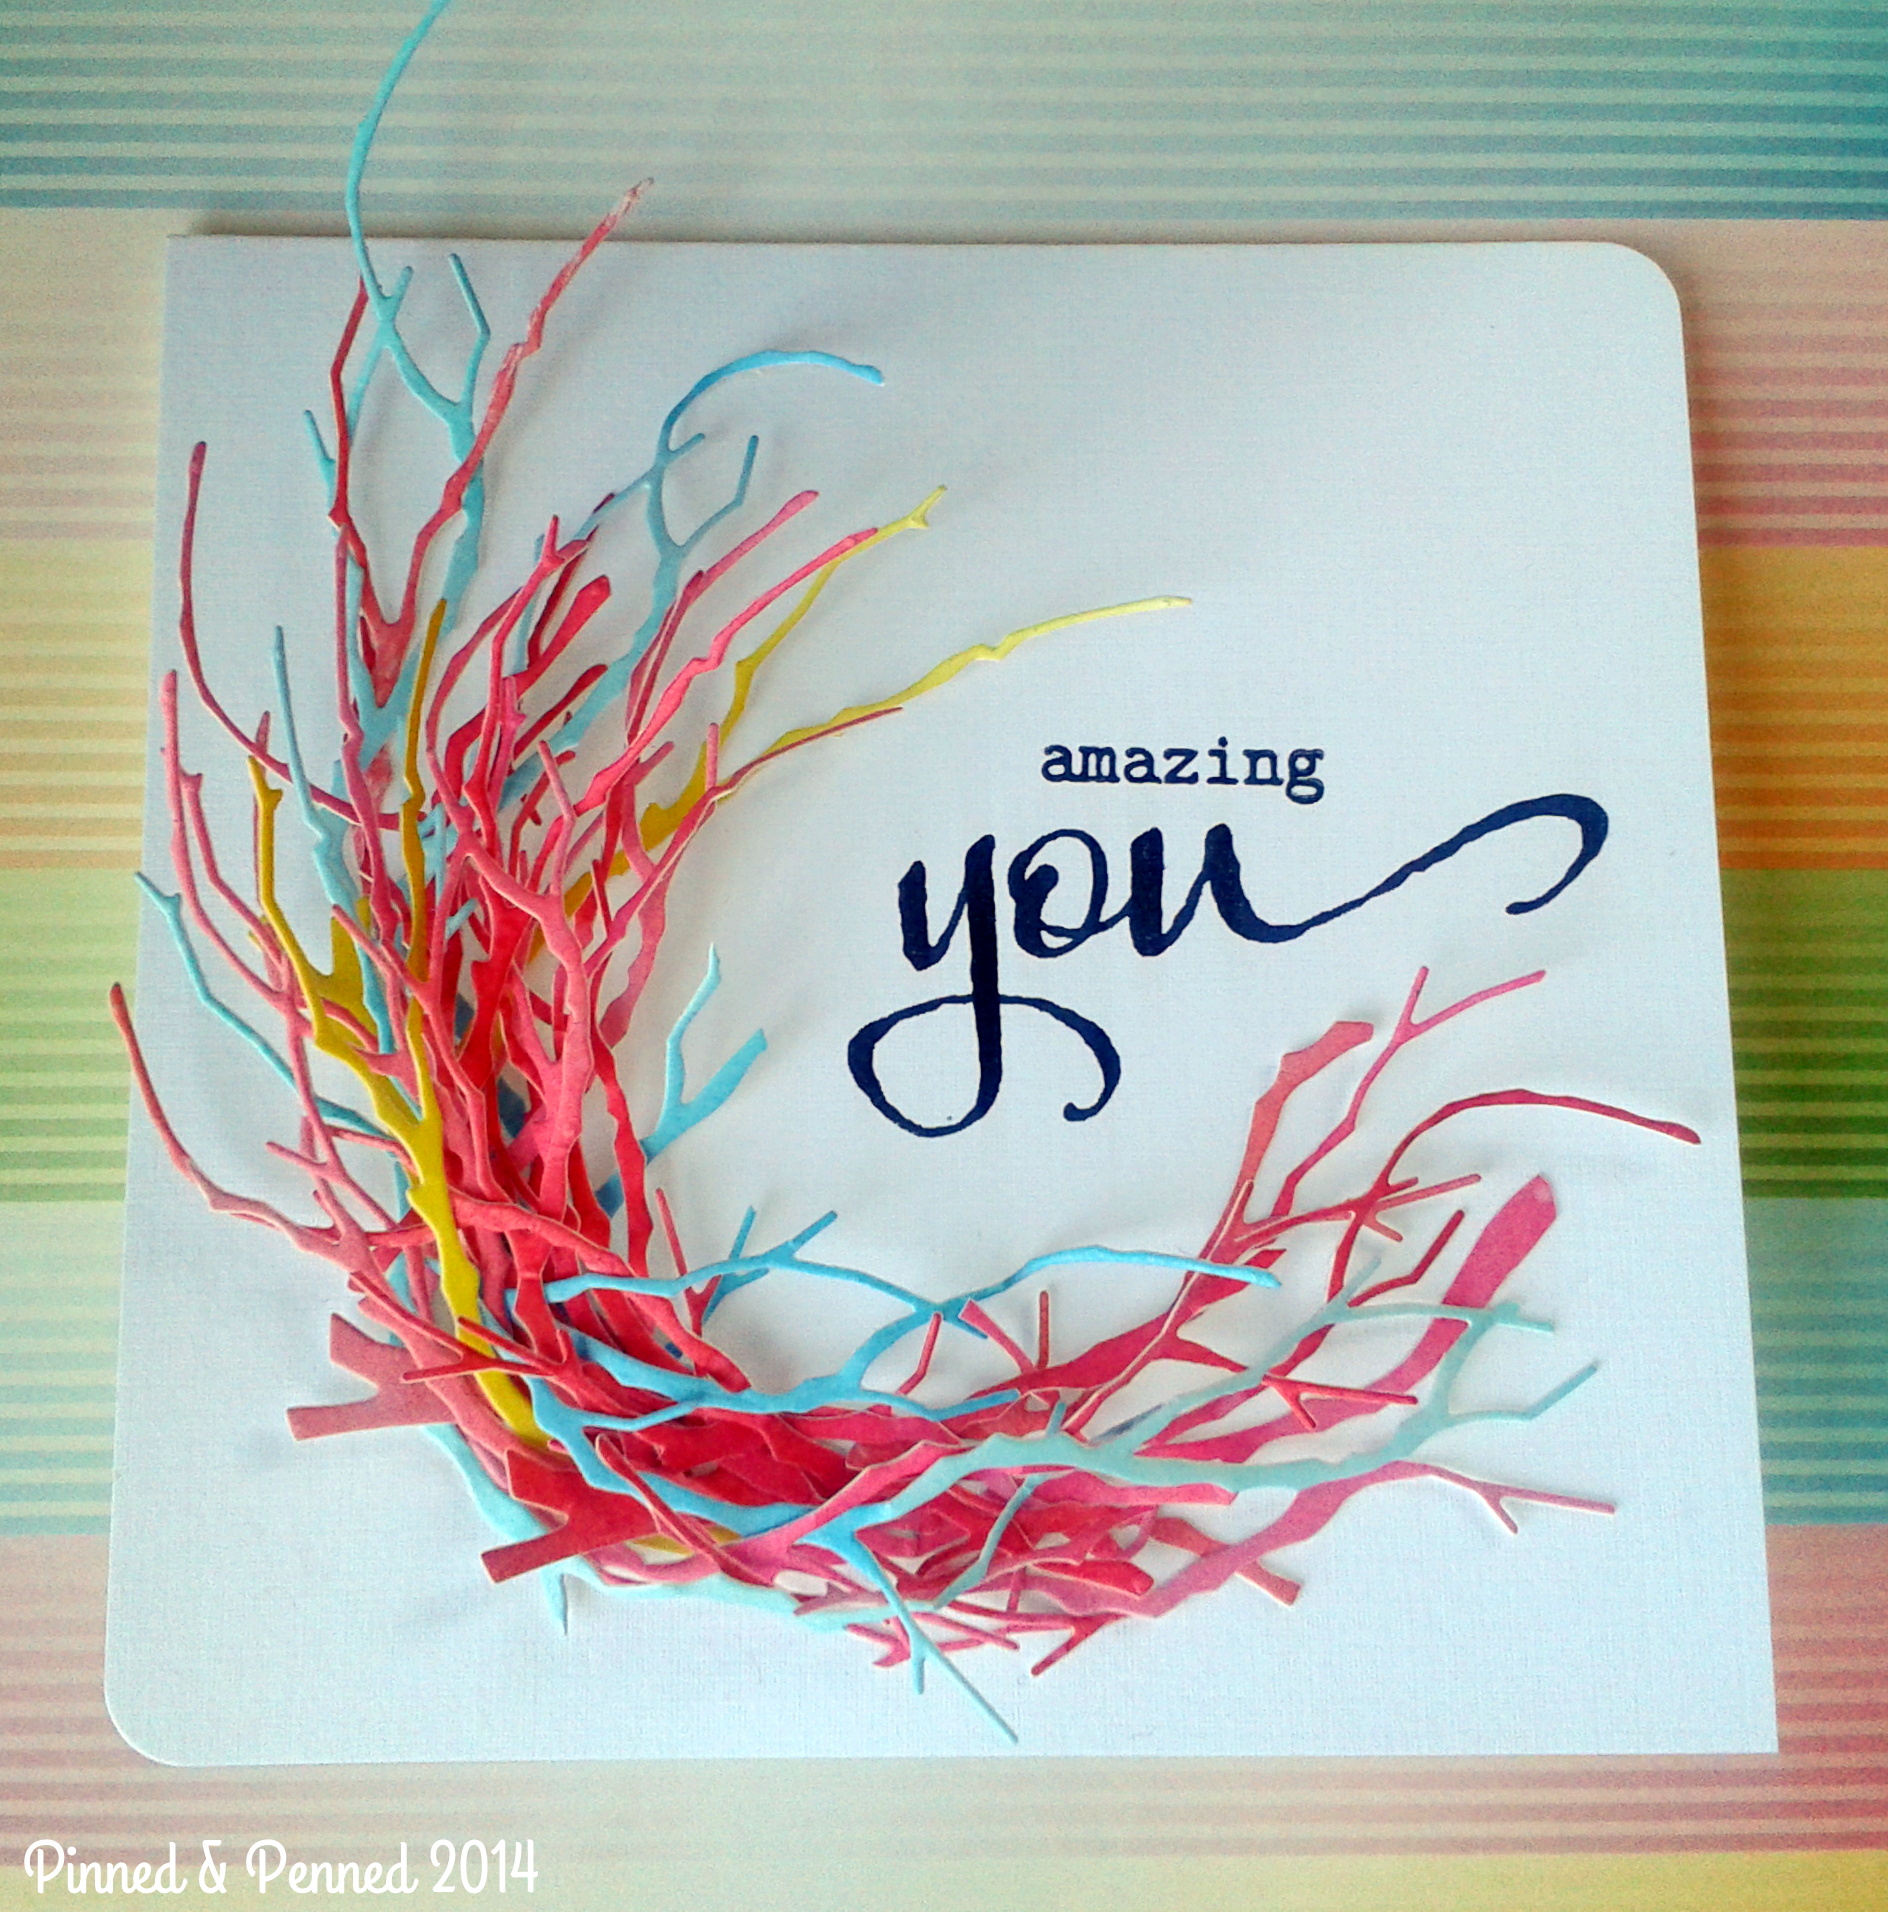
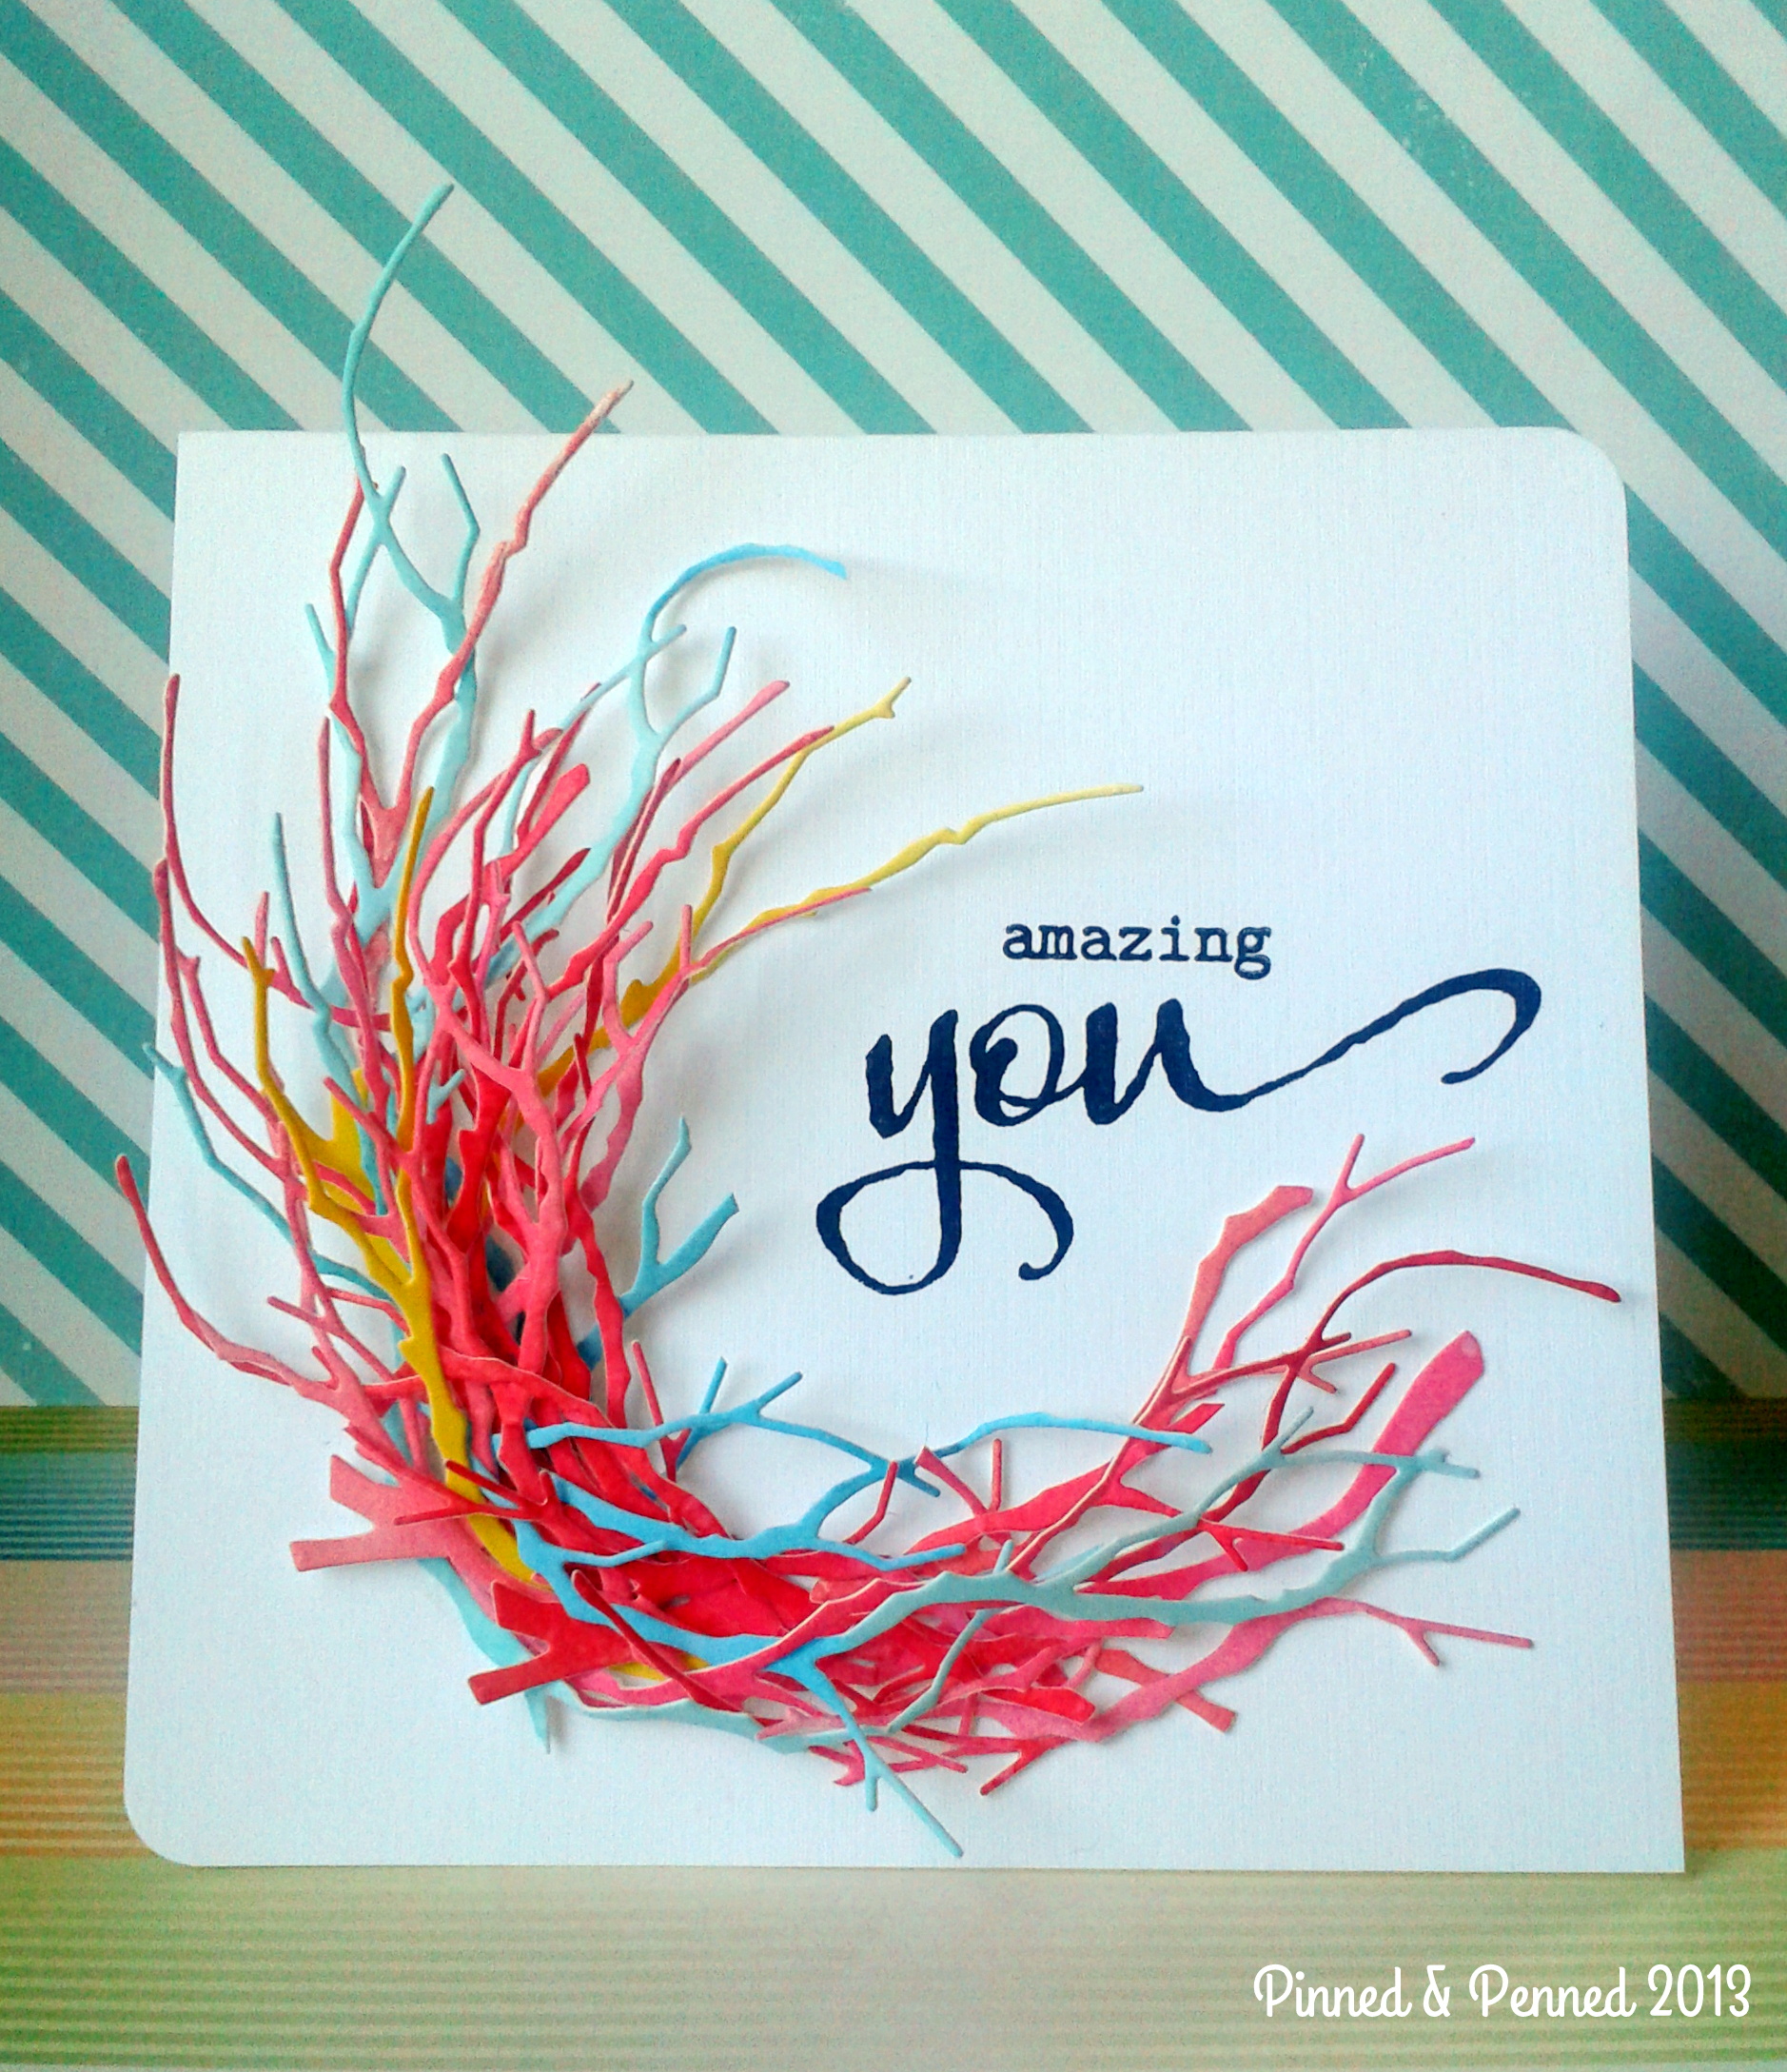
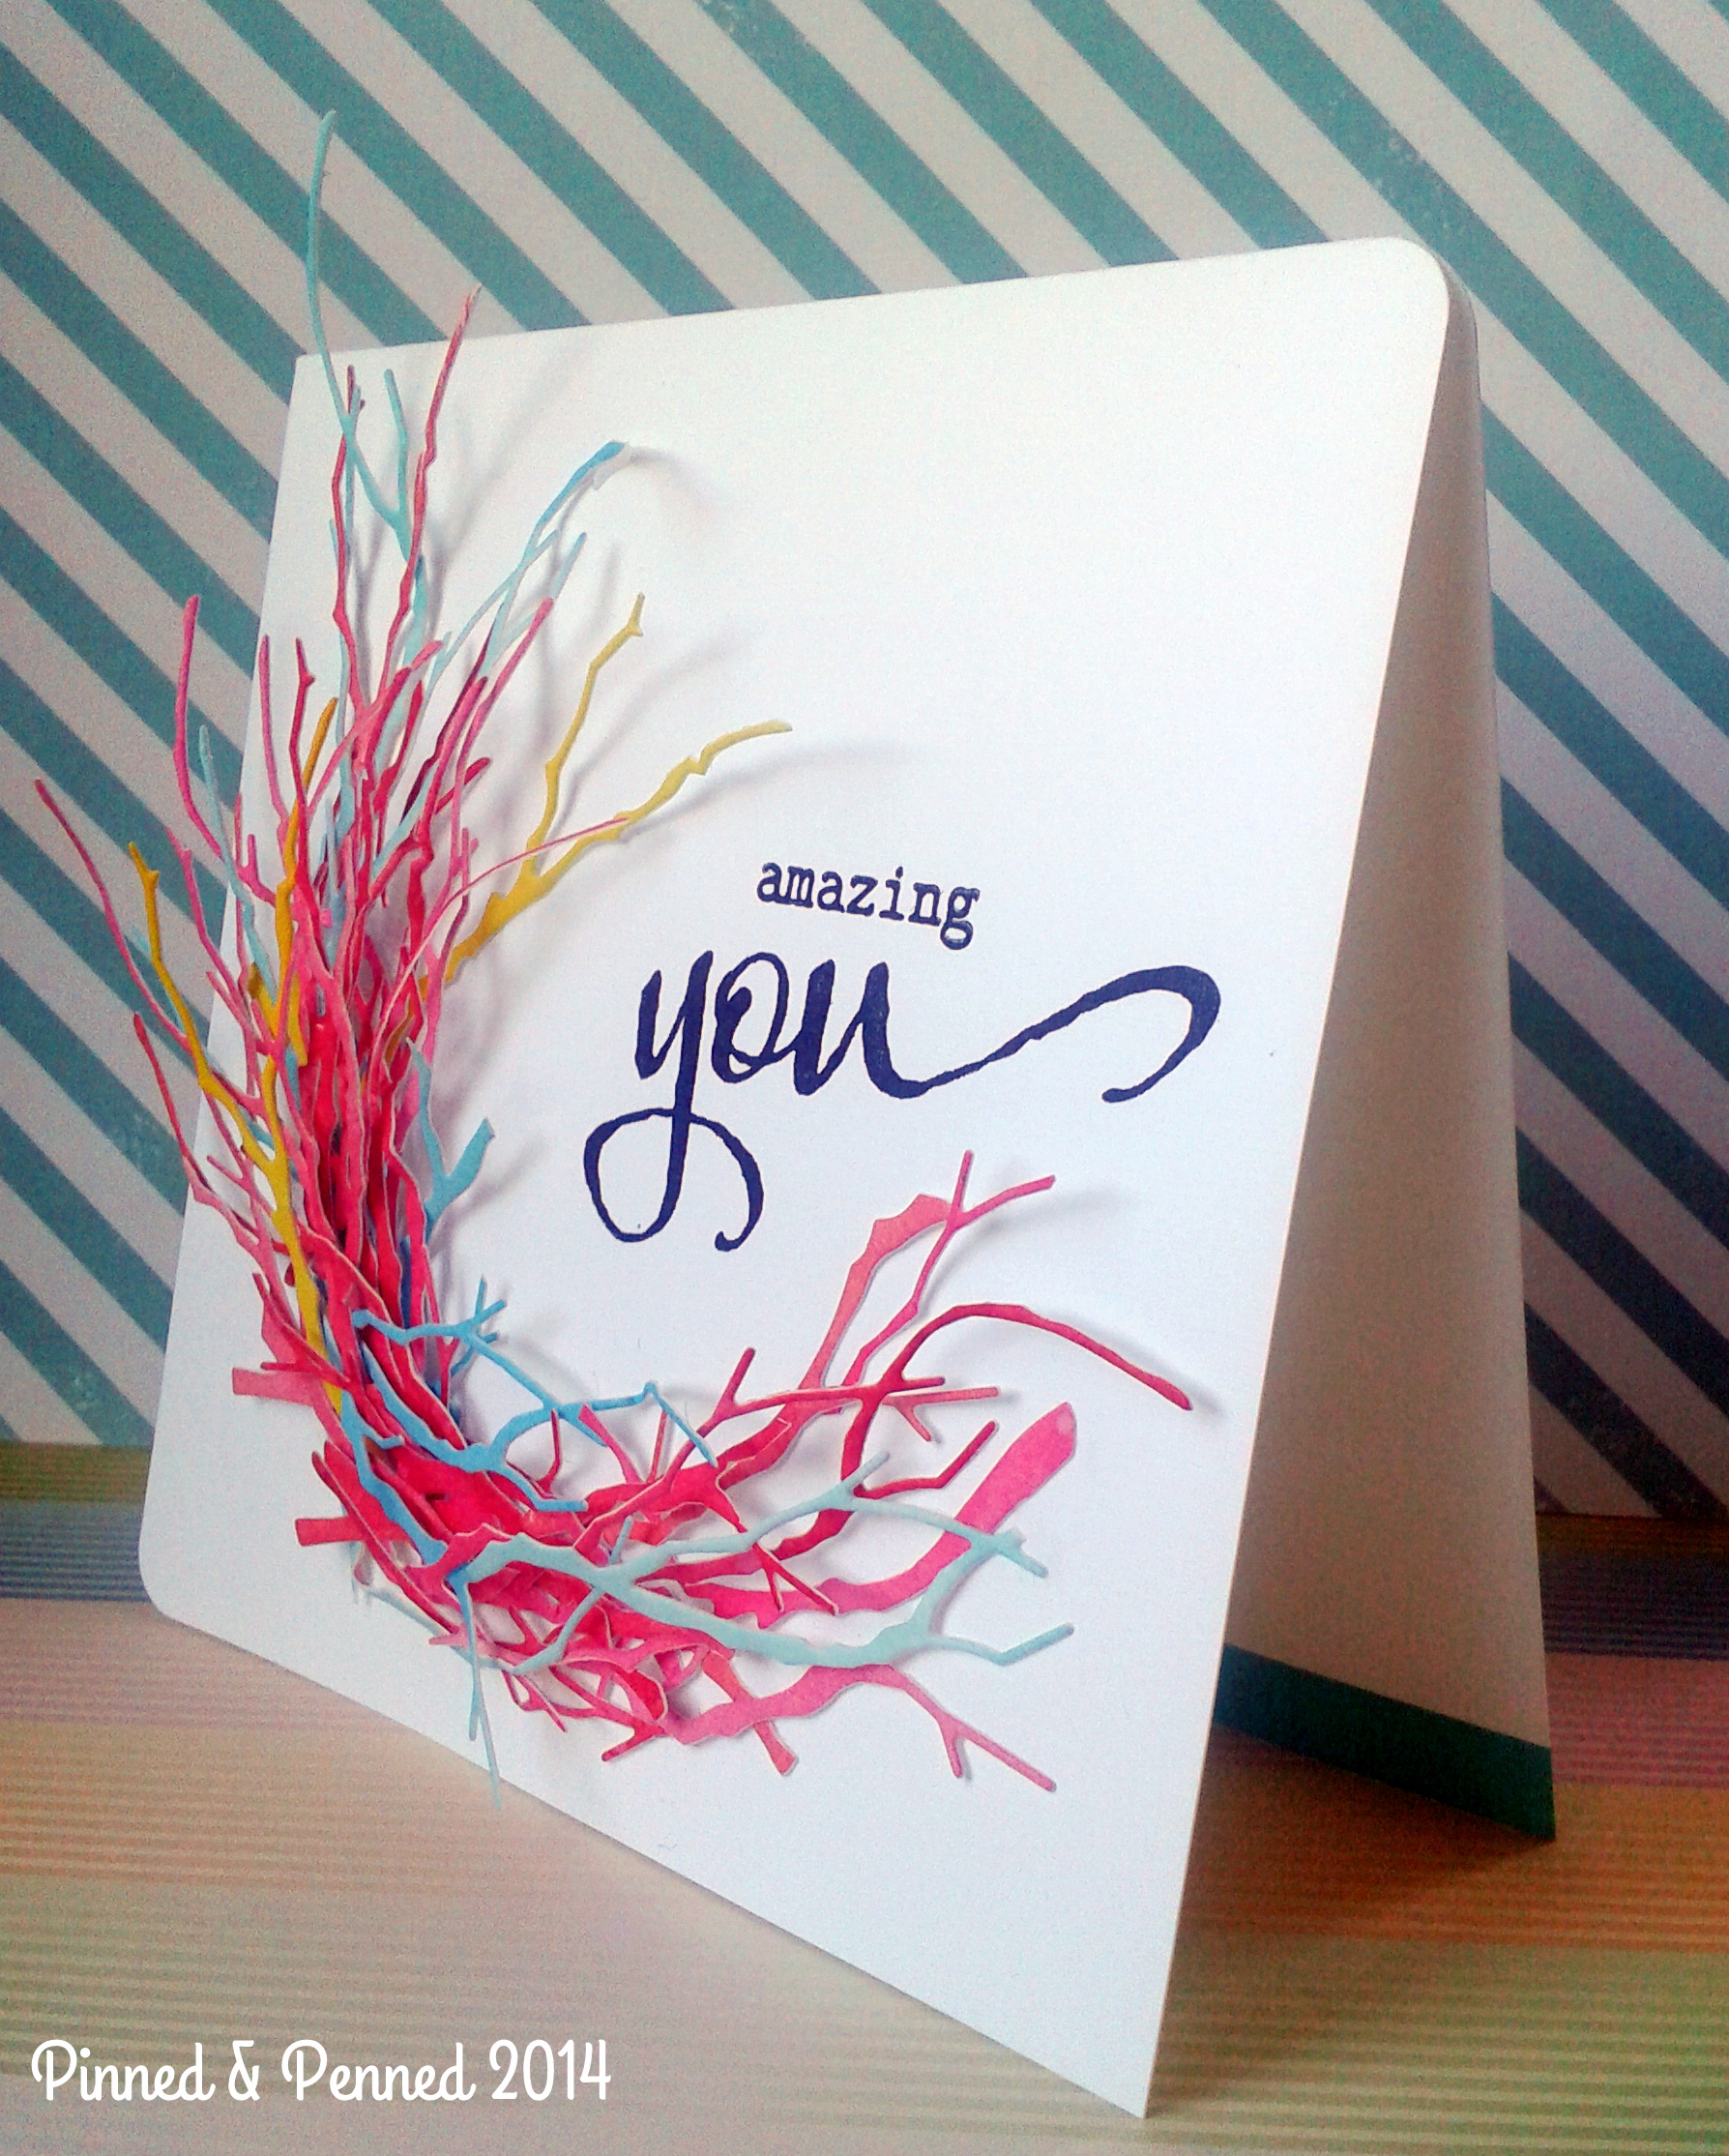
Here is my card:
As I mentioned in a previous post, I have been compelled to create paper nests. I have also been gravitating to varying hues of turquoise, coral, and pink, as you may have noted in my last few cards. So when I saw Lauren’s work, I knew I wanted to try and replicate its form and color with my Memory Box branches.
TECHNIQUE:
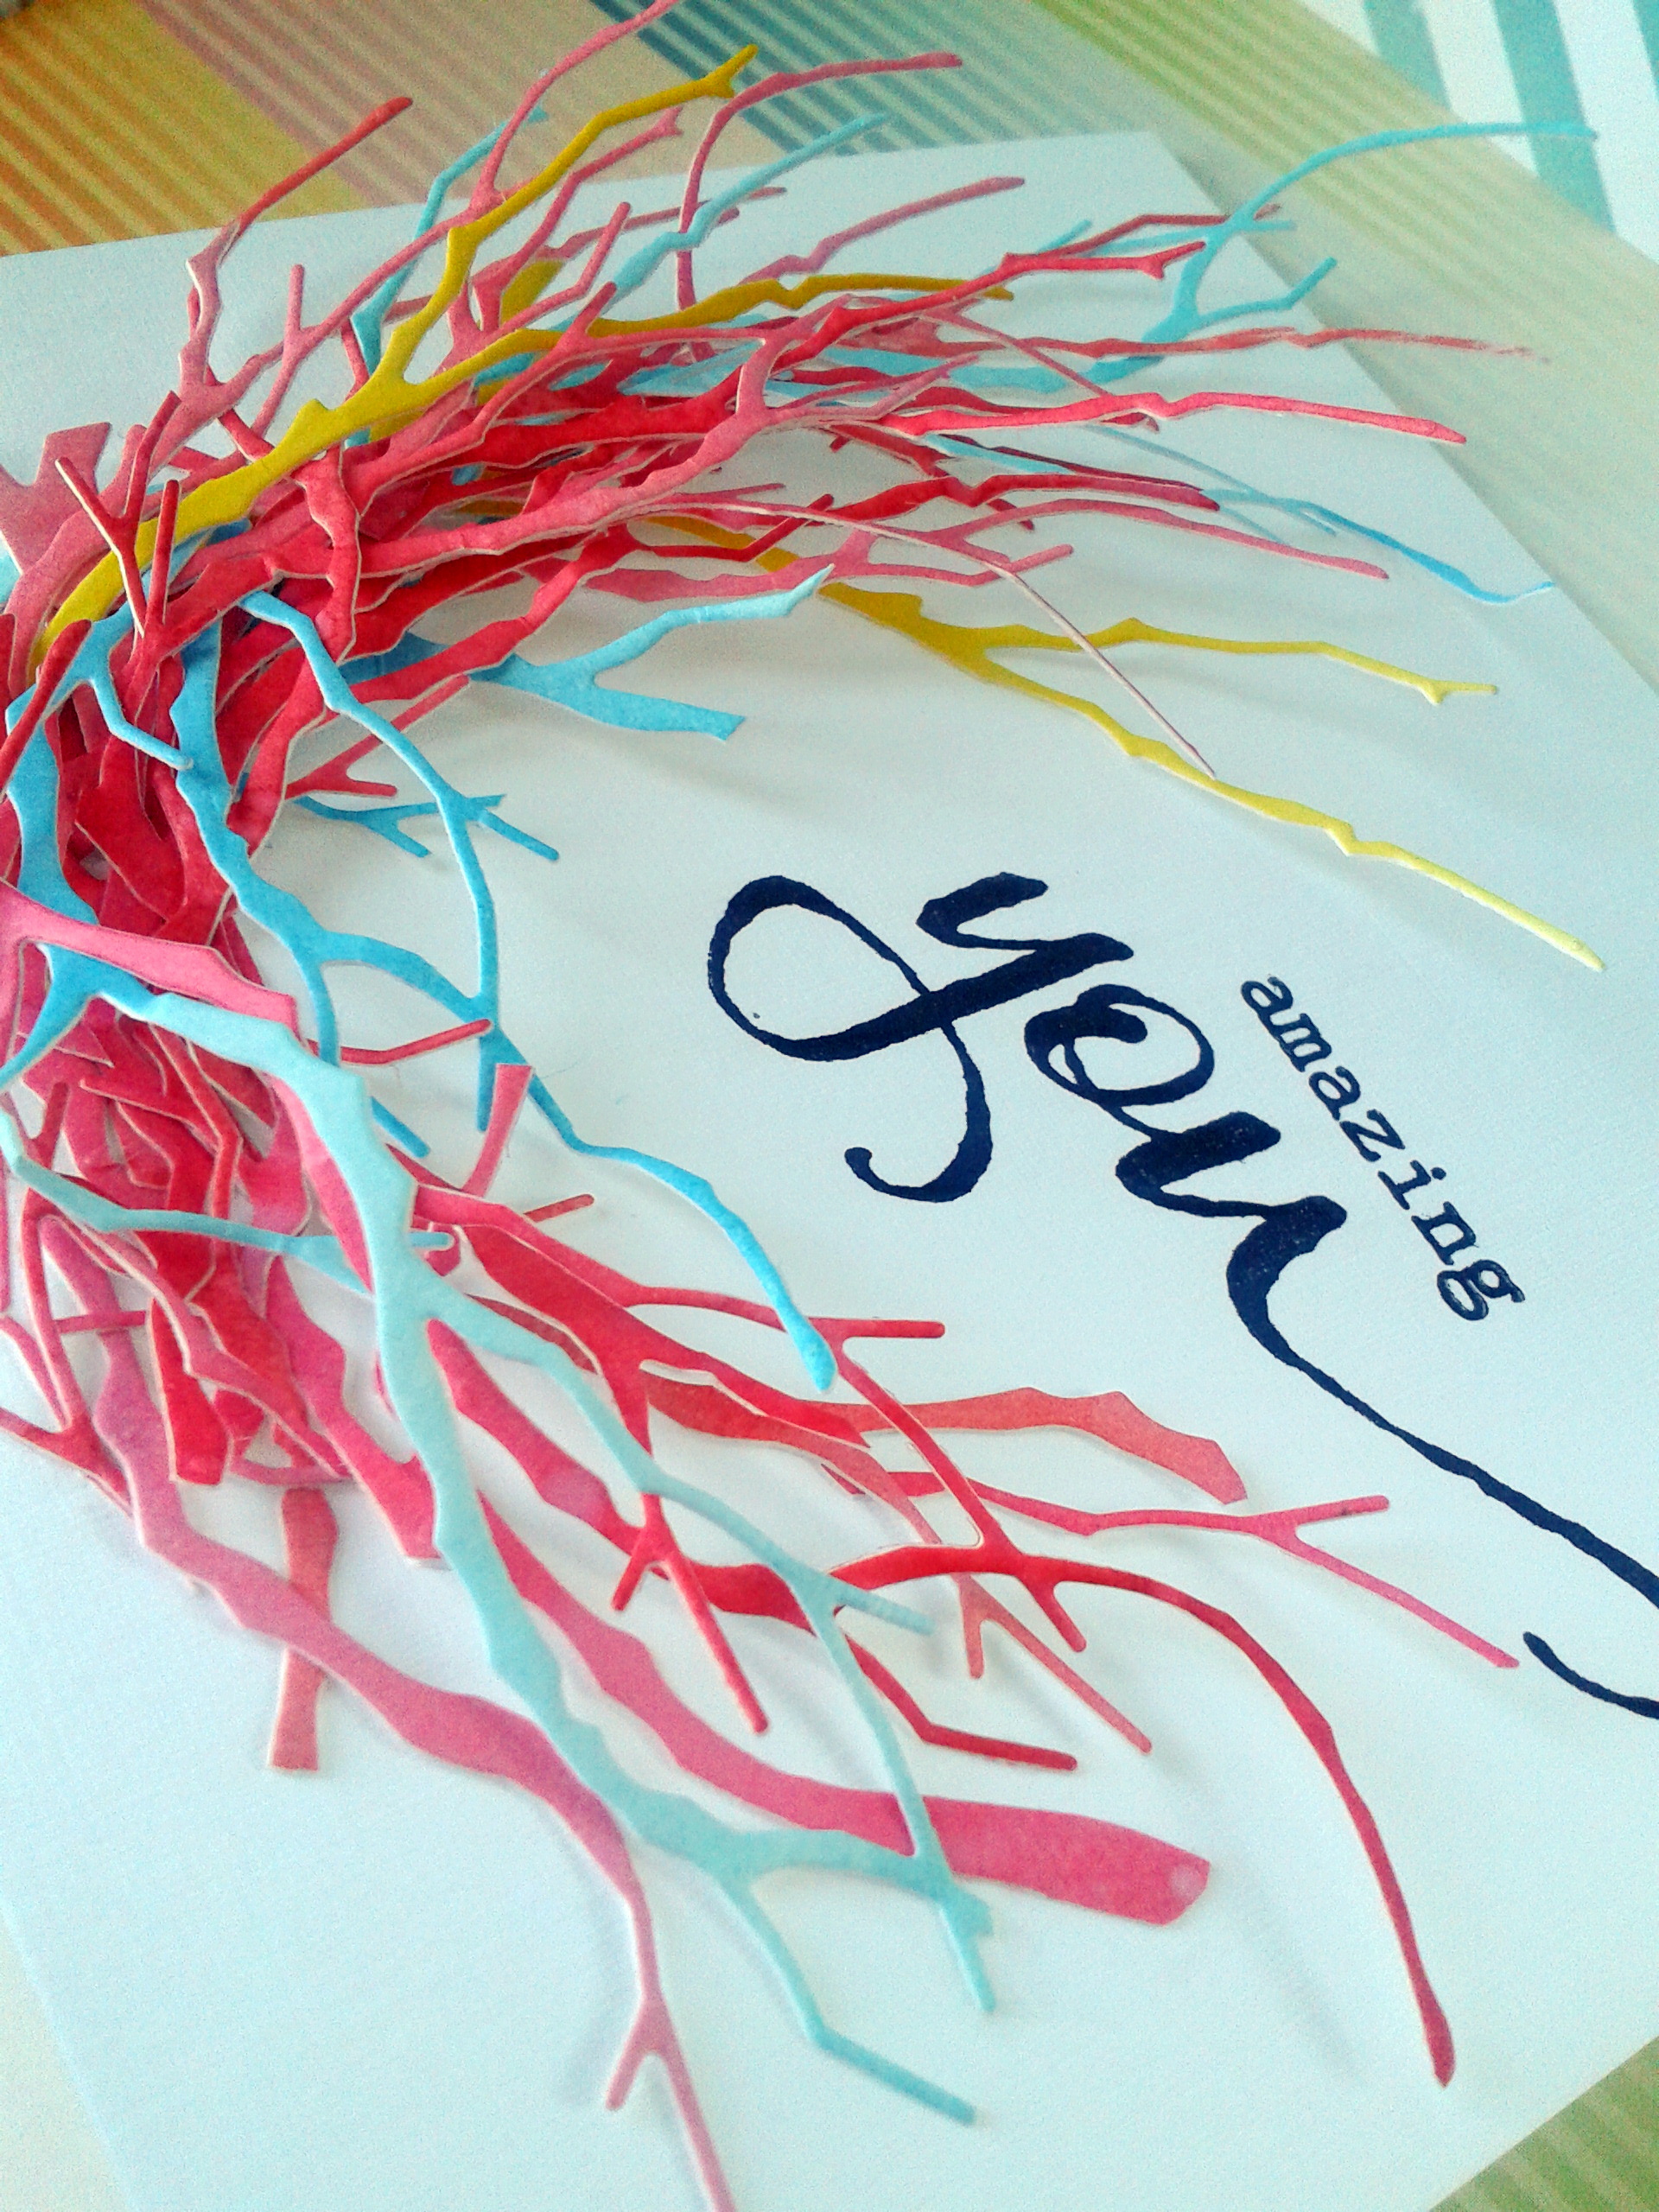
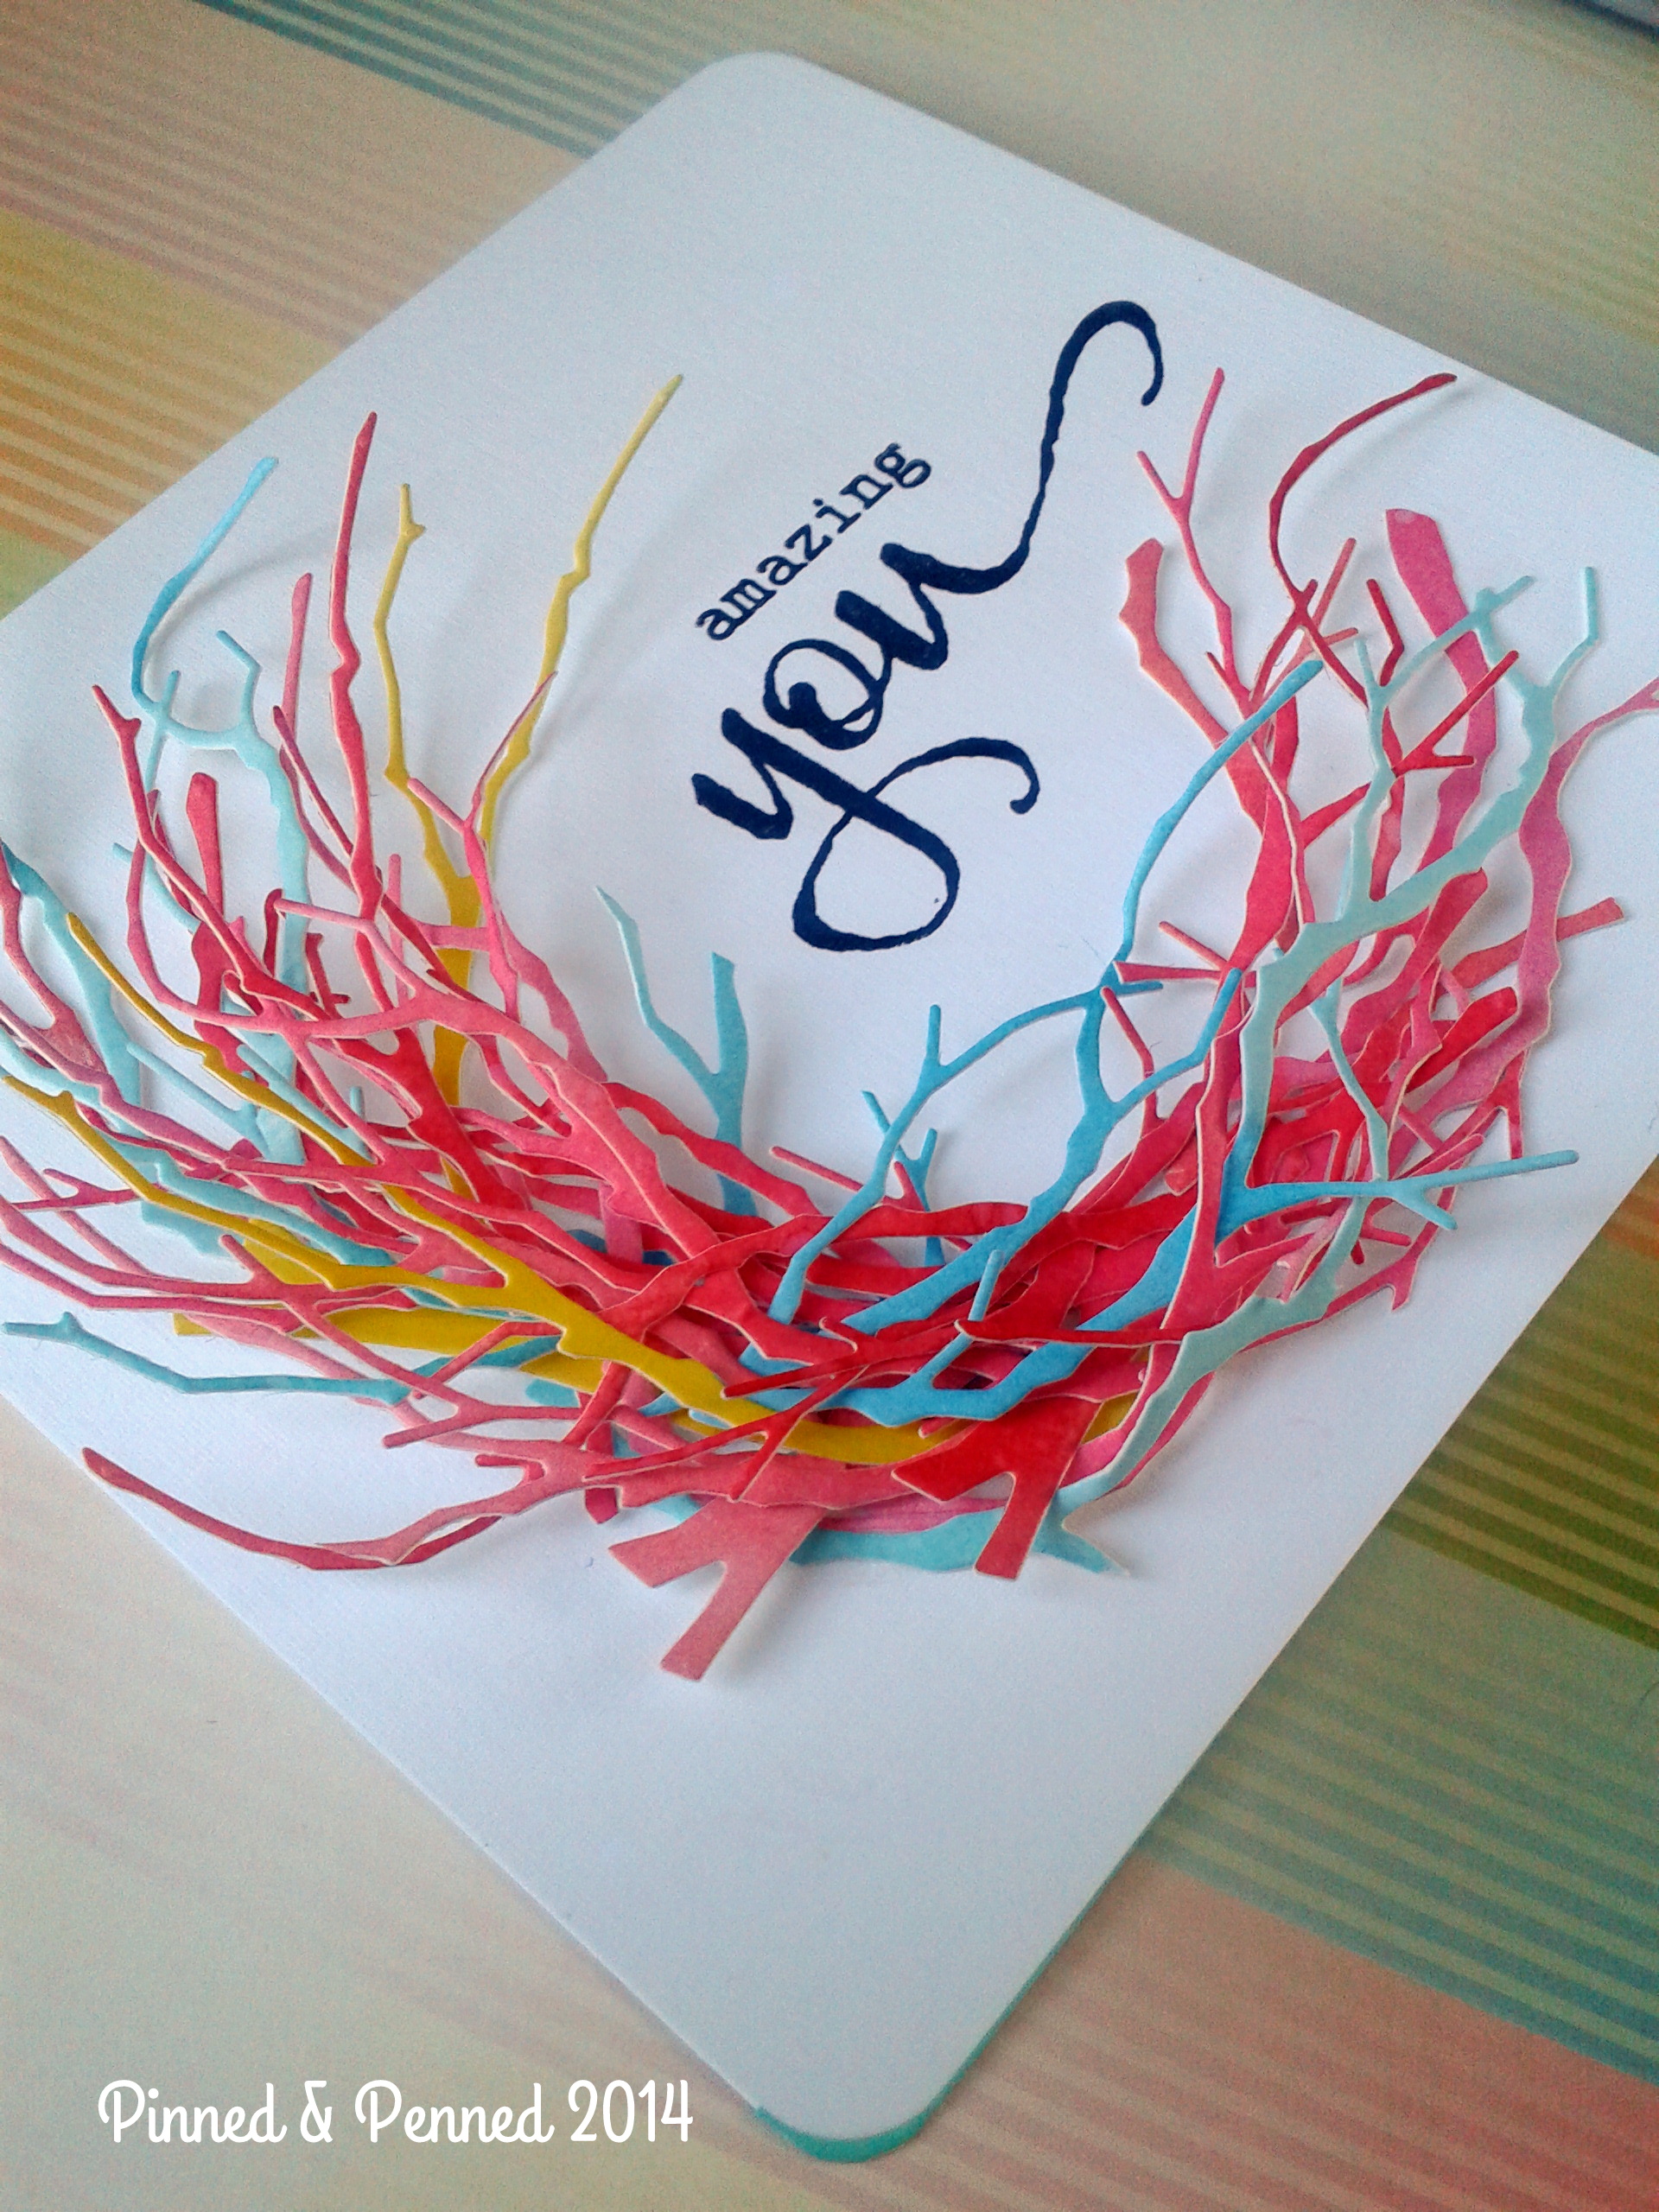
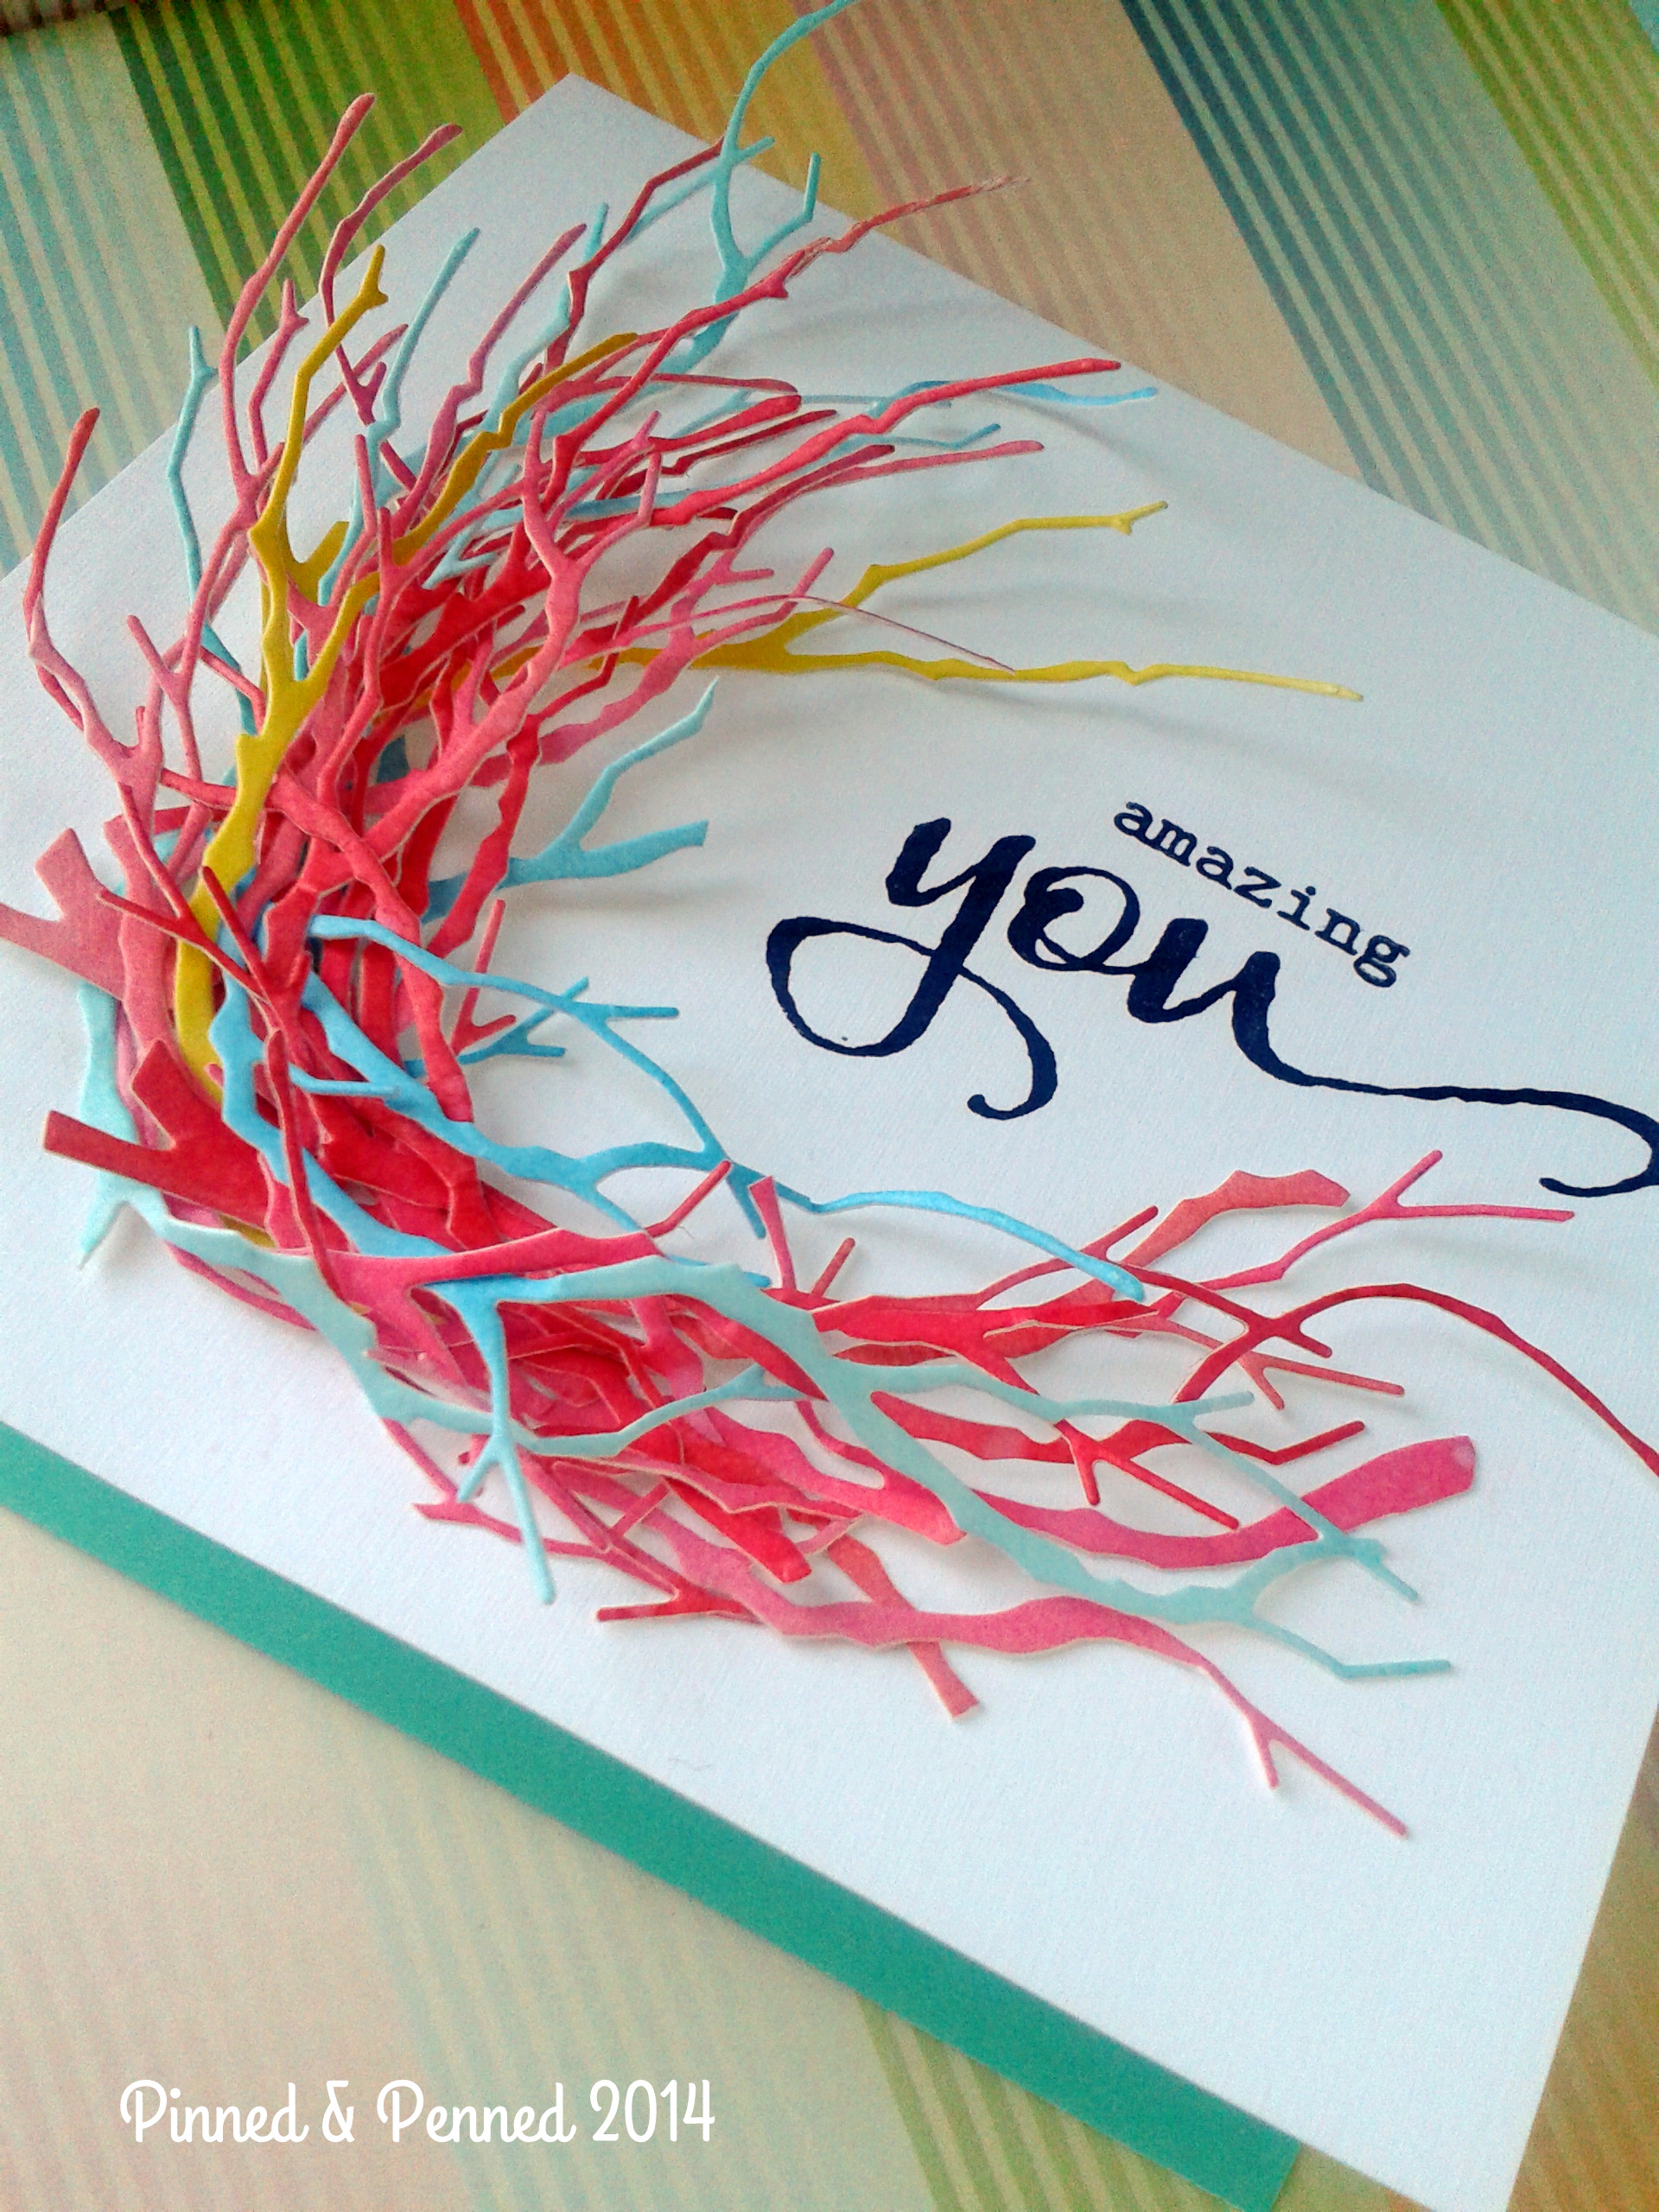
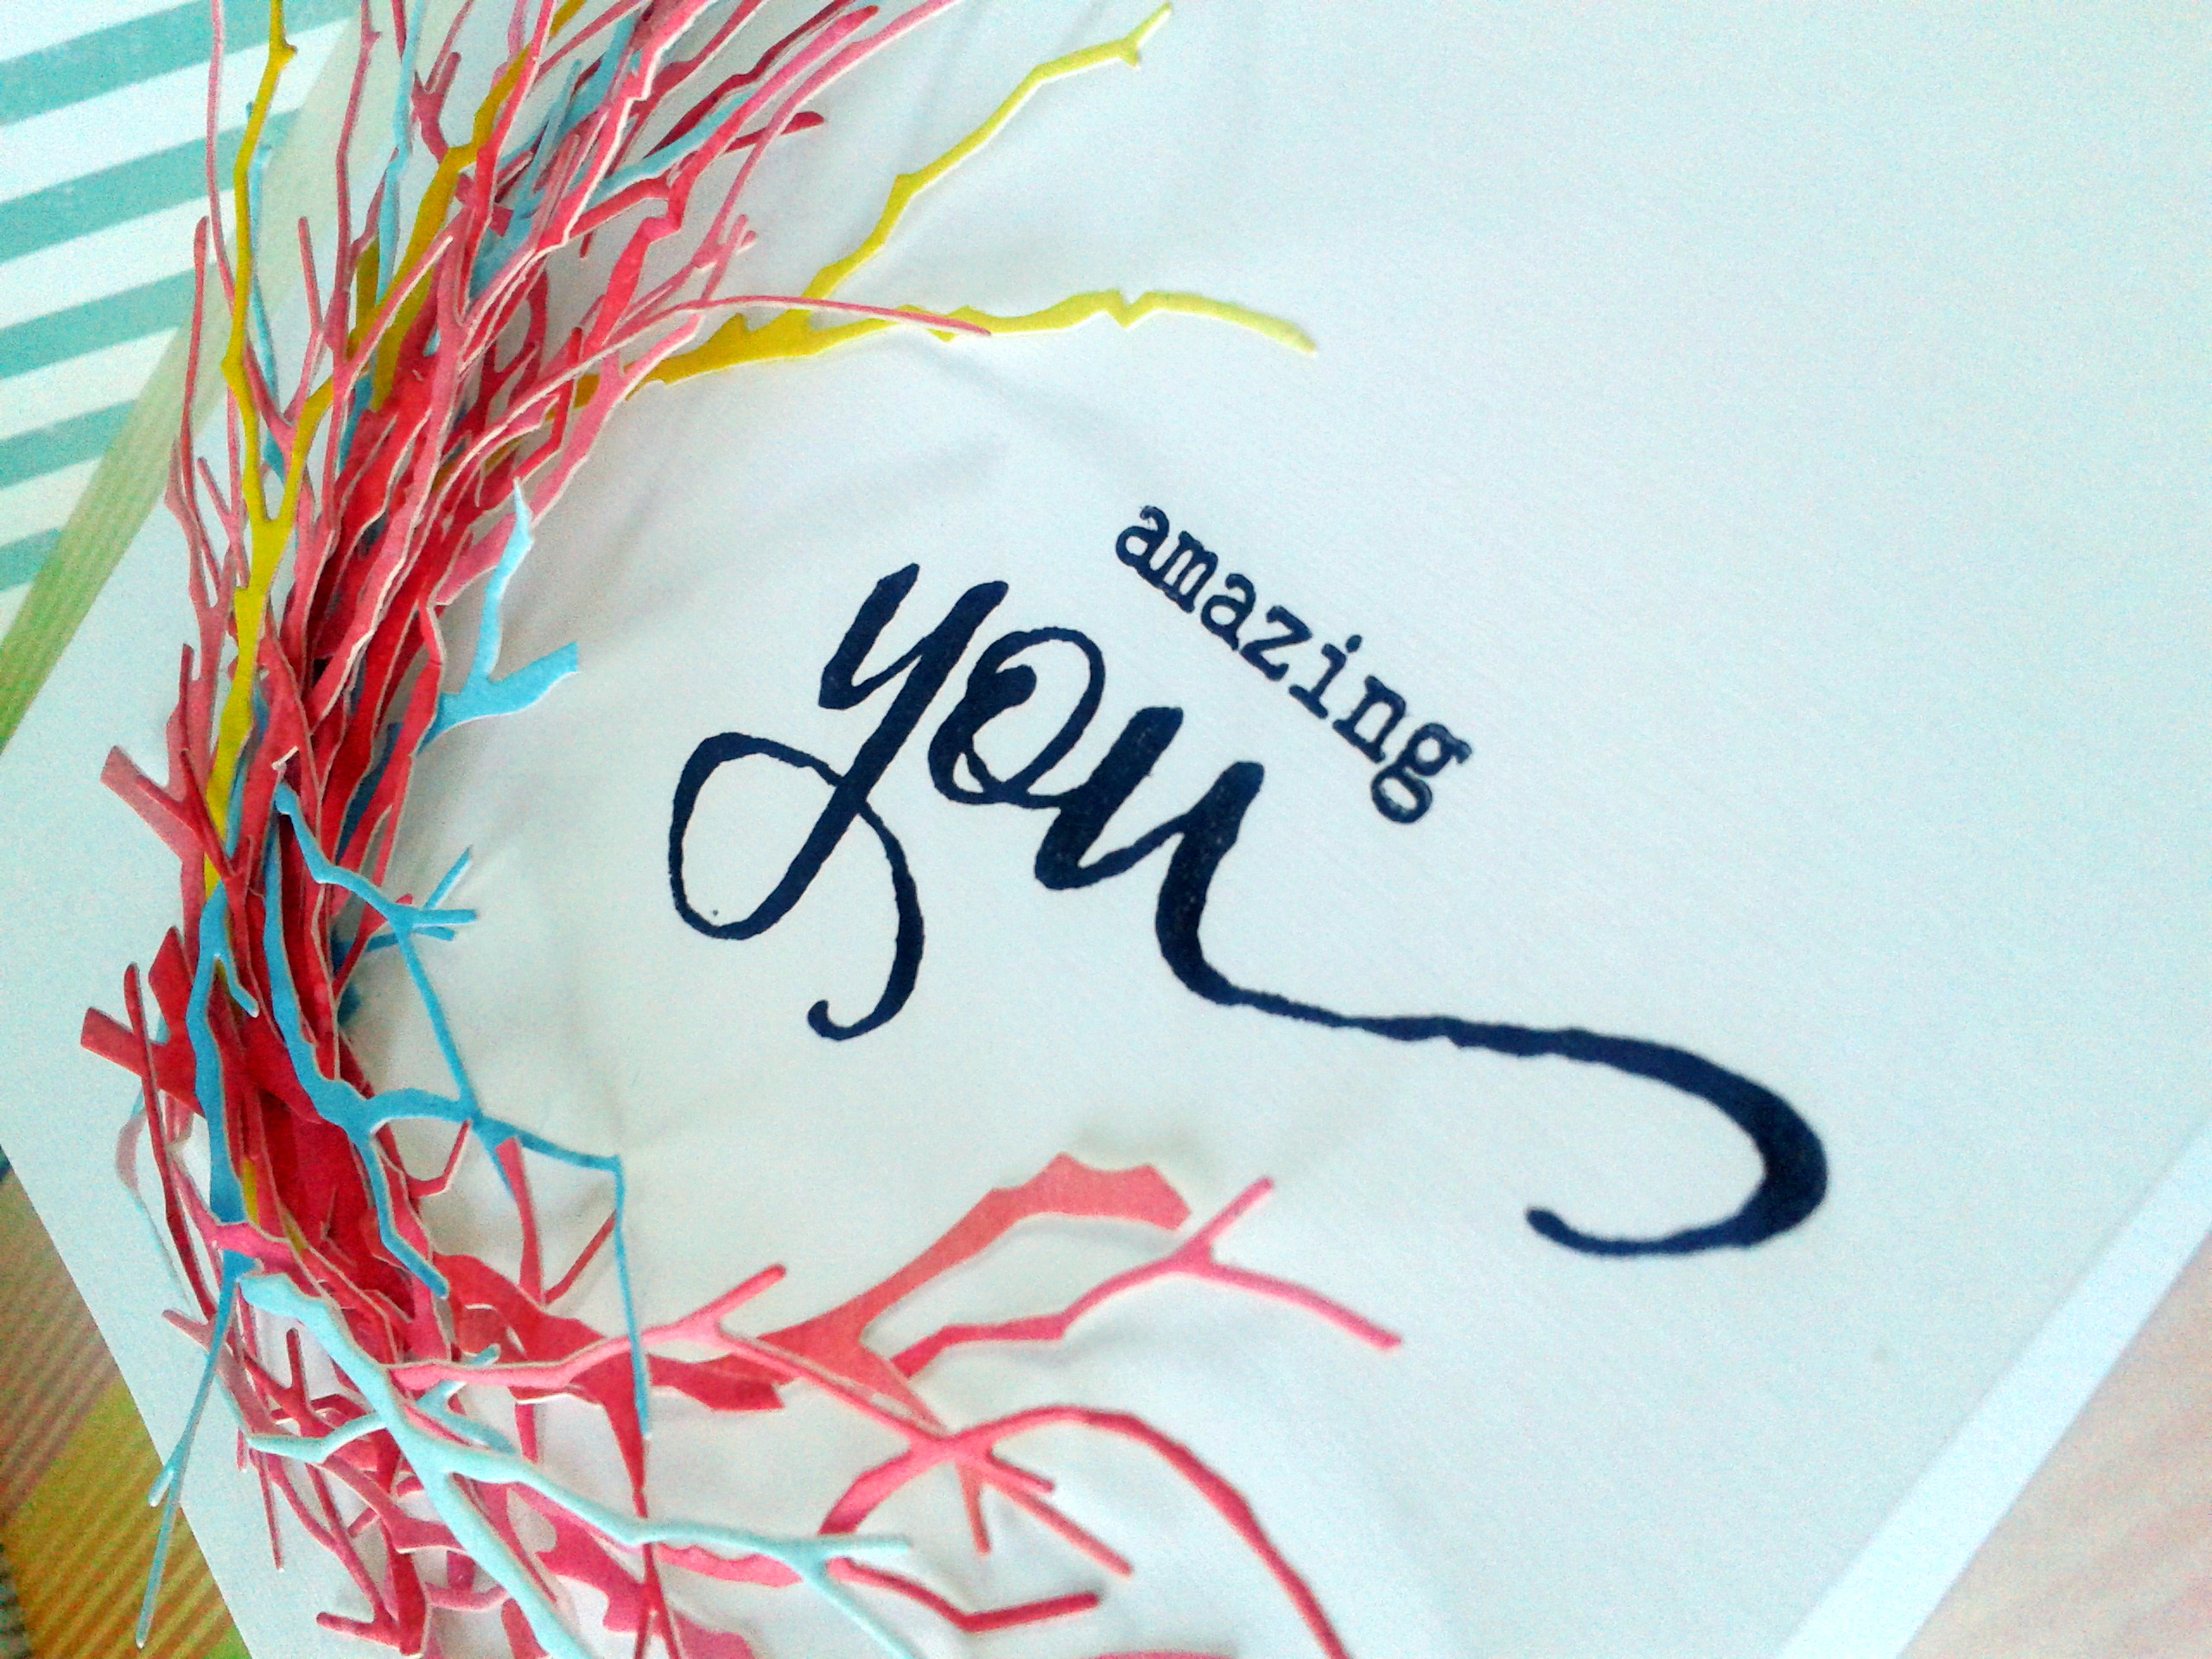
I first colored separate panels of watercolor paper with a water-color brush and Distress Inks and Stains. I saturated some areas for deep color and lightened others with water. I also flicked water onto parts of the panel for spotting. I wanted to create an ombre effect, which you can see more clearly in the close-ups.
After creating my pink, blue, purple, and yellow panels, I strategically cut many branches! I’ve been quite the die cutting machine lately with my recent cards! Flowers, circle, branches, oh my!
I then altered branches to get the desired shapes and sizes. Finally, I worked on placement, which took some time!
TIP: Take pictures of your stages, especially when working with a lot of large and small paper elements. This will aid your memory greatly and allow you to compare different arrangements.
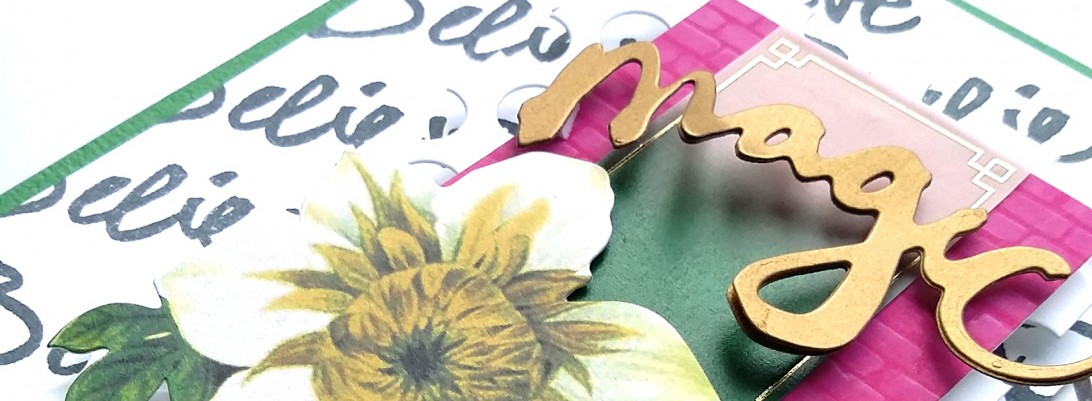
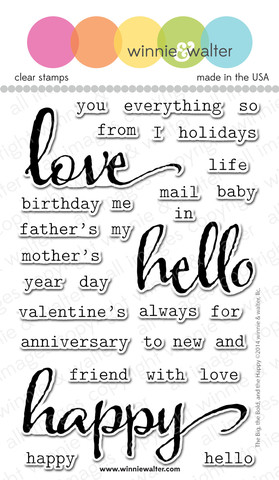
I was then ready to add that gorgeous sentiment from Winnie and Walter’s set The Big, Bold, and You. I absolutely cannot get enough of these fonts and the quality of the stamps is awesome. I just ordered their other set, The Big, Bold and Happy. I used Versafine Onyx Black, which is just as bold as the sentiment!
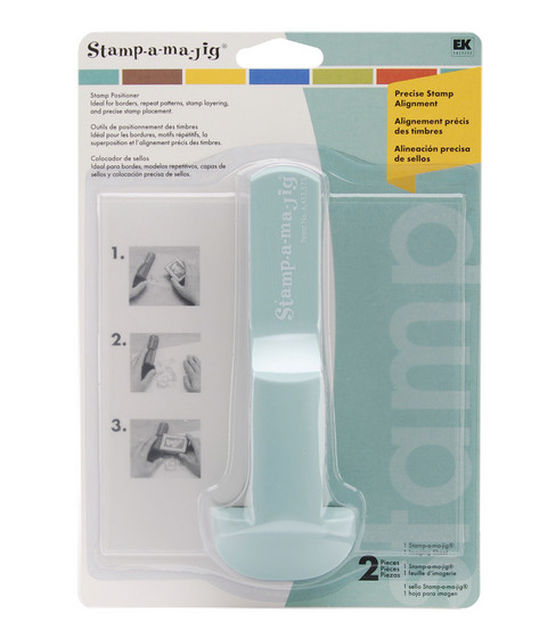
TIP: When working on placement of your font, use the Stamp-a-ma-jig and corresponding plastic sheet or stamp your sentiment on a scrap paper and position.
I absolutely love how the flow of the “you” follows that of the branches.
The inside and back are finished off with a simple strip of turquoise washi.
As some of you may know, CASE Study, run by the ever-inspirational artist, Chupa, is looking to expand its design team. I had the honor of guest designing in March and would love to continue creating alongside all of the talented ladies on the team.
Chupa asked applicants to create a project based on the work of a personal muse in the crafting industry and a style that would challenge us artistically. I have many muses in the crafting world to whom I turn time and again for inspiration– and they vary greatly in their styles. I will be featuring some of these individuals and the cards I created based on their inspiration in upcoming posts.
However, as a writer and paper crafter, I have always looked to the art world and popular culture for inspiration. So in this instance, while I am not CASE-ing any particular card artist, I was drawn to a compelling visual artist that inspired me to create a bold, modern, CAS-style card. I hope this will count!
If you would like to apply for a position on the CASE Study team, submit your entry by 4/30!
It is a gorgeous, cloudless day here on the beach, much like the afternoon when the idea for this card sprung to life!
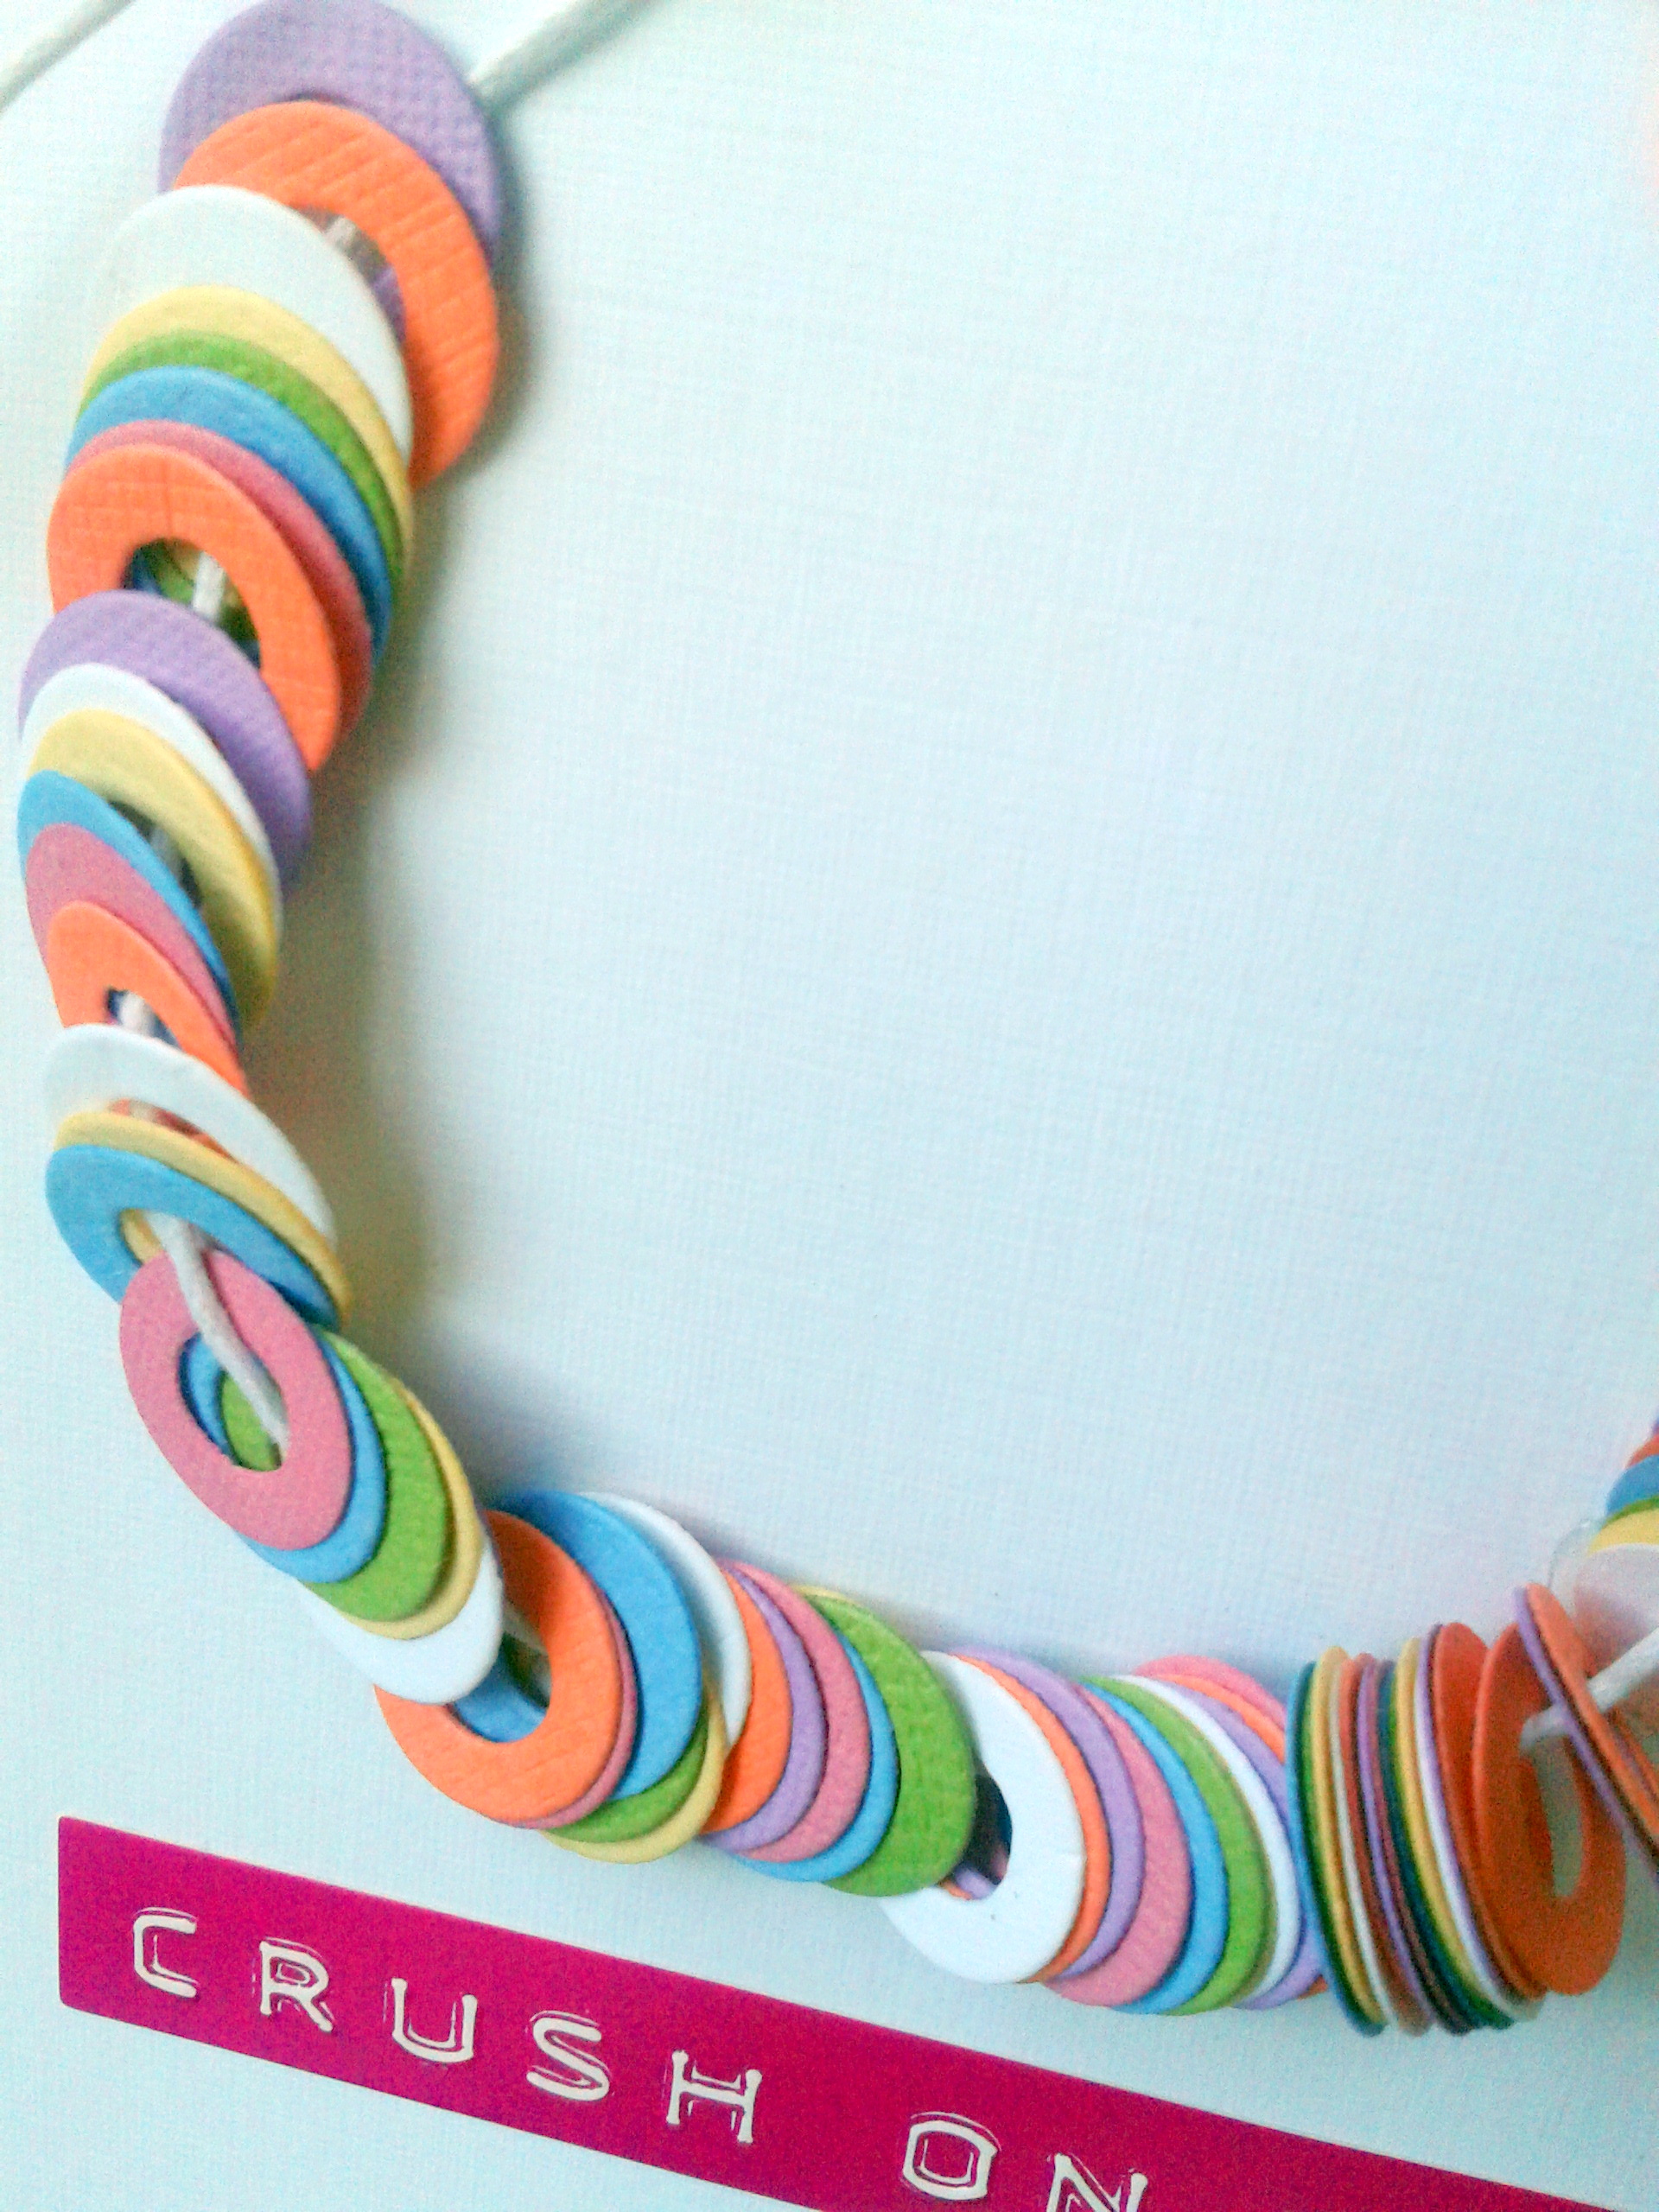
A few week’s ago, my partner and I were walking along the water and spotted a collection of candy necklaces just hanging from a post. How odd, and wasteful, (I still love candy necklaces!) that someone would have left five uneaten strands there! Then my partner said, “You should make a card like that.” I started thinking about how I would execute it, but I only had time to think until today.
Candy Necklaces were invented in 1958; click the image for an article on vintage candy favorites that are still around today!
Now before I get to the actual card, I must relay a bit of synchronicity. I played along with Fusion last week, and Kimberly told me that I would really love this week’s challenge. Sure enough, she was right, as it aligned perfectly with my candy necklace idea!!
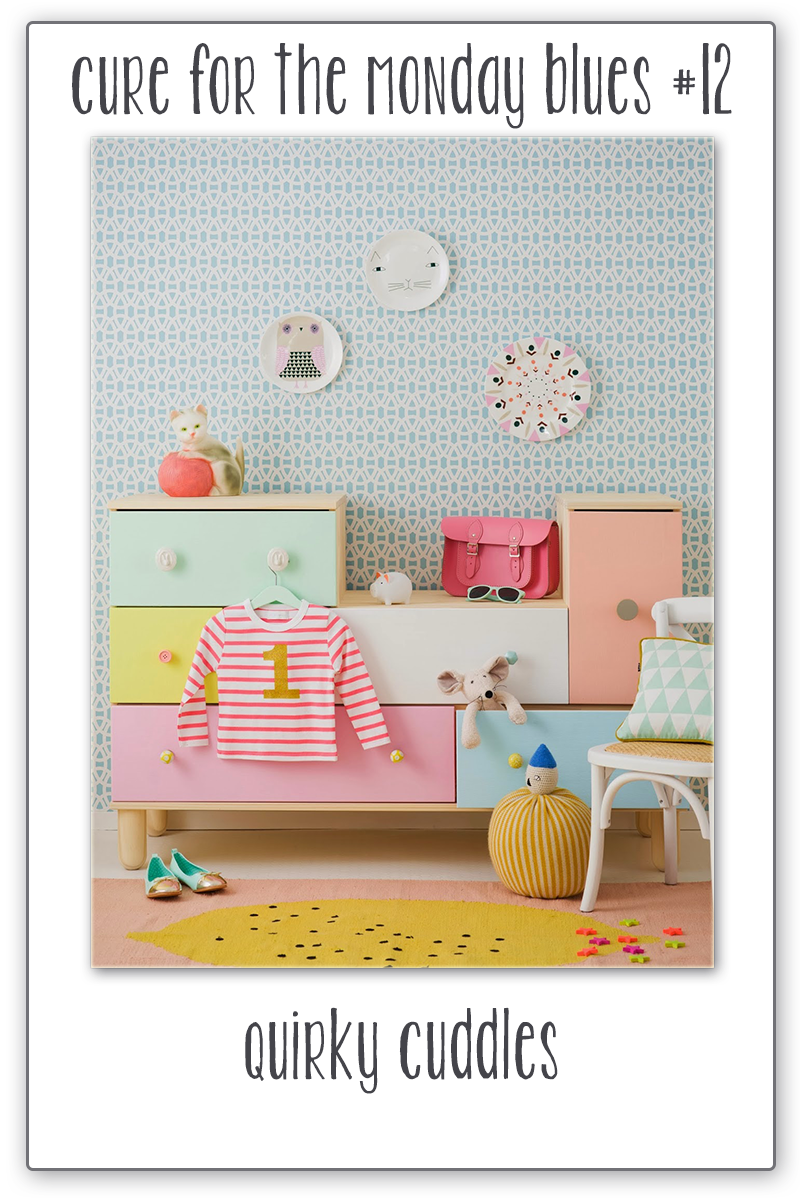
So today I was able to finally fuse together that moment on the beach and the inspiration below! I was also thinking about the colors in Taheerah’s Cure for the Monday Blues challenge photo–for which I have another card slated, but potentially won’t finish in time…additionally, her photo conveys the soft, sweet dreaminess of childhood so it connects perfectly to one of my favorite candies from youth!
So here is this week’s Fusion image:
And Taheerah’s image:
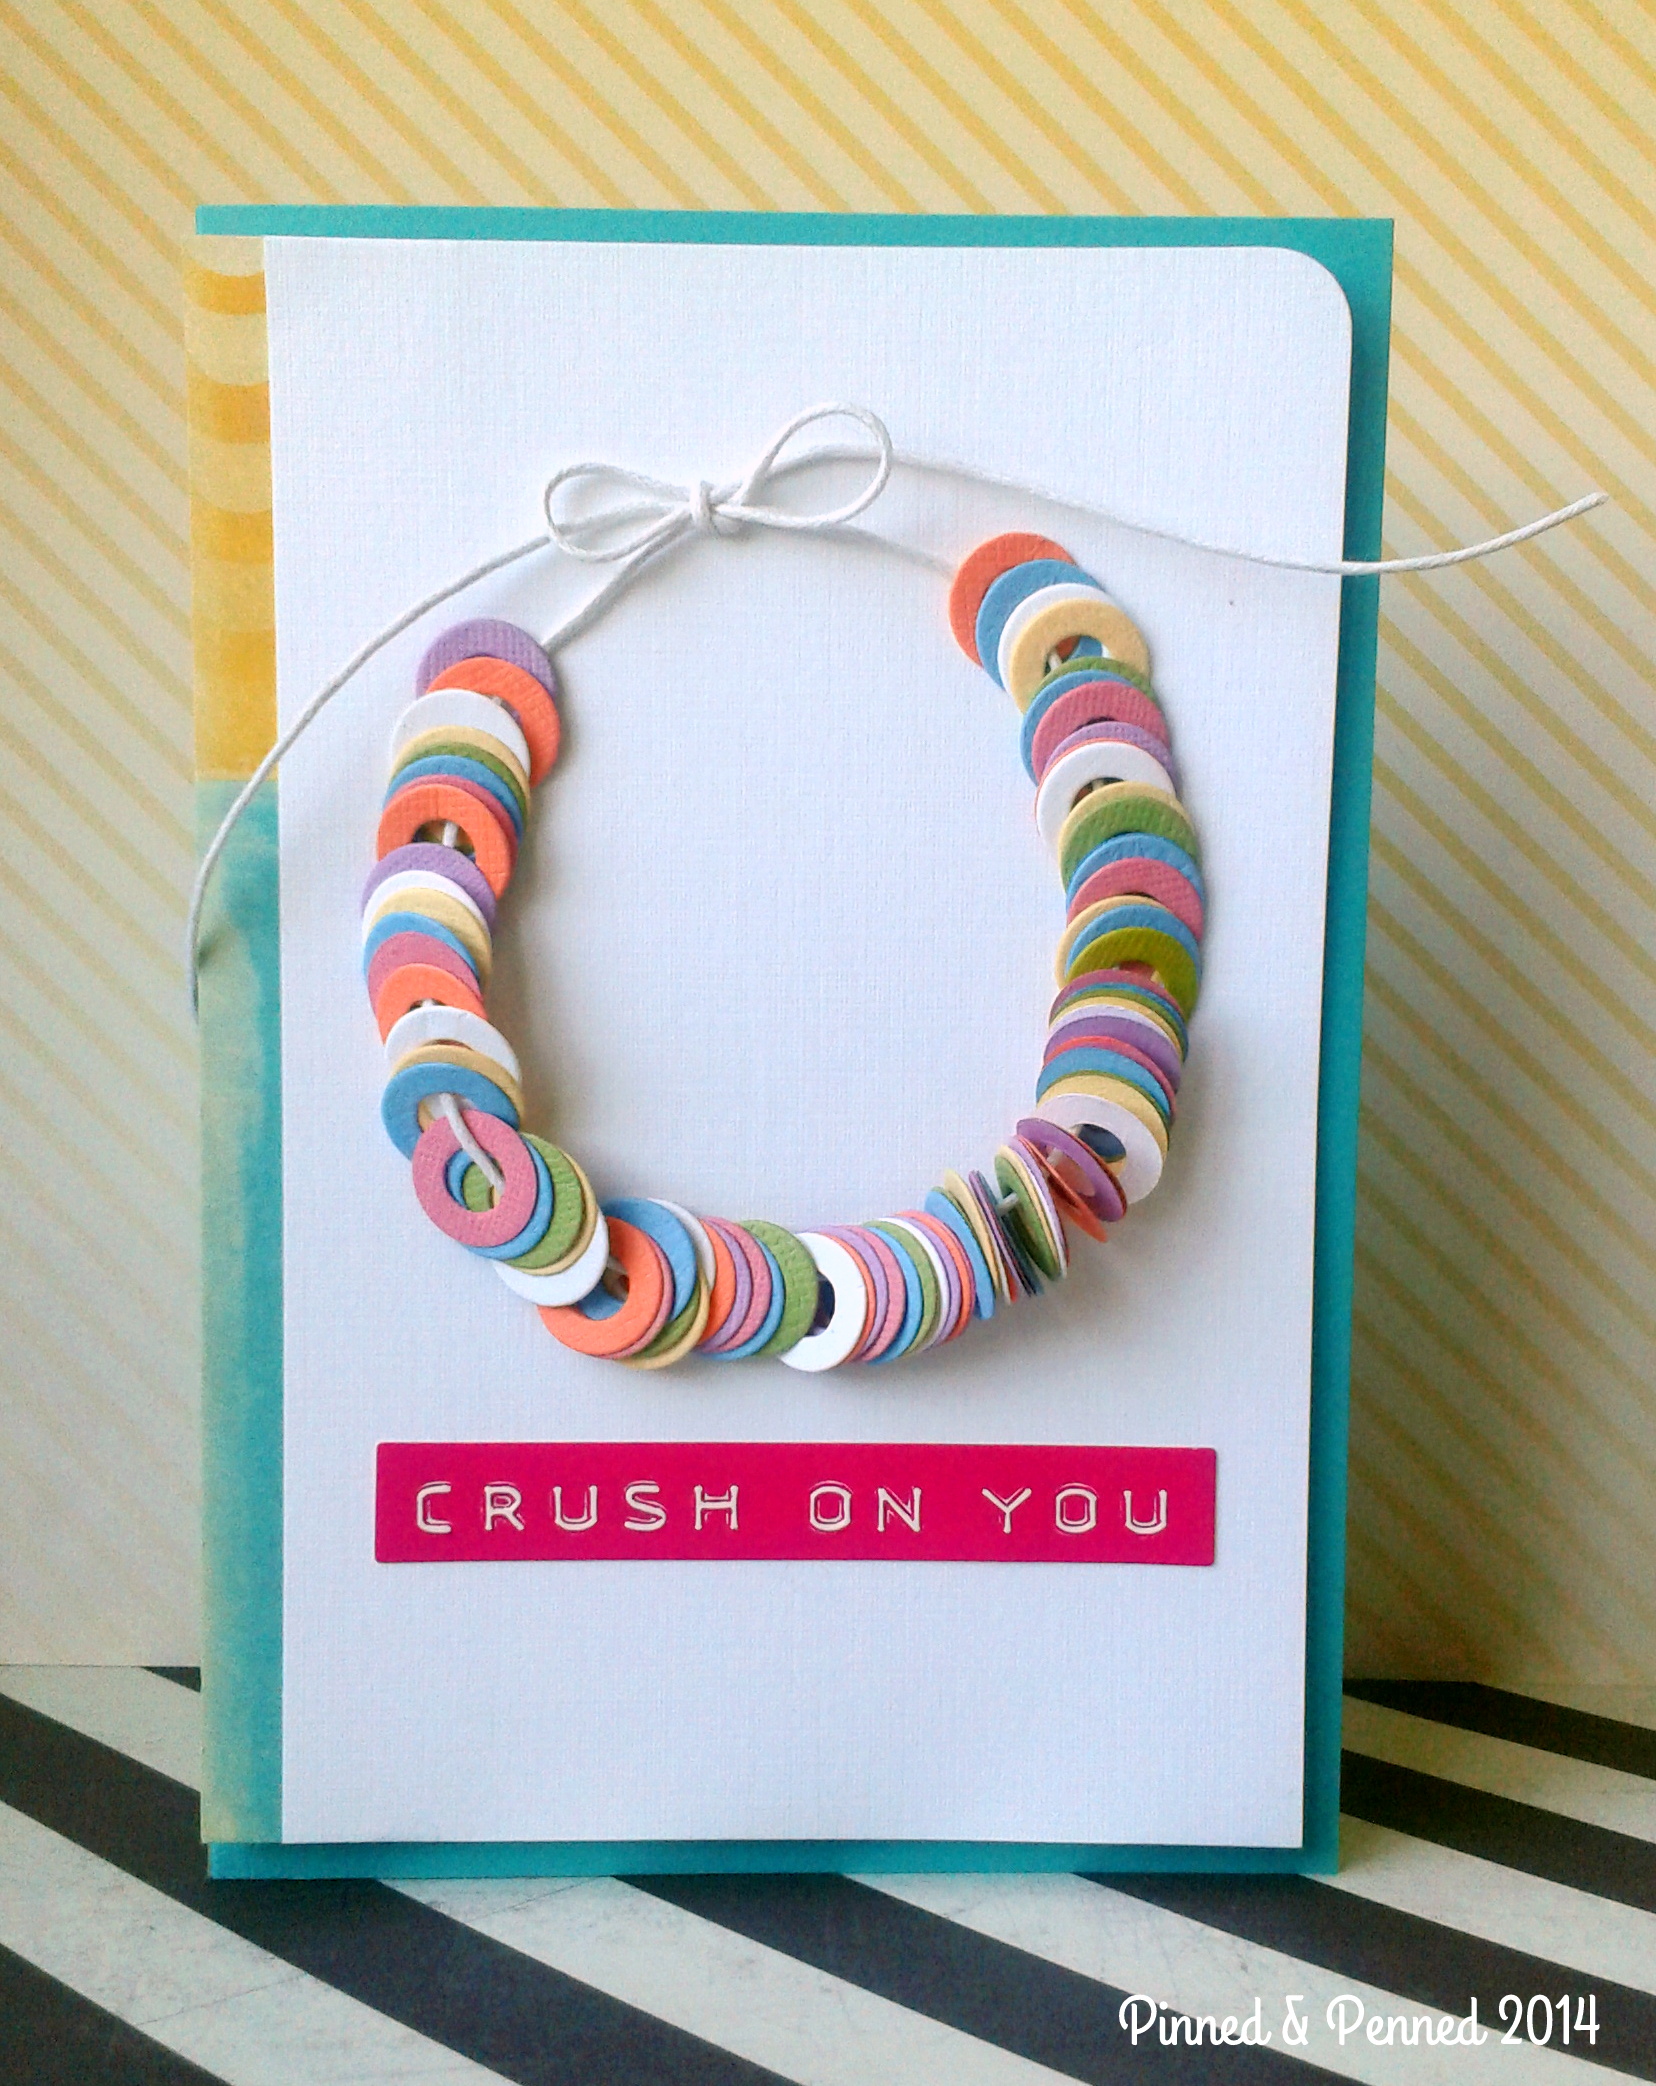
And here is my sweet card:
Before I saw the photo, I knew I wanted to stay pretty faithful to the powdery soft colors of the original candy necklace, so they just happened to align perfectly with the softness of the pastel rose garland. I decided not to fill the whole necklace with “candy” and left a bow at the top for interest; it also echoes the bow within the garland.
I pulled the blue tablecloths in the photo into my side panel, a scrap paper from a discount pack. Initially, I thought I would use the white linen for both the card body and front panel; but decided to go with the turquoise. It was only when I turned the Bazzill paper over to cut it did I notice that the color of the paper is… Candy Necklace!! Another fusion!! I had to read it twice to believe my eyes. This paper is so delicious in terms of weight and color, I don’t even think you can get the full impact from my photos. It’s from Bazzill’s “Green with Envy” set of papers.
PROCESS:
Okay, so how did I execute my little “candies” and their placement? I immediately thought of Avery Elle’s Simply Tags set when I saw the real necklaces. The little circle die was a perfect, if not tedious, choice! I cut 12-15 of each color. And I only have one of those little circles…
At any rate, once I had finally finished die cutting, I got to thinking about how I would be able to adhere the necklace while giving it dimension and interest, but making sure it stayed on the card and the adhesive would not be seen!!
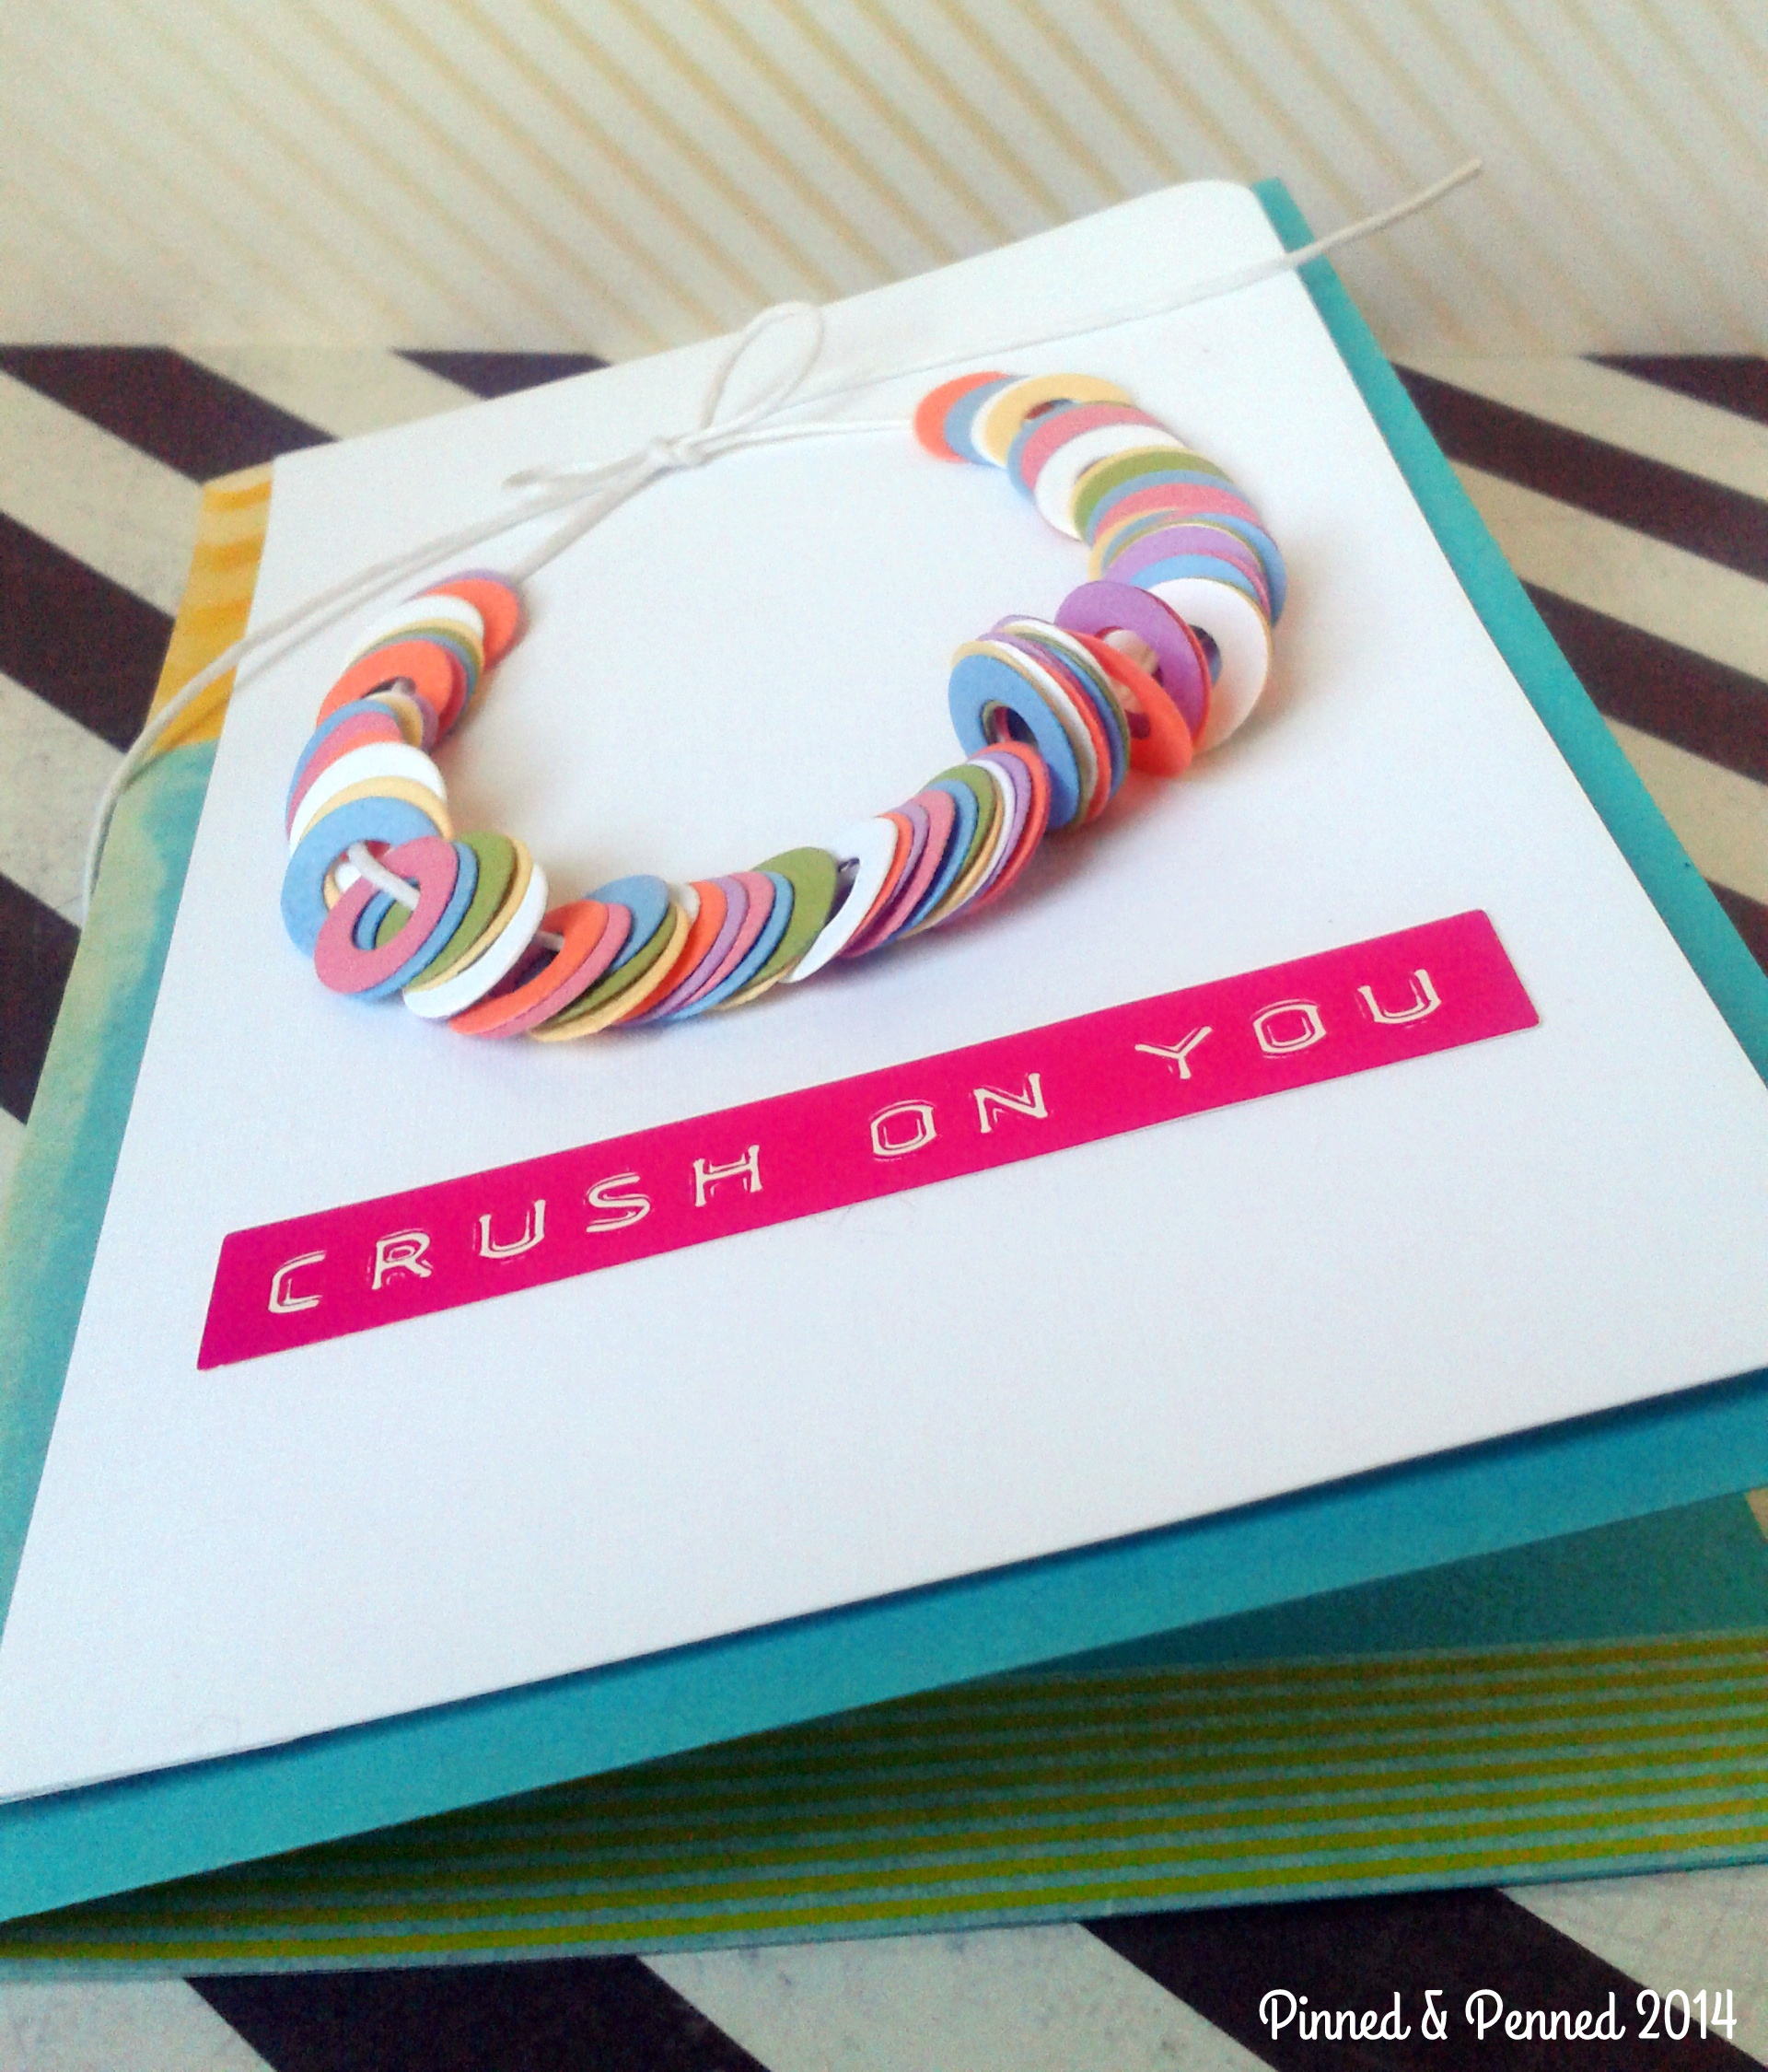
I used a combination of Mod-Podge and Scotch ultra-thin glue dots. The glue dots anchored certain parts, while I was able to manipulate other areas easily using the Mod-Podge.
I wanted some of the pieces to move, so I anchored those on either end of the loose ones. In the photo below you can see the texture of the papers I used, and the standing pieces are moveable.
The back and inside are finished off with yellow washi– I love how the striped back of the front panel peeks through just a little!
Last but not least, I needed a sentiment. I had planned to stamp a bold black “sweet” on the front originally, then my eye wandered over to the American Crafts Valentine Phrase Stickers I had bought waaaaay back in February at Target for some valentines that never materialized. Another moment in this process where stars aligned. And a card was born!
To be honest, I am crushing pretty hard on this card! What about you?
You have until the 22nd to play along with the challenge at Fusion, and only hours until Taheerah’s challenge runs out. But don’t worry– she’ll be back with more on Monday!
Since Simon’s Challenge this week is all about sweets, I am going to send this card right over there as well! A triple-header!
Wishing you crafty time full of flow and sweet serendipity this weekend!
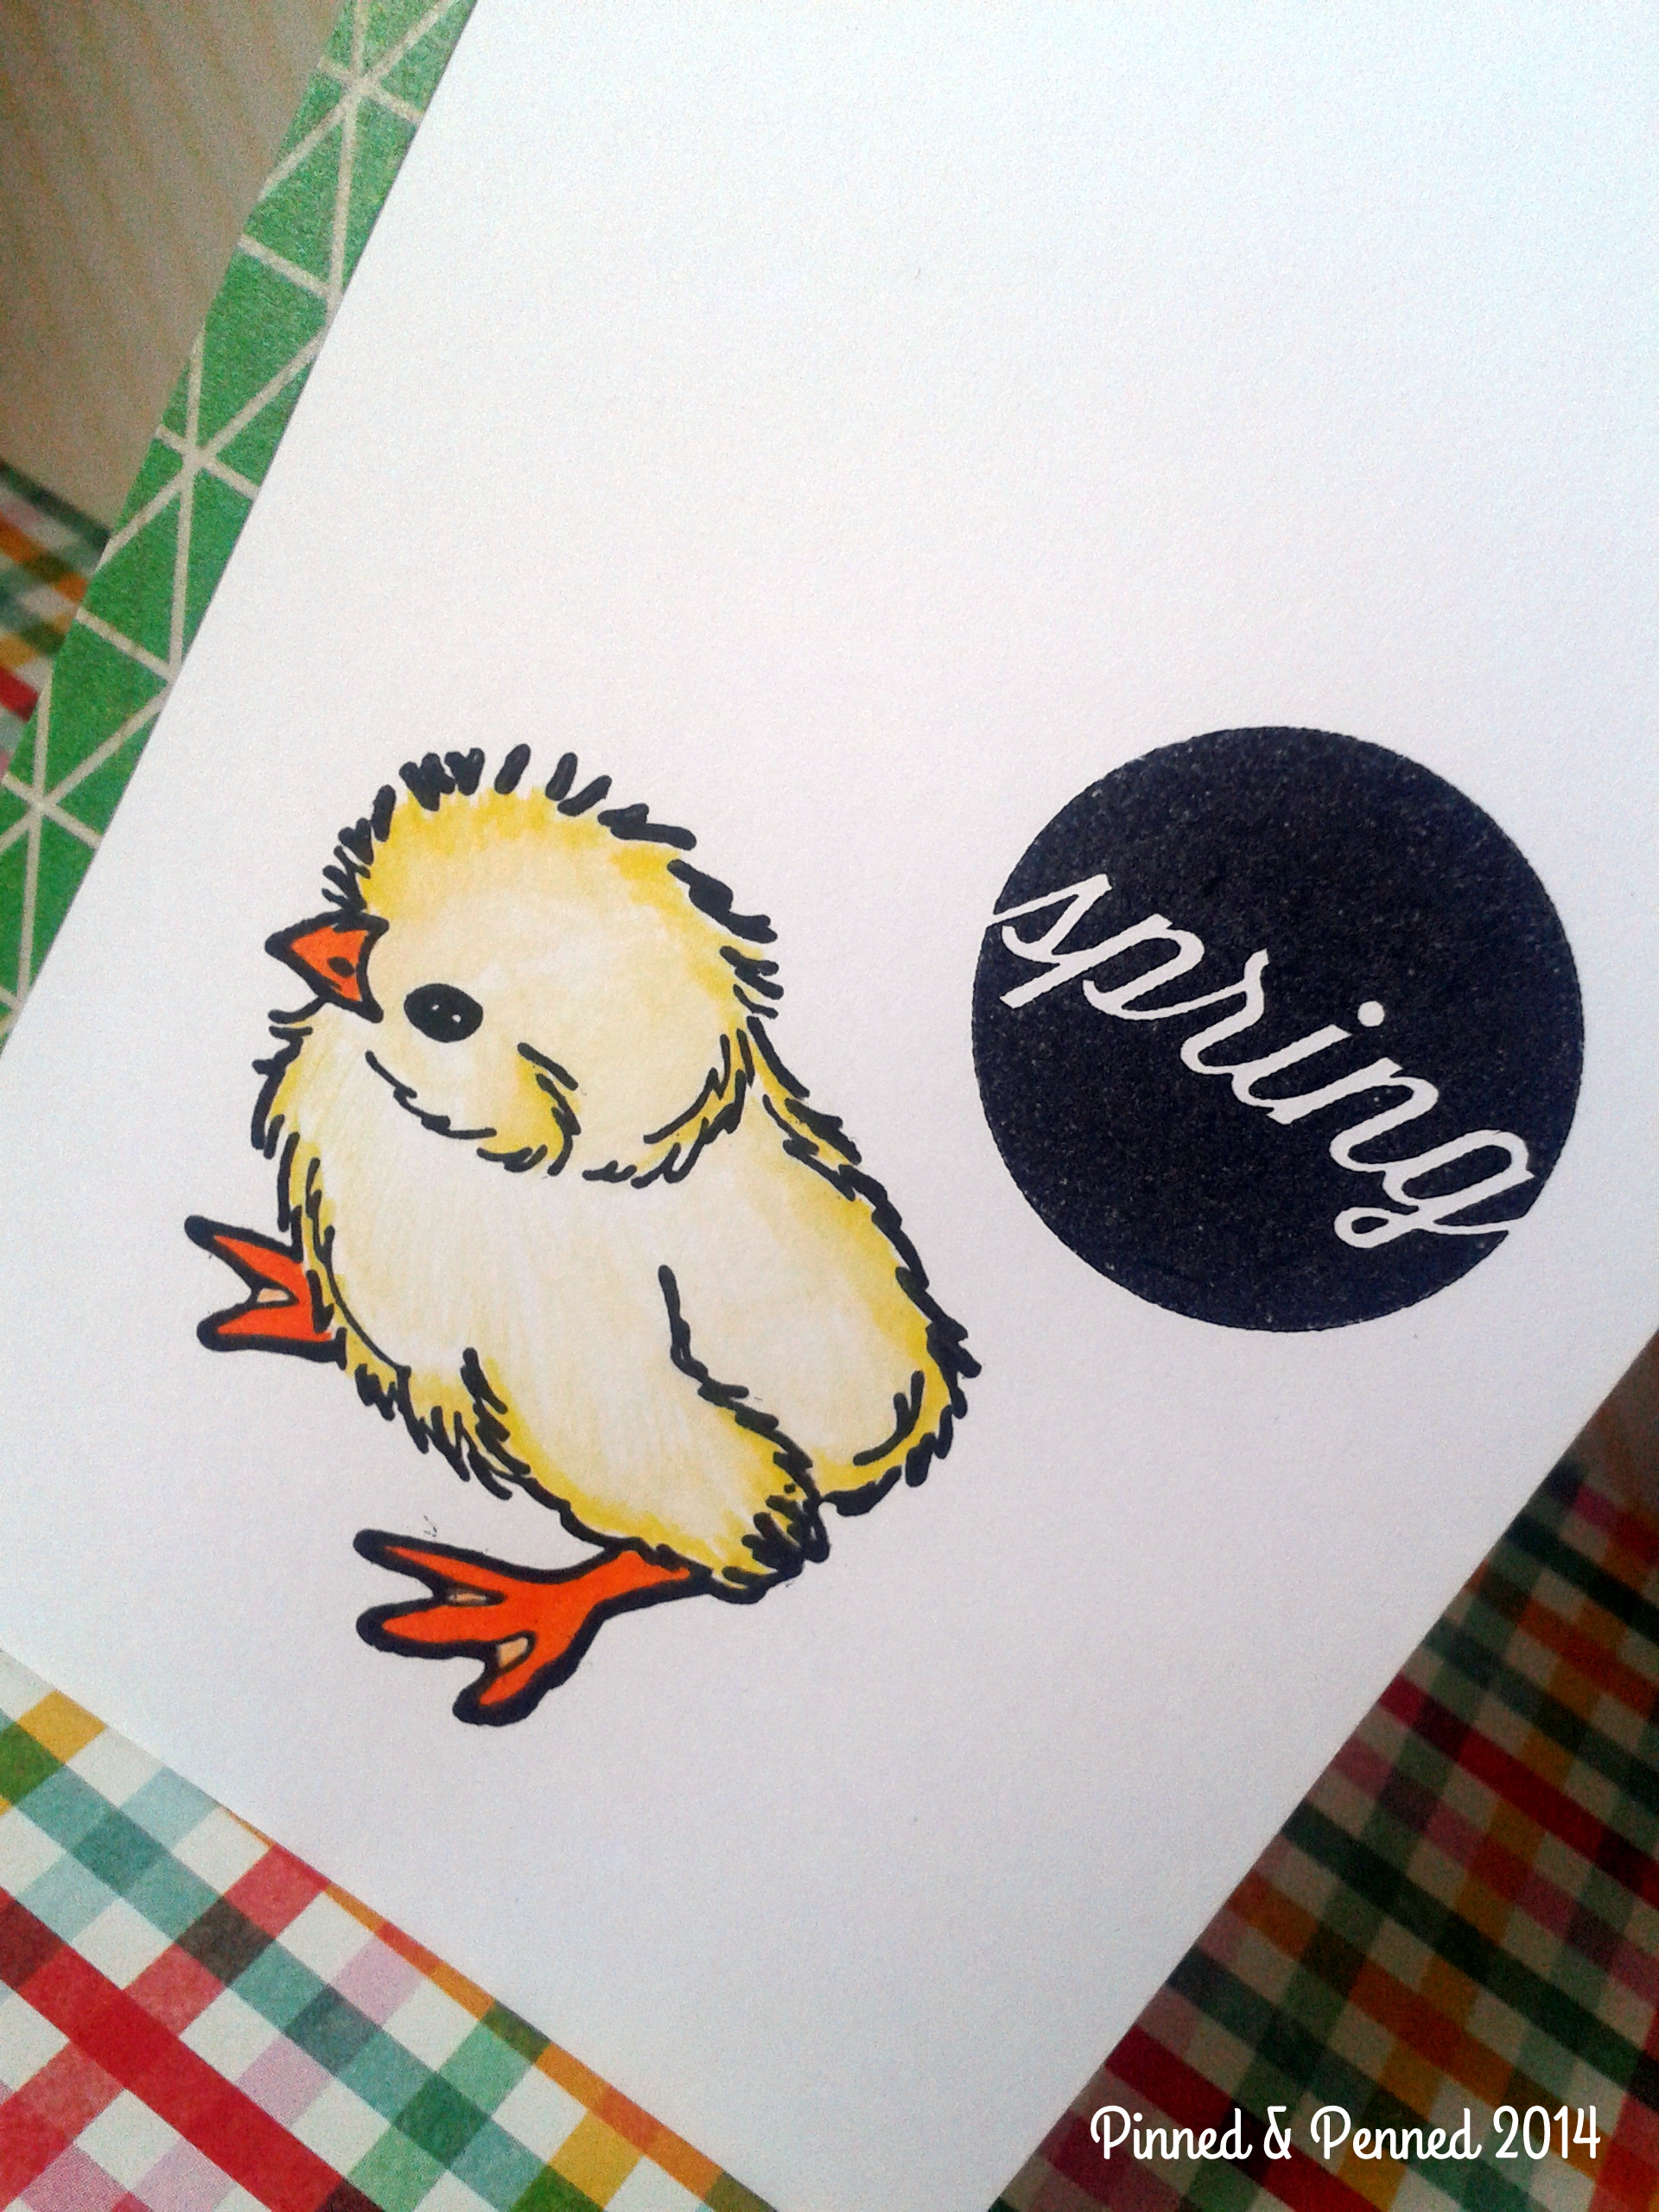
Happy Friday, everyone! We are one week into spring and look what just hatched!
Isn’t he just adorable? This little chick from Deep Red Stamps has been dying to break through (along with about a million other stamps and ideas!) for months now! I absolutely love the rich, vintage images of Deep Red Stamps, and featured a few of them in recent posts here. The rest are awaiting their big break!
So, a couple weeks ago, I stamped this little guy onto a variety of papers and played with coloring techniques from Copics, to Distress inking, and watercoloring with pencils and Gelatos.
Of all the techniques, I really liked the combination of pencils and gelatos for a more realistic look.
In the image above, I used Staedtler Watercolor pencils in two yellows for his body, and two orange Gelatos for his feet and beak. The pencils are perfect for this particular image, as I can get some texture from the dry application and more intensity and smooth blending when using with water. For his feet and beak, though, I preferred the orange intensity, coverage, and creaminess of the Gelatos, which are fairly new to me
Since I was using watercoloring, he was stamped in Versafine black oil-based ink.
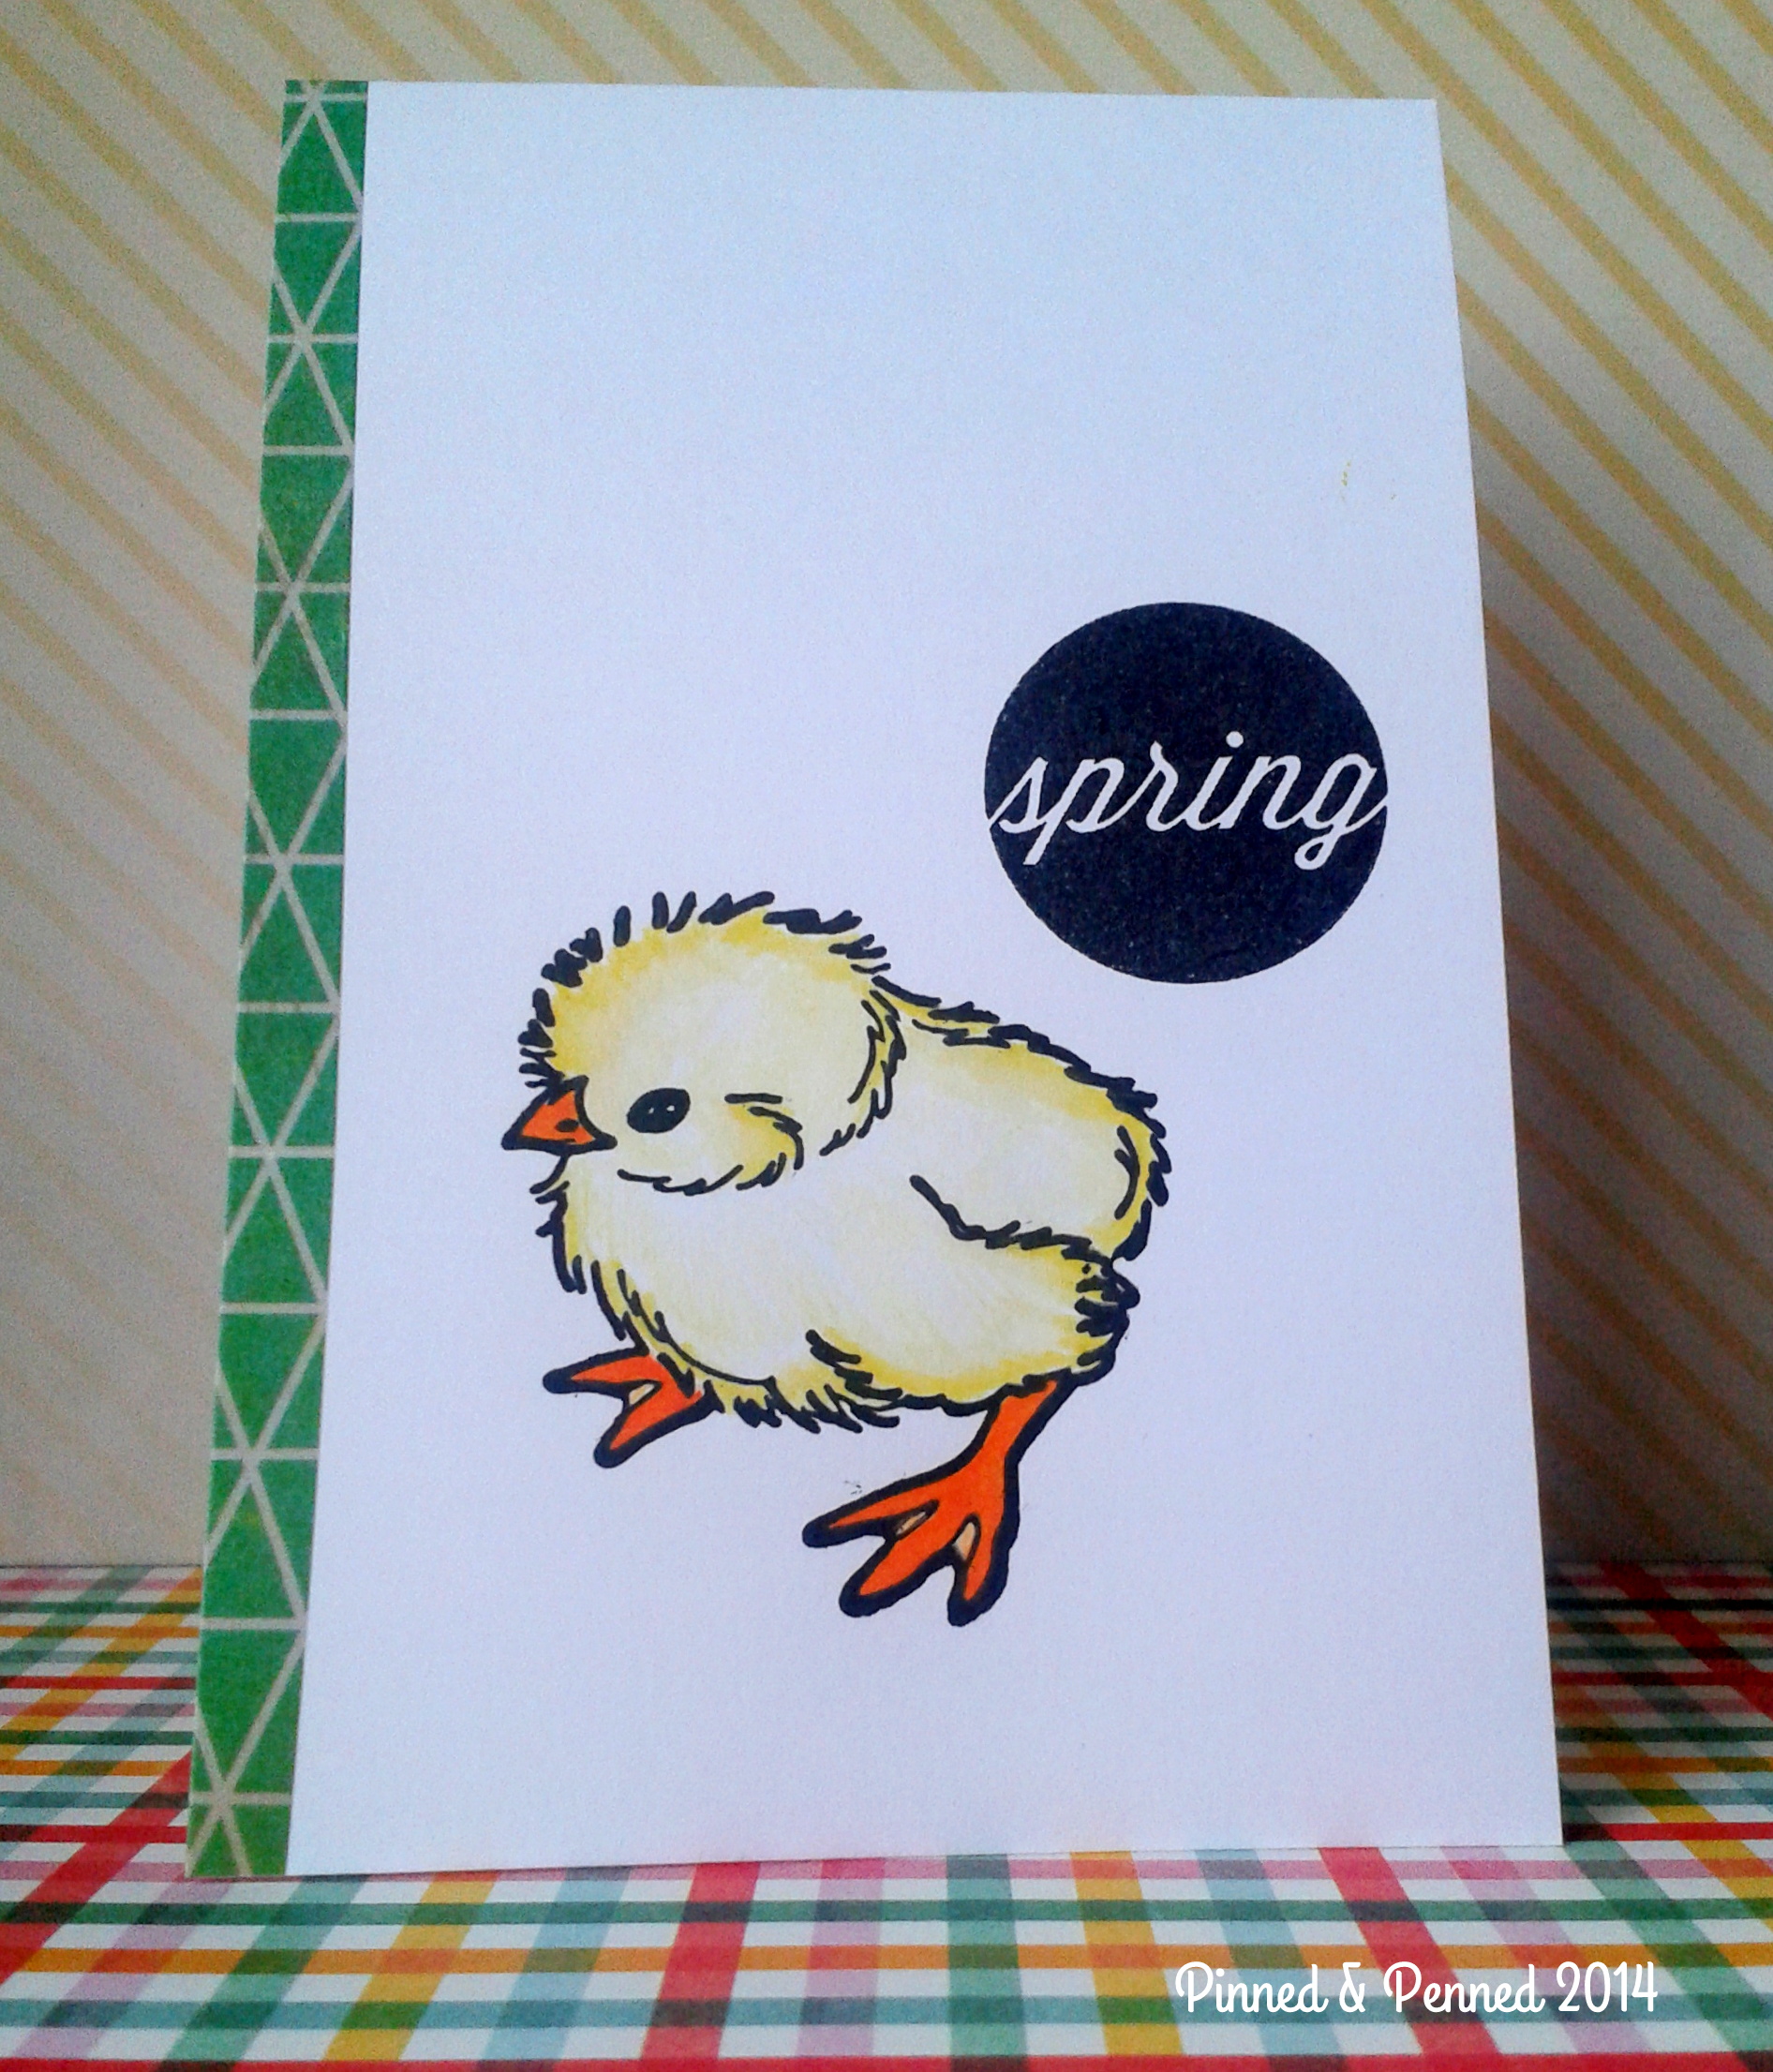
He could use a little more blending, but I was not using watercolor paper or heavy stock, and this was a trial run on the Neenah Solar White 80lb scrap I was using, so I did could not overly saturate or color as the paper would bleed and pill.
My new PTI set Monthly Moments: March just arrived this week, and I immediately knew I wanted to use that Spring bubble with the chick.
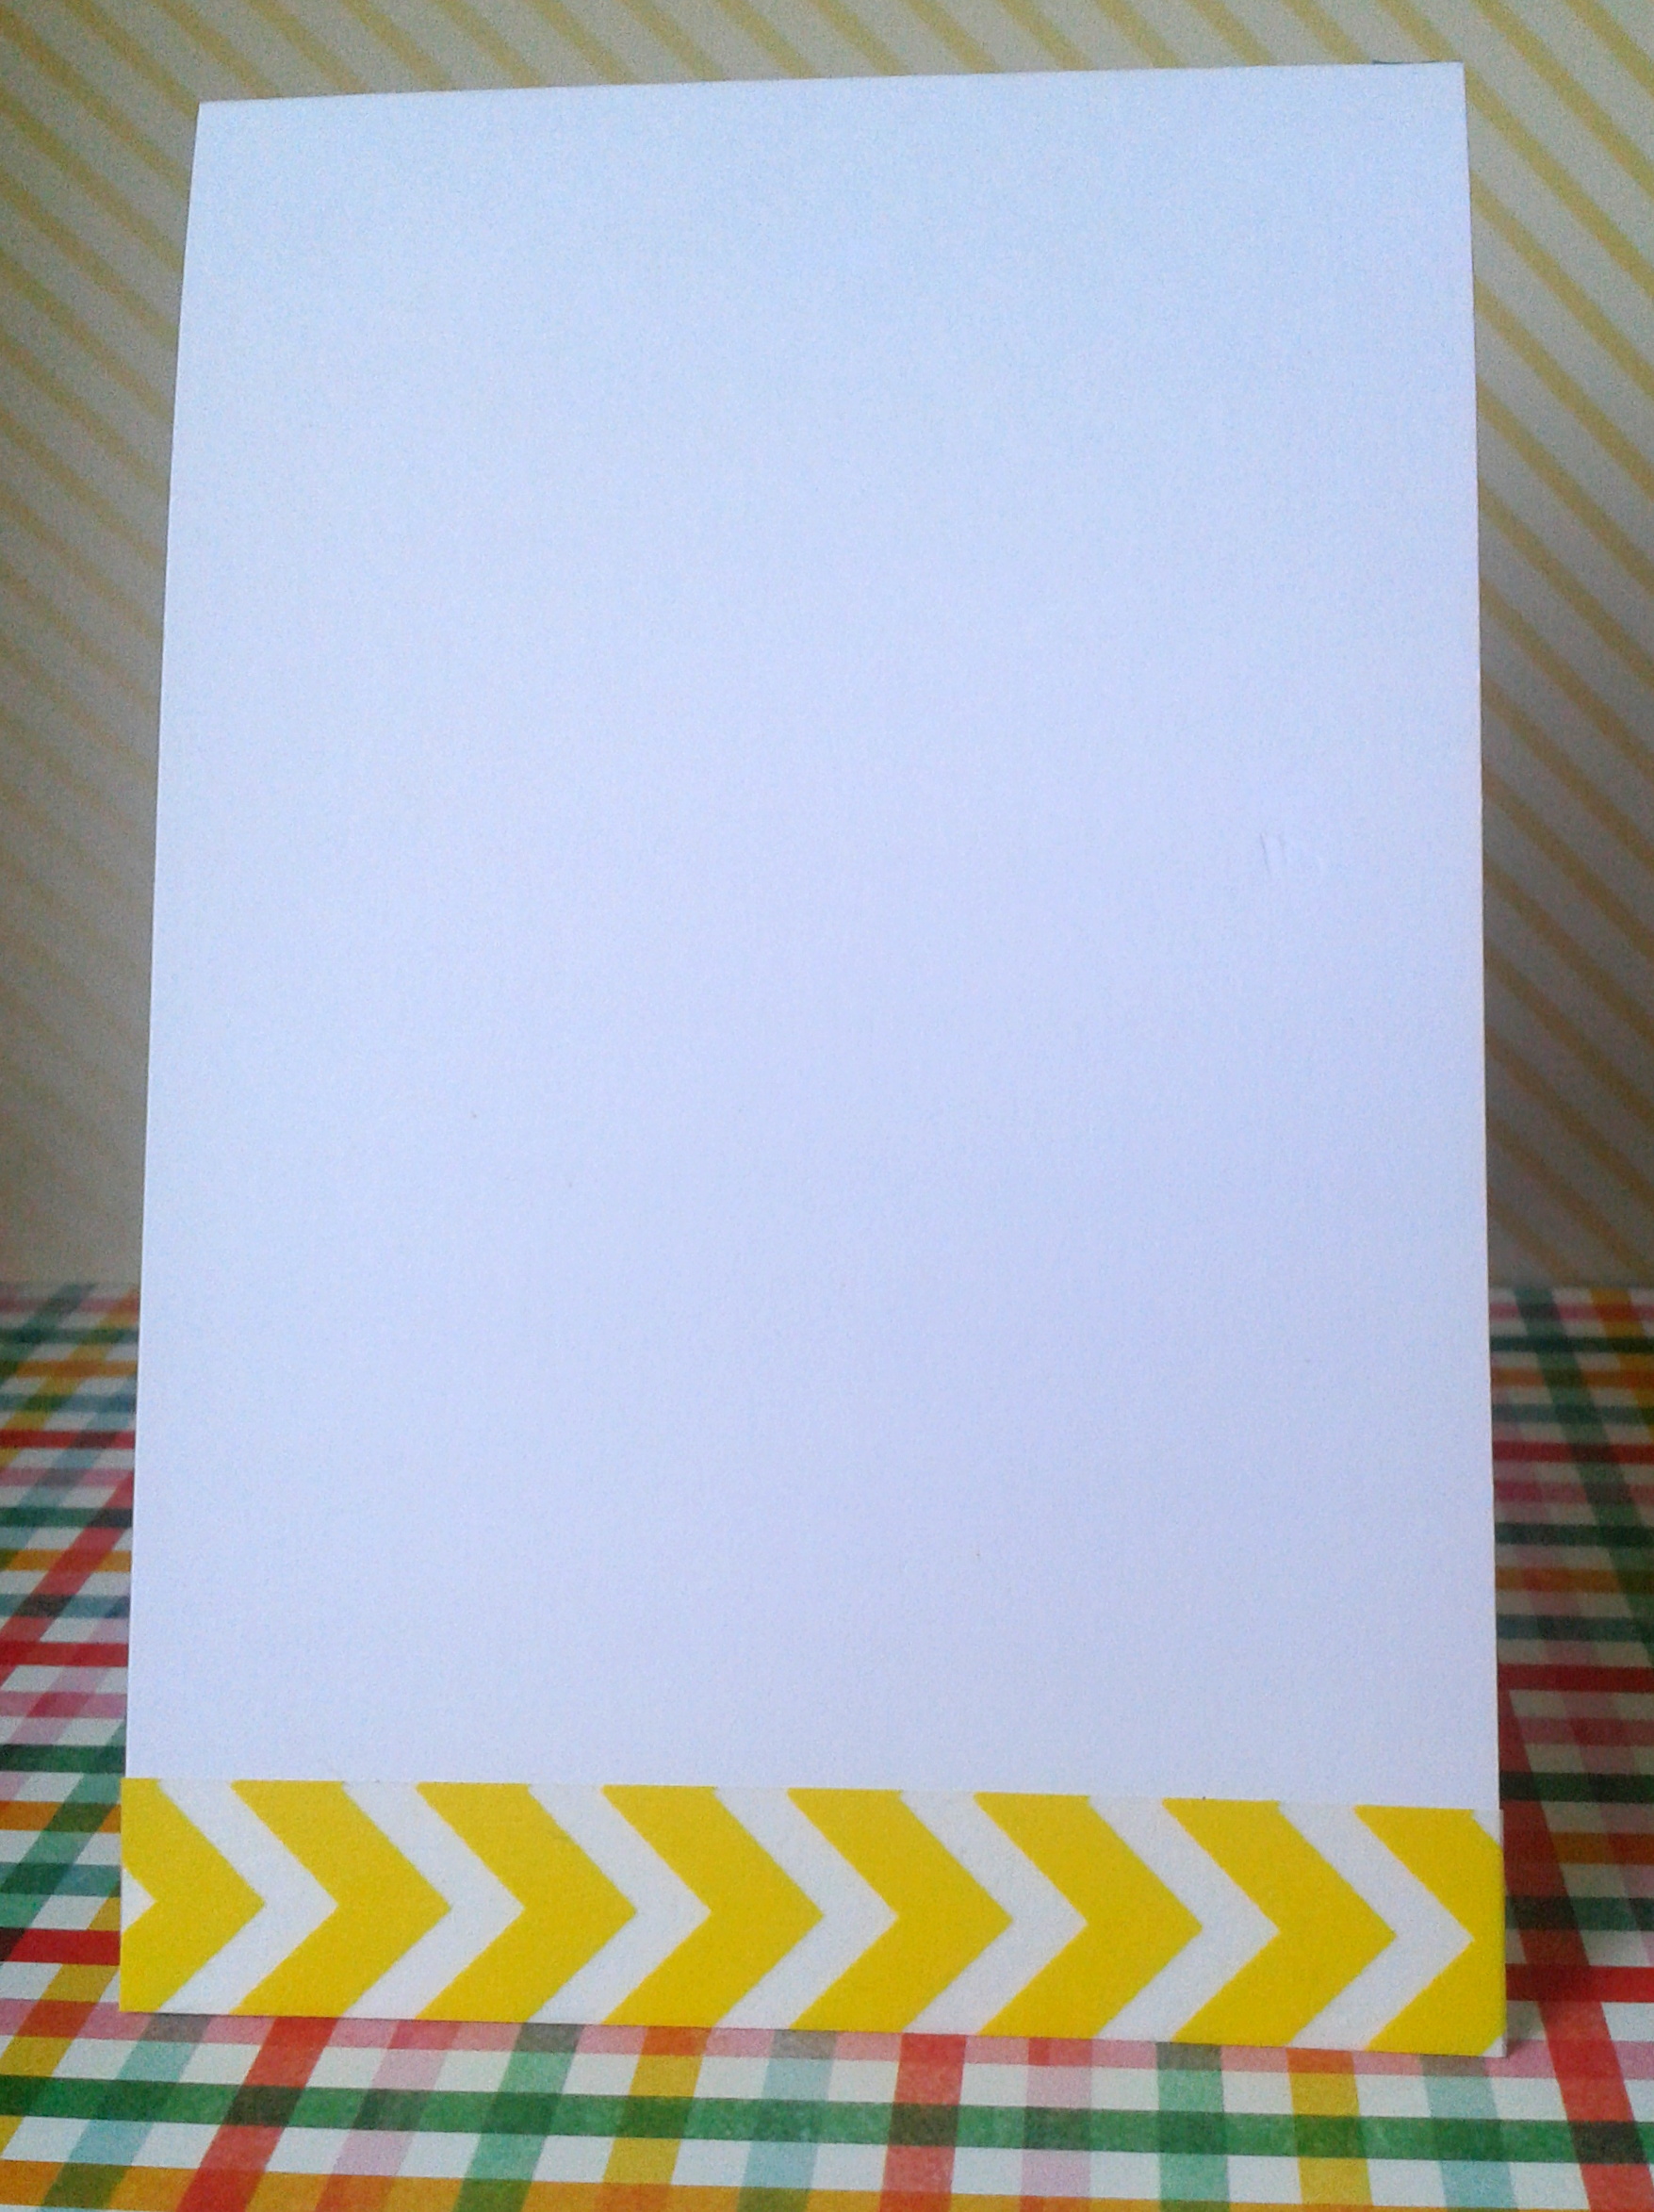
I finished off the edge with Crate Paper DIY Shoppe adhesive paper and the back with some washi.
And ta-da, a very simple one-layer card. He’s headed over to and CAS-ual Friday’s Good Egg since he’s so clean and simple and such a good egg!! 🙂
THE NEXT VERSION
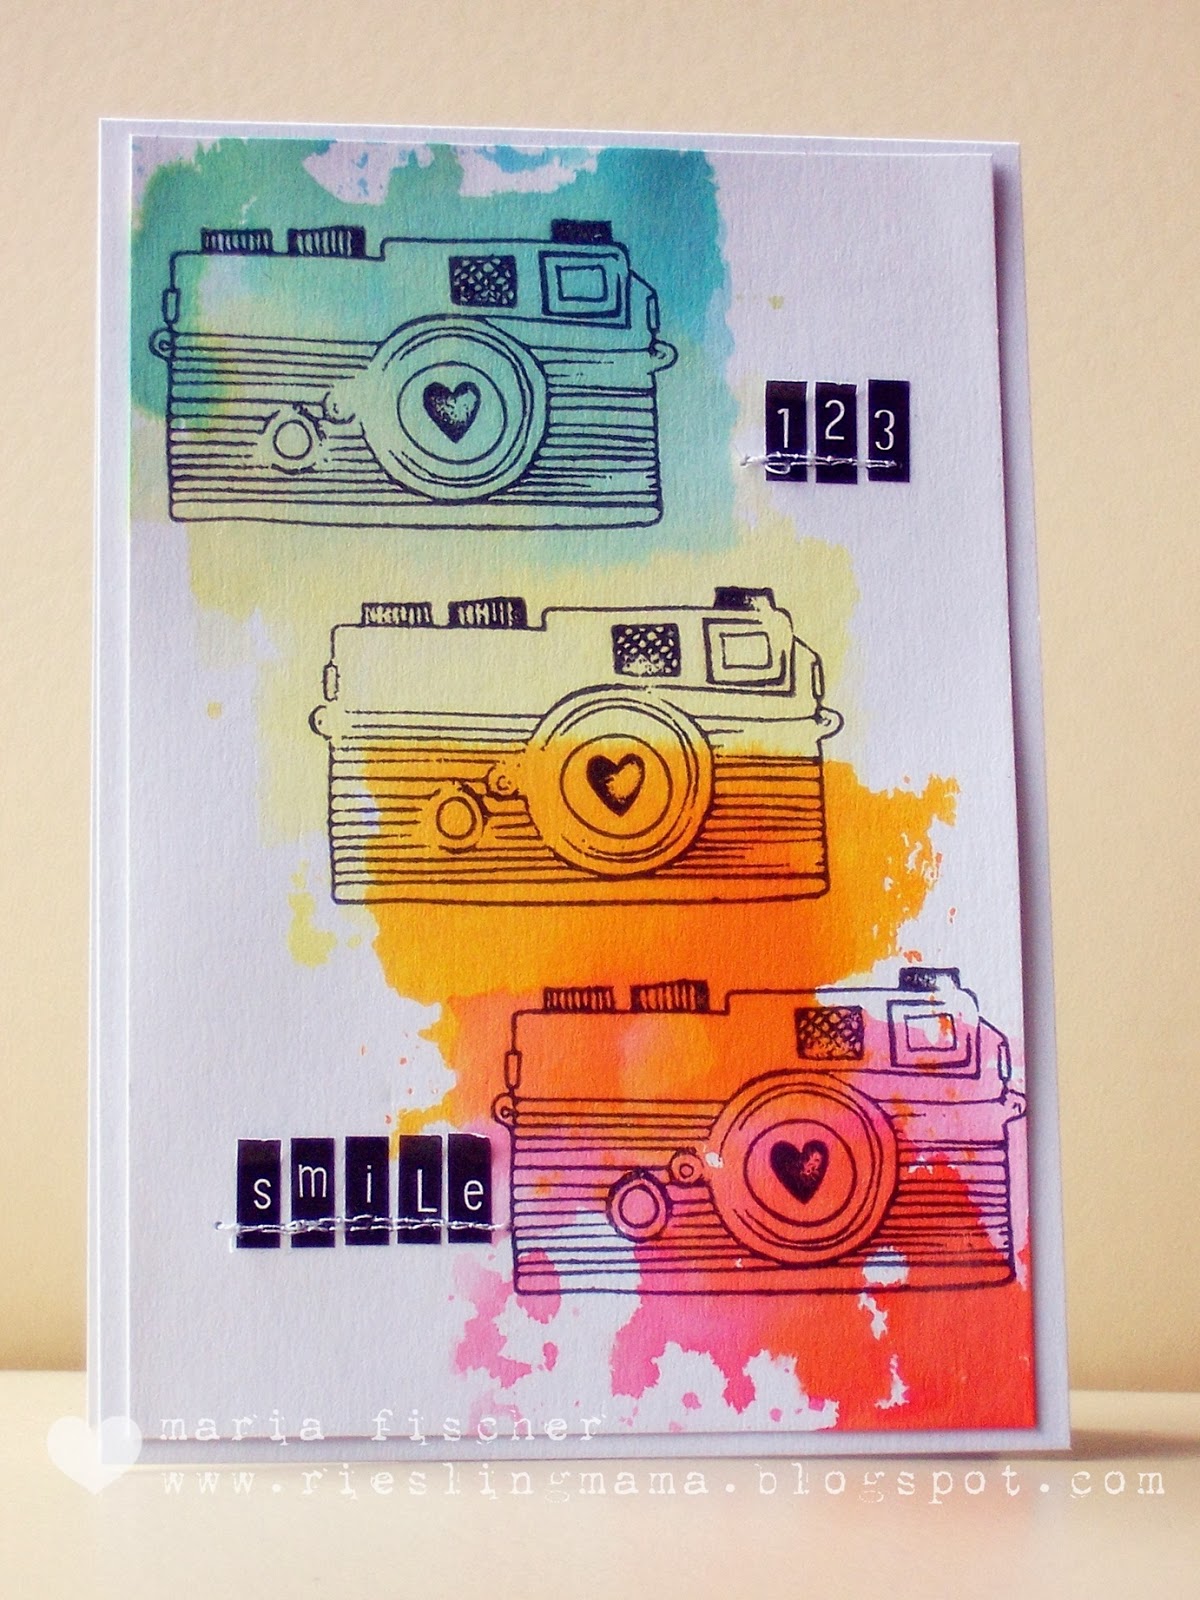
Now this one was designed with a few purposes in mind, one of which being Maria of Riesling Mama, who just had a birthday! I was very much thinking of her aesthetic and personality when approaching both of these cards.
She used a technique for one of her cards where she took Distress Ink, rubbed it on an acrylic block, spritzed and applied to cardstock. No stamp involved! You can check her post out here.
Here’s her super cool card featuring the technique.
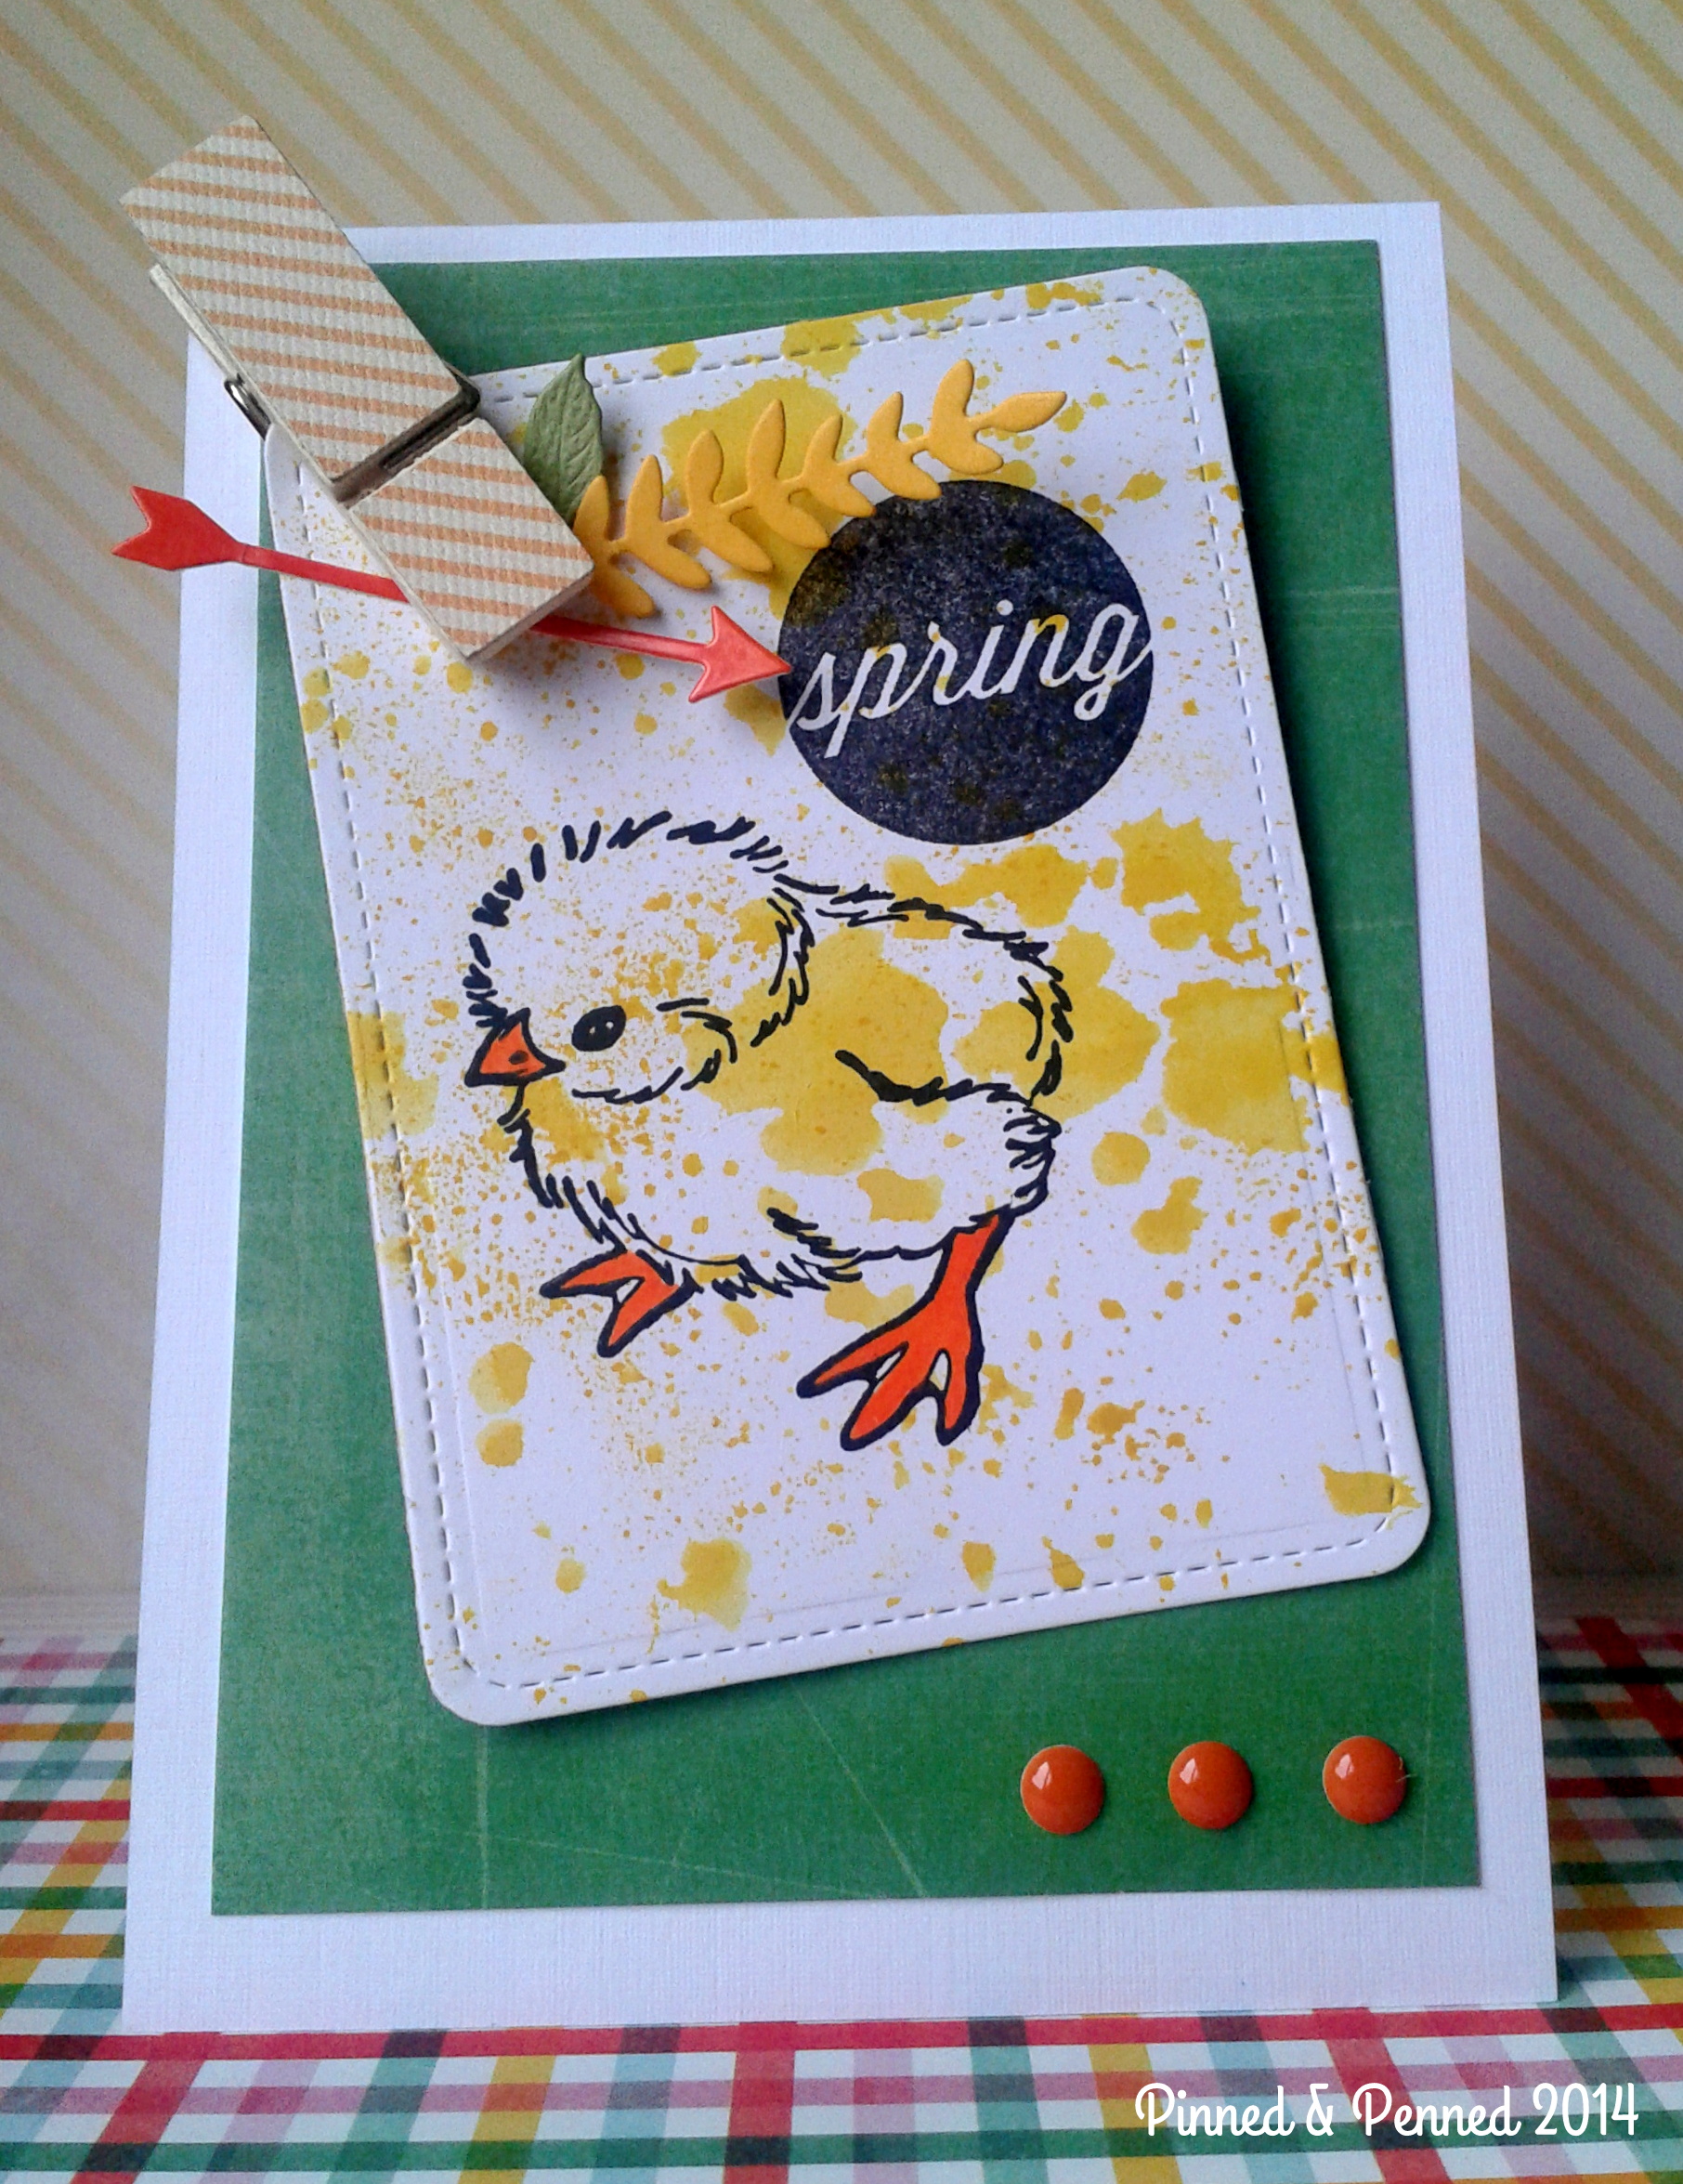
As you can see, my chick is a bit more grunge here!
TECHNIQUE: To achieve the large splatter, I inked my acrylic with Mustard Seed Distress, spritzed with water, and then stamped off 3 times to move the ink around. I didn’t want it to be solid, as in Maria’s application. Afterward, I picked up some of the ink and flicked with my brush.
CLUSTERING & LAYERING
I love digging through my embellishments box and scrap baggies, which after this creation I got to re-organizing. It is utterly amazing how many left-overs this art form generates!! I have a pretty good system of storage and categorizing if I keep up on it, but with every card, I seem to have oodles more material than I did beforehand (which is not mathematically possible!!).
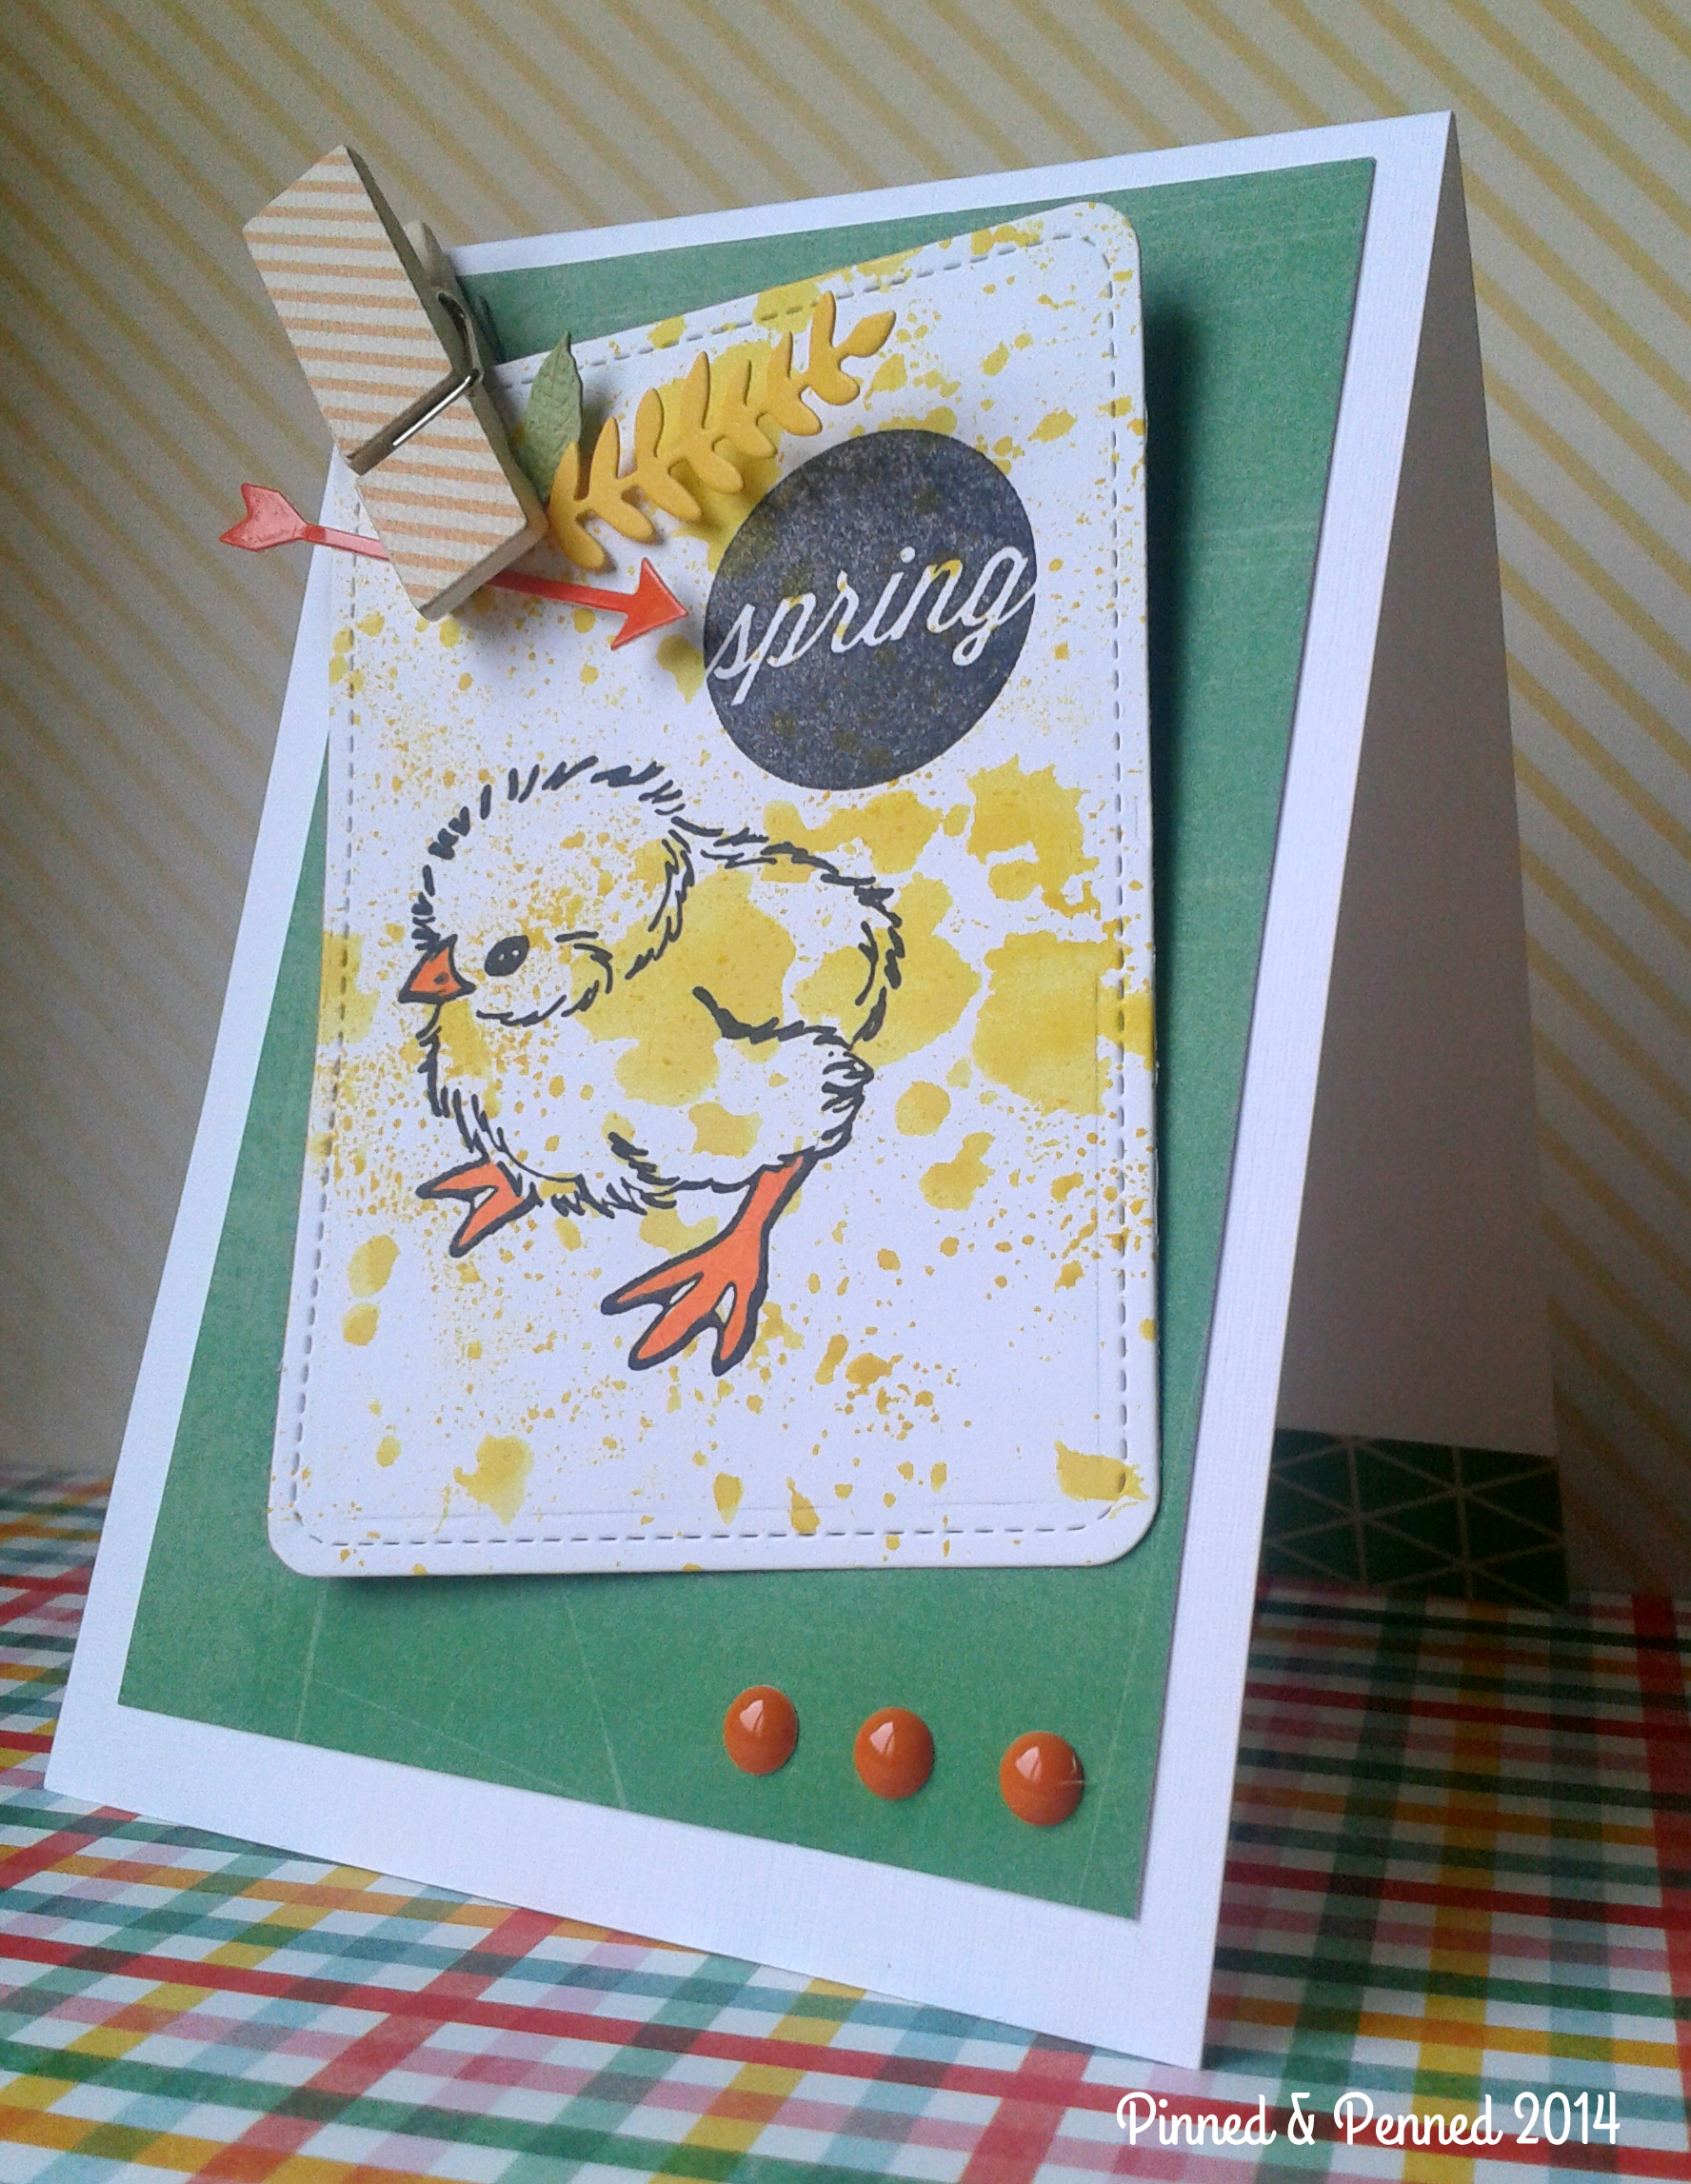
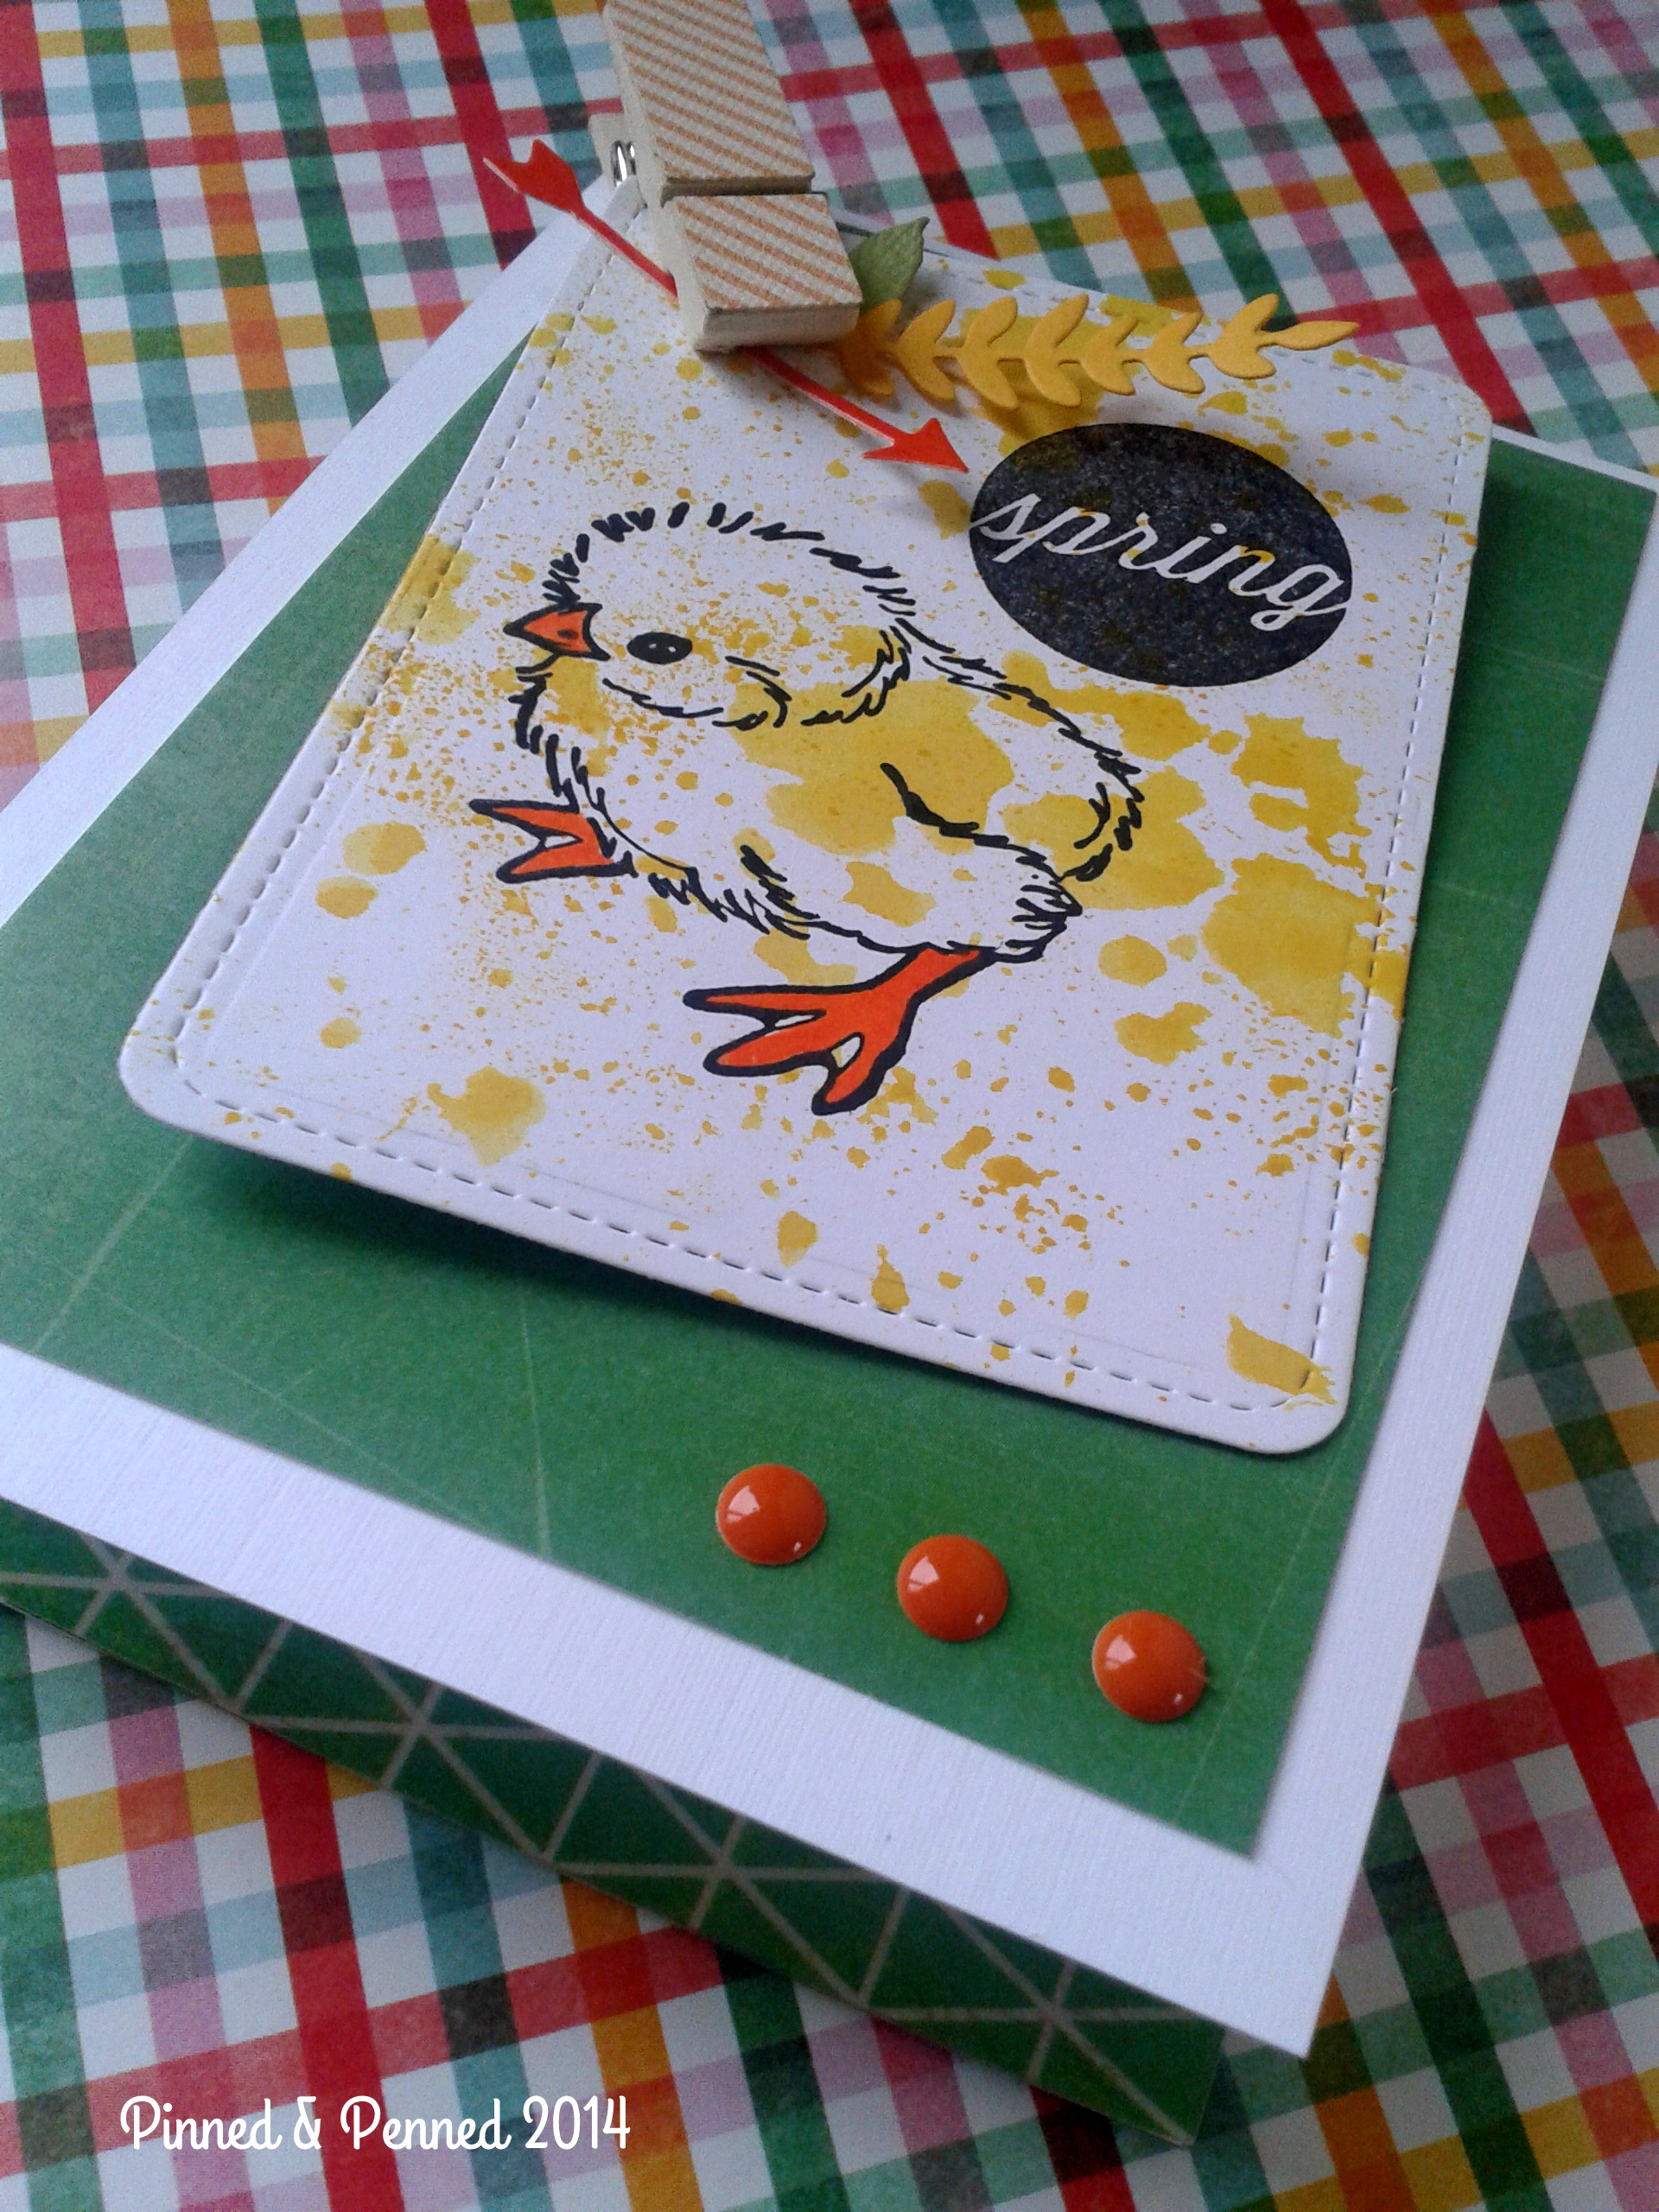
So I made use of a little lost leaf, an alcohol-inked glossy arrow, and the back of a deconstructed card which I die cut with Lawn Fawn’s Stitched Notes. Upcycled and recycled!
New elements include the die cut Savvy sprig, Prima clothespin, orange enamel dots, Hey Boy paper, DIY Shop adhesive paper (lining inside and back of card), and Ellen’s Essentials White Linen cardstock.
I love the distressed look of the green paper and all the textures involved from the woven linen of the stock and clothespin to the gloss of the arrow and dots. And then there are the colors! The yellows, oranges, and grass green against the white just make me so happy to look at! So fresh and so clean!
I sure hope Maria likes it and more importantly that she is feeling as springy as a new chick as she enters a new, fabulous decade!
If you haven’t checked out her work, it’s a must-see. While you are hopping around, make sure to check out CAS-ual Fridays challenge, and the ever gorgeous offerings at Catered Crop.
Here’s a little supplies list for you before I check out for the evening; click on any image!